Creative Art Challenges
Create While You Isolate!
CFCA Art Challenge #1
Lighthouse Painting
Share your own creation on our FB page to help bring light to us all!
A lighthouse can symbolize overcoming challenges and adversity with guidance and care. A lighthouse represents a way forward and help navigating through the world.
We challenge you to create your own lighthouse.
This can be any medium and any style, kids too! Use watercolour, acrylic, pen and paper, sidewalk chalk, etc. Give it a try!
Our Healing Arts Program instructor Leslie Bjur has supplied these three steps to a lighthouse watercolour painting:
Step 1: a simple composition sketch.
Step 2: apply the light shades of watercolours to wet paper, do not touch the lighthouse.
Step 3: apply the darker shades of watercolours.
 Simple Sketch
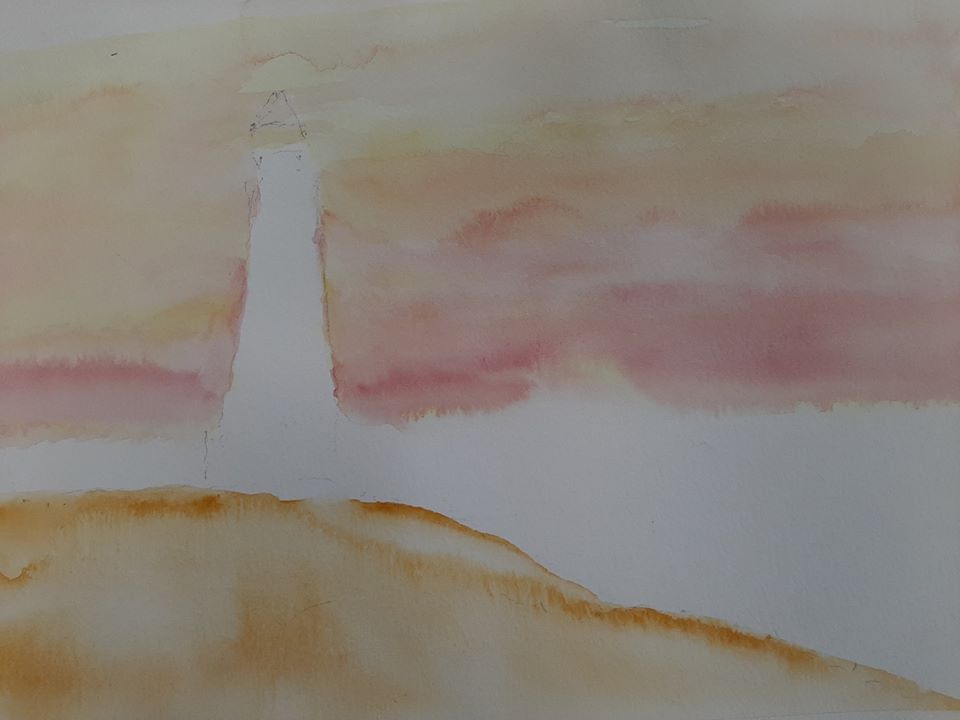 Add light background colours
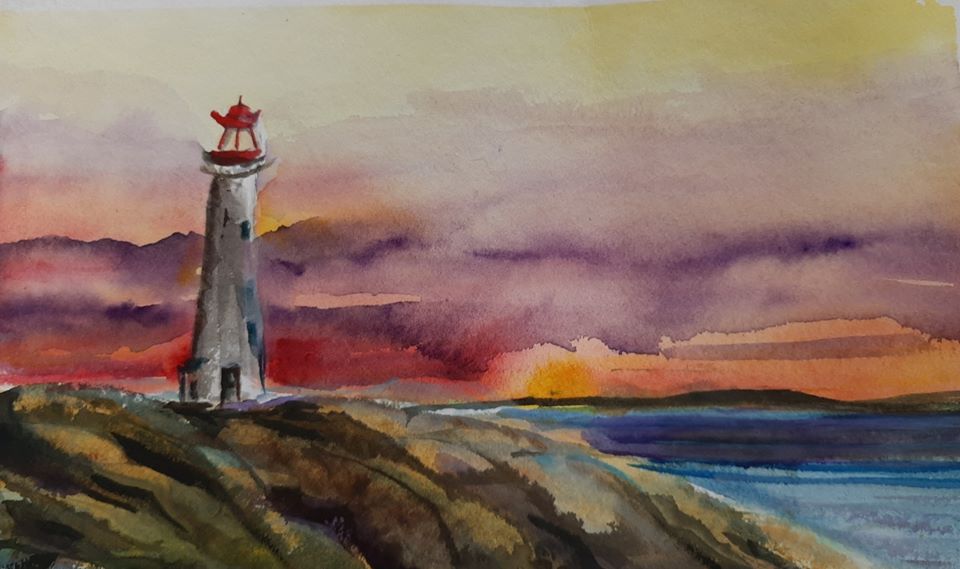 Add darker shades and paint lighthouse
CFCA Art Challenge #2
Blind Contour Drawing
Why?
This is a technique used by artists to loosen up. It helps artists to draw from sight and not rely on memorized shapes, so that you draw more realistically. A fun quick project for any age!
How?
1) Pick a subject. Some thing that is around you. It can be a person, your mirrored reflection, a plant, a toy, anything!
2) Use a piece of paper and any drawing tool. In the examples, we have used markers, pencil and charcoal. Use what you have at hand.
3) Look at the subject and follow its outlines. Use your drawing tool to draw them without taking your eyes off the subject. Use a slow continuous line. Try it without taking your pencil off the paper. It should only take a minute or two.
Remember that the drawing is not supposed to look perfect. It will look funny and wobbly, but next time you draw it normally, you can use the observation skills you learnt to make a more realistic piece of art.
Please share your images with us on Facebook and Instagram!
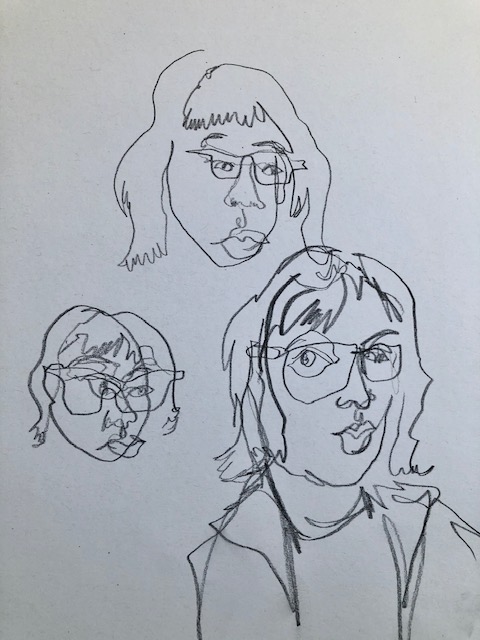 Blind Contour Self Portrait
 Subject
 Blind Contour Drawing with Marker
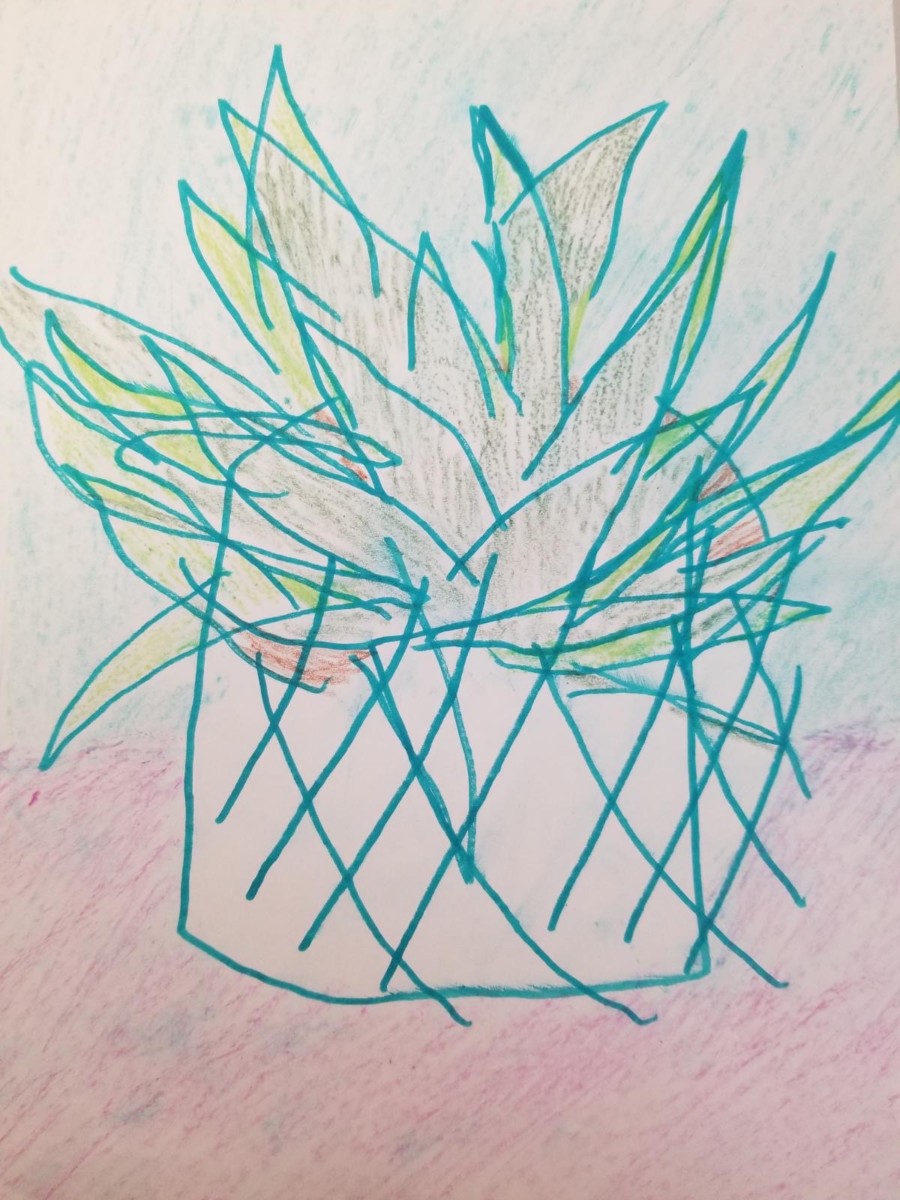 Added colour
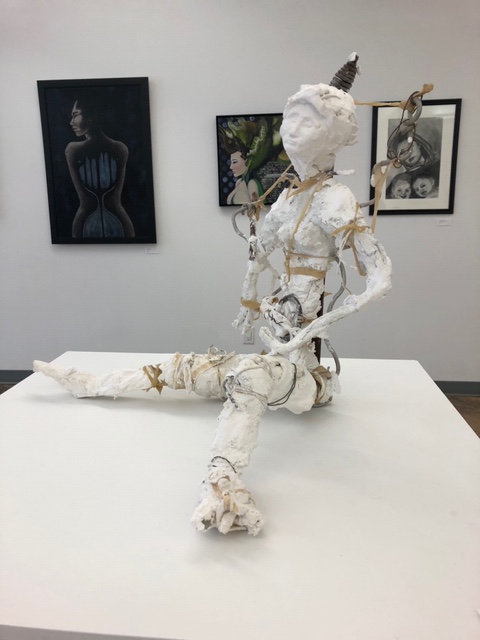 Subject “Bonds That Bind Us” sculpture by Alysoun Wells
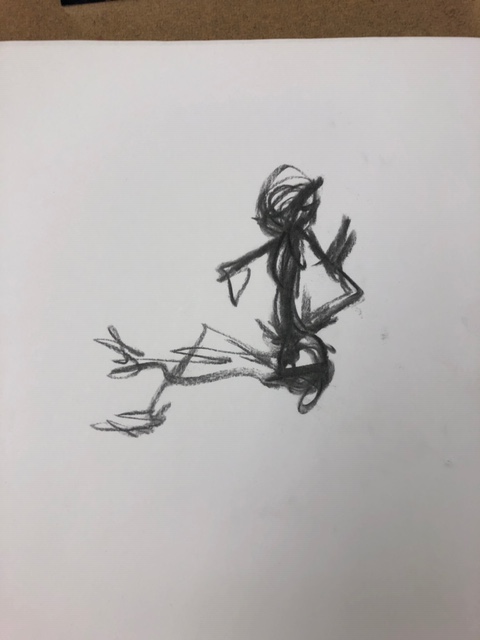 Blind Contour 1
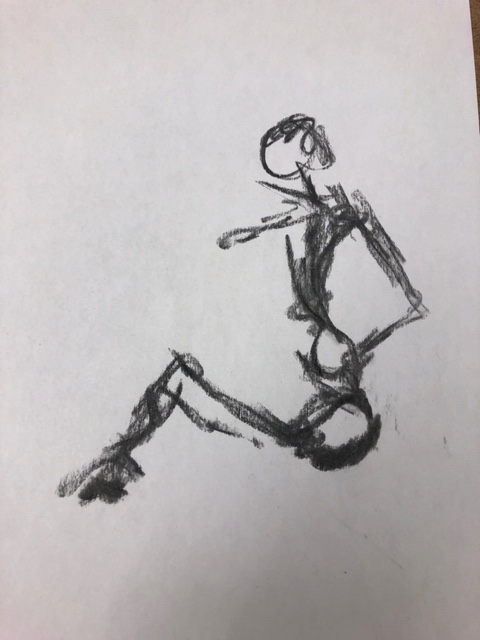 Blind Contour 2
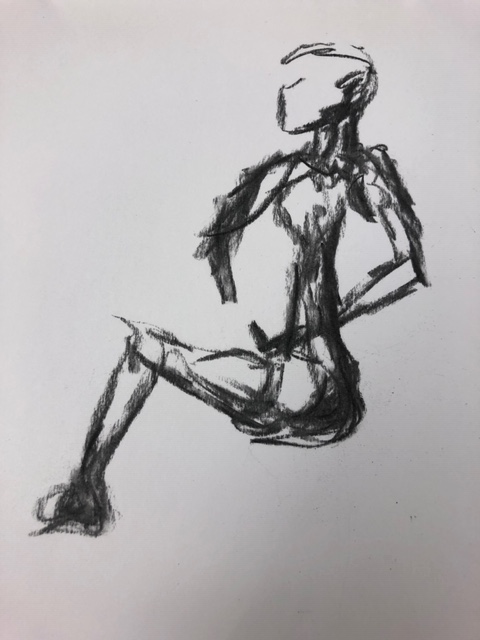 Blind Contour 3
CFCA Art Challenge #3
Baby Fox Marker Drawing
Materials:
Markers
Pencil
Paper
This was fun. Everything is shapes. A fox is a diamond shape with triangles for ears. Place the light values first. Restate and darken the surface. Where is the light? The shadow? Contrast.
1) Use a pencil to lightly sketch a diamond shape with triangle ears. Sketch in large round circles for the eyes and superman logo shape for the nose.
2) Use a black or dark brown marker to outline the eyes and add pupils. Outline the nose and add mouth lines. Outline the top of the ears.
3) Use orange, brown and grey markers to add short fur lines to the face. Use a green marker to make grass around the fox. Use a brown marker to make dirt under the grass.
4) Use an orange and a light orange, flesh colour or yellow to colour in the rest of the face fur. Use short squiggly lines to look like fur. Colour in the back ground using grassy greens, and dark browns and blacks so that it looks like your baby fox is peeking out from his or her foxhole.
Share your creation on our Facebook page!
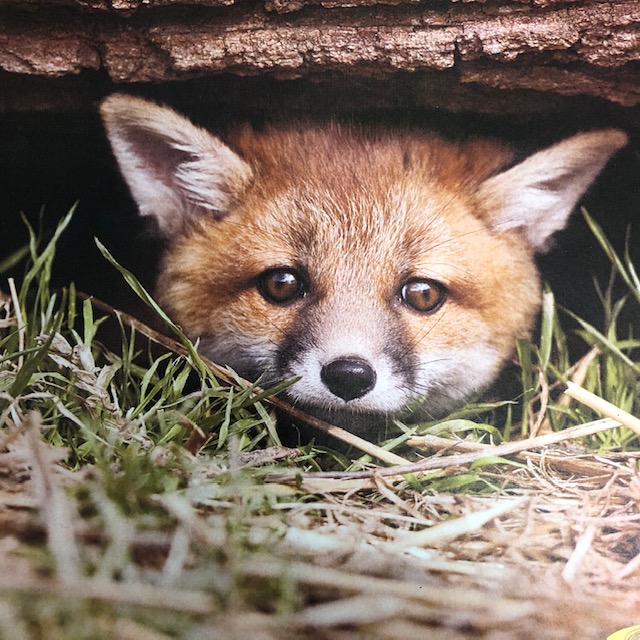 Reference Picture
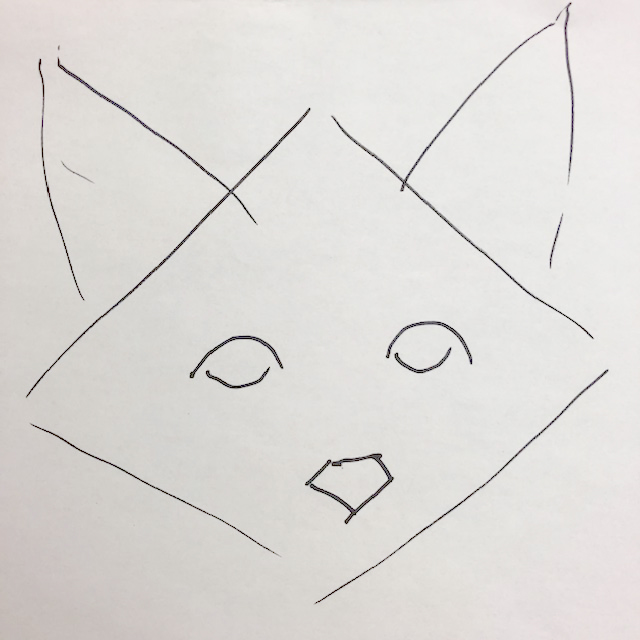 Light pencil sketch
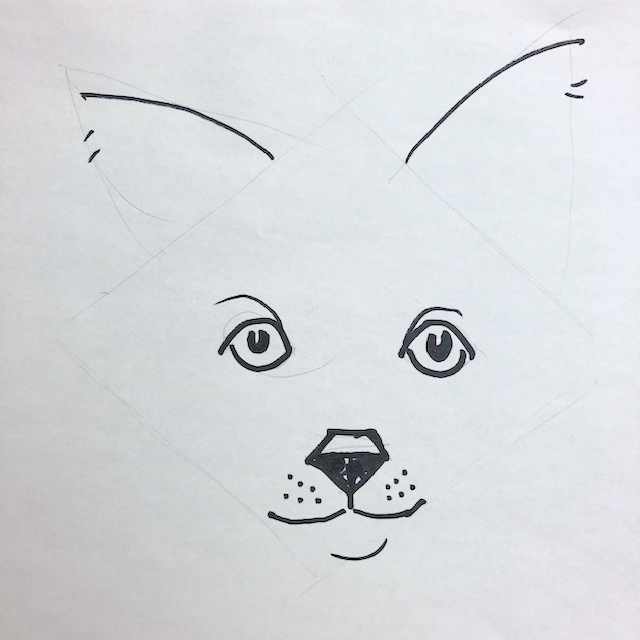 Use marker to add face details
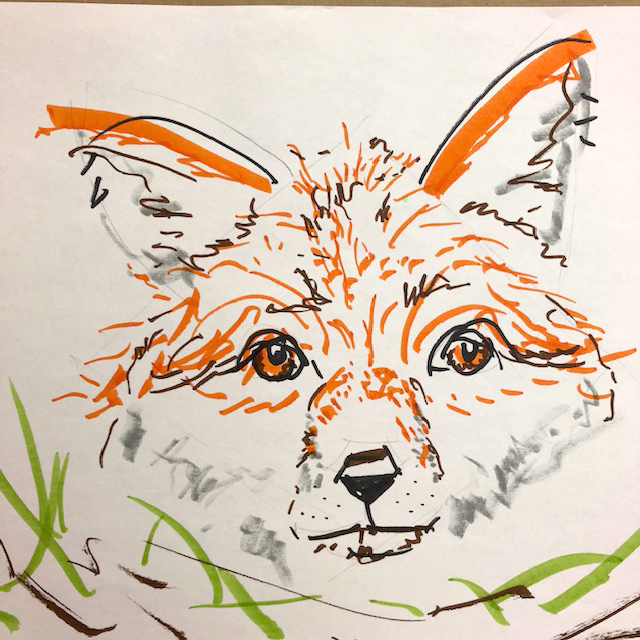 Use short stokes to make fur
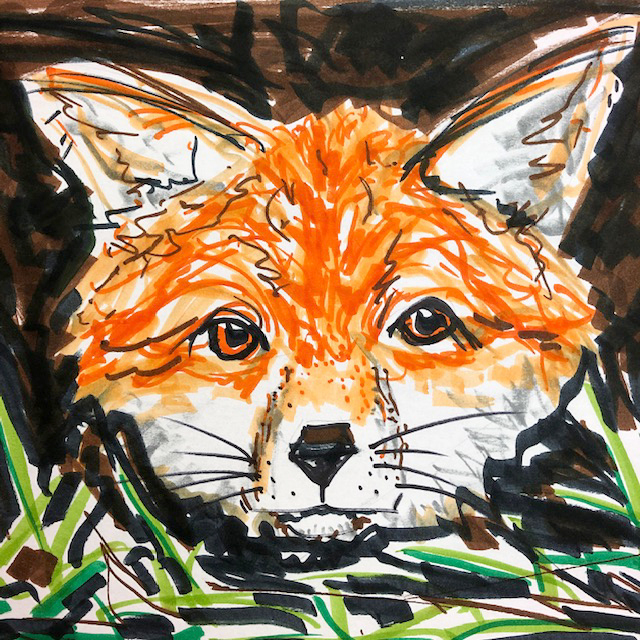 Finish colouring in the face and background
CFCA Art Challenge #4
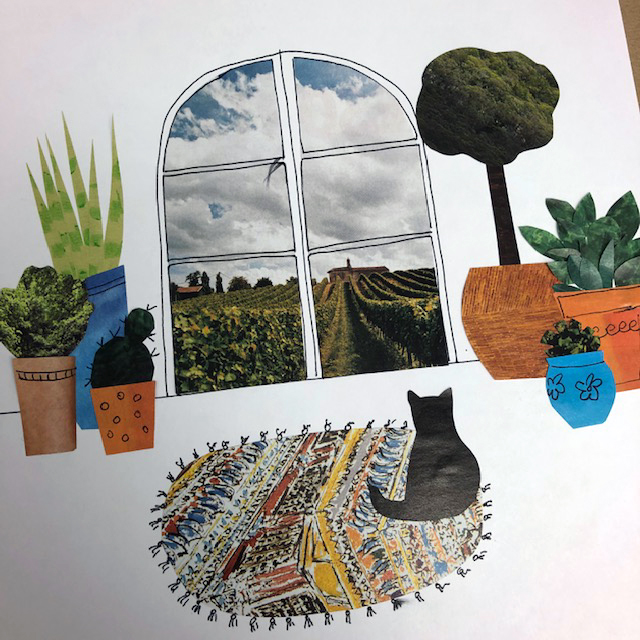
Collage a Cosy Room
Materials:
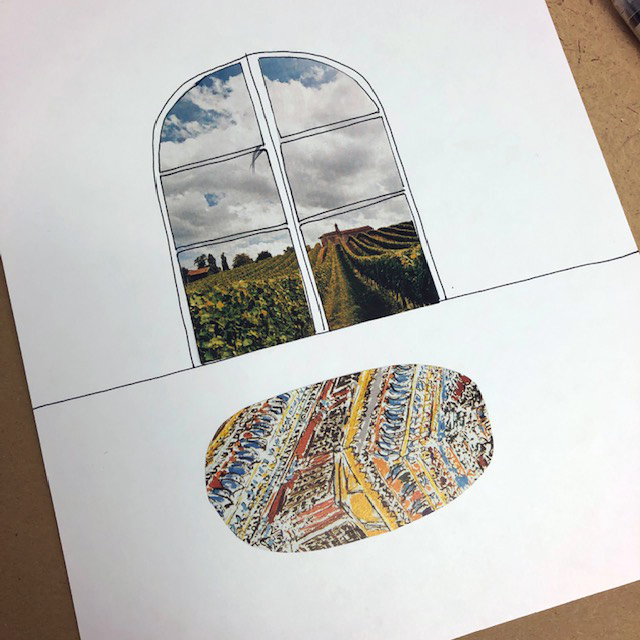
- Draw a line across the background page about half way to two thirds down the page. The top part is the wall, the bottom is the floor.
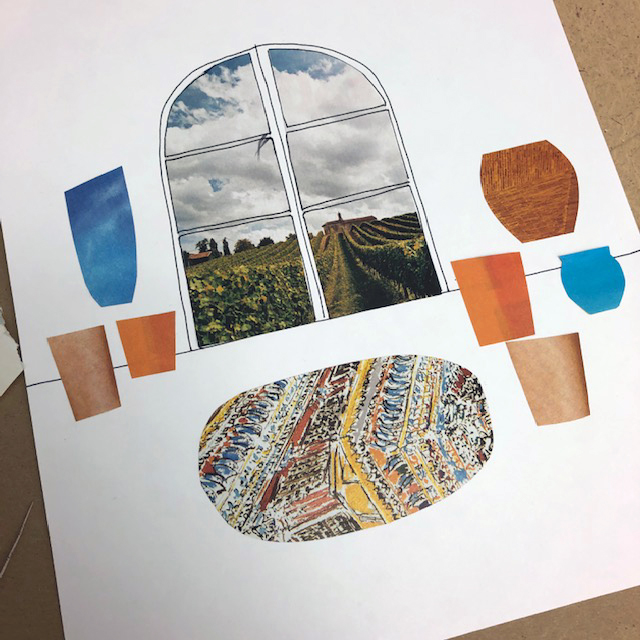
- Look through your magazines. Find an image that could be a view from a window. Cut it into a window shape. Mine turned into patio doors looking over a vineyard. Glue the image down to your background. Use a pen or marker to draw details around it.
- Add colour to your floor. You can colour it or you can find magazine pages that look like a good carpet or floor. I decided on a rug. Cut it out and glue it down.
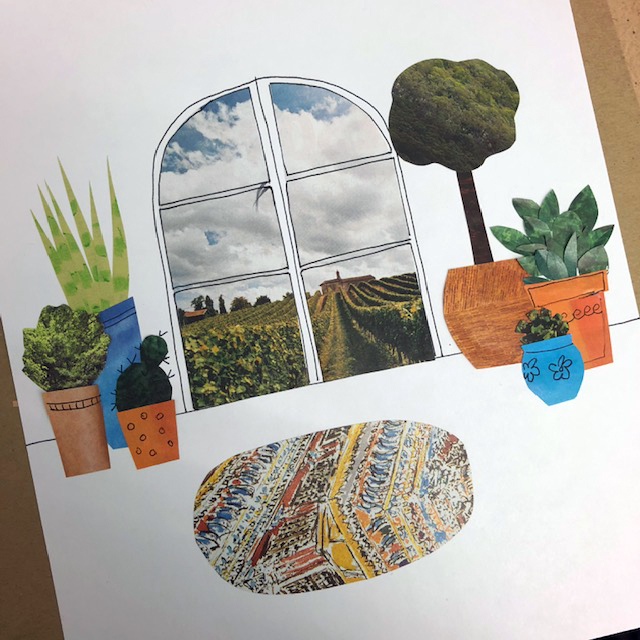
- Now what would you like in your room? I like plants, so I cut out pot shapes and found green magazine papers to cut out plant shapes. I used markers and pens to add details on the plants and pots. One tip is to glue just the bottom of the pot, then add the plant coming out of it, before gluing down the top of the pot over the plant.
- I felt like I needed a furry friend in my room, so I cut out a cat shape from a black magazine page. he is looking out the window, but you could add eyes and details with pens.
- You can add anything to your room. Add pictures to the wall. Shelves to hold stuffed animals. Cut out shapes from your papers. Use pens and markers to add details and colour to your room. I added colour to the floor with crayons because I forgot to do this before and I added a fringe around my rug.
- What does your room look like? We can’t wait to see it! Share your creations with us on our Face book page.
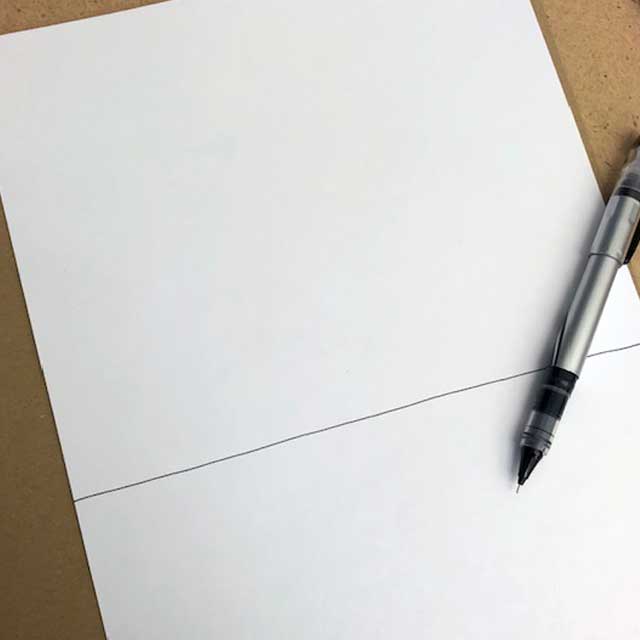 Draw a line 2/3 down the page
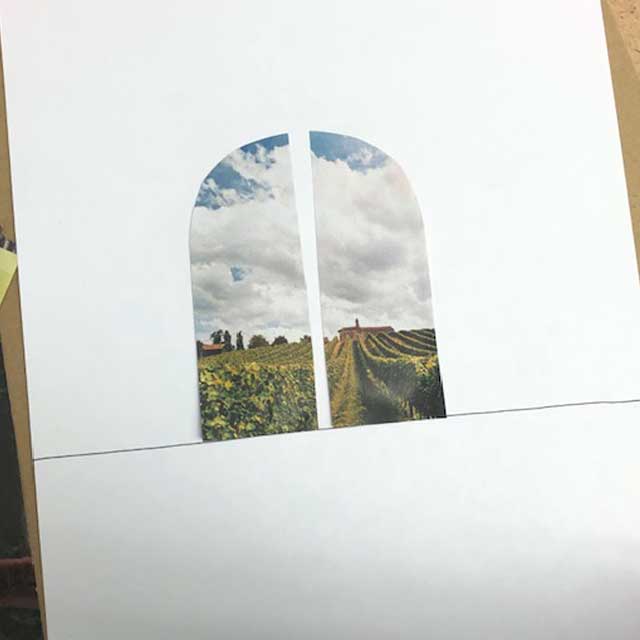 Add your window
 Draw details around your window
 add flooring or a rug
 add flooring or a rug
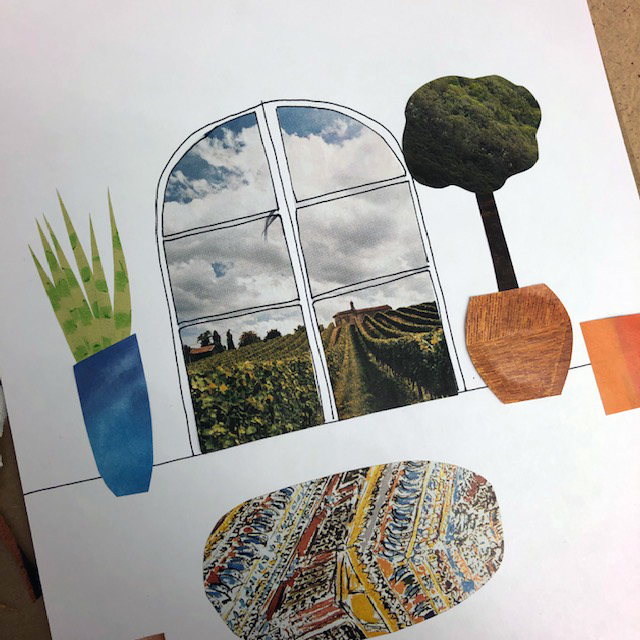 Add plants in your pots or other details to your room
 More details! Use pens and markers!
 Add a furry friend if you would like
 Add more colour and details until your room is cosy!
CFCA Art Challenge #5
Toilet Paper Tube Cactus Buddy
This is a fun craft for any age! Make a forest of cactus to decorate your home! If you are a kid, please ask an adult to cut and use the glue gun for you.
Materials:
- Toilet paper cardboard tubes, paper towel roll tubes
- Cardboard (from a cereal box or similar)
- Pencil
- Green, white and pink paint
- Hot glue gun and sticks. (Can use white glue instead)
- Paint brush
- Plastic lid to use as a paint palette
- Jar for water
- Sharpie or dark coloured marker
- Coloured tissue paper (or yarn or a pompom, anything that could be a flower)
- Decide on a size for your cactus. You can use a full size toilet paper tube or cut on down to make a shorter one. Use a paper towel roll and cut it down to make a taller cactus.
- Lay your tube next to your cardboard and draw cactus arm shapes on the cardboard. They kind of look like jelly beans with a flat edge on one end.
- Use scissors to cut out the shapes. Add as many as you want!
- Using hot glue (ask an adult!) glue on the flat edge of the arms to the tube. Scatter them around the tube at different heights. Put smaller arms closer to the tip and larger ones lower. If using white glue, you may need to hold each arm in place as it dries.
- When everything is dry, Paint your cactus a nice green colour, mix in white to make it lighter if you wish. Let it dry completely.
- if you would like to add a face, use a sharpie or marker to add eyes and a smile. Add a white paint dot to each eye to make it sparkle! You can add pink painted cheeks if you wish.
- Using a lighter (or darker) shade of green, paint thin lines down the body and arms. These represent the ribs of the cactus.
- When it is all dry, use a dark marker or sharpie to add spines.
- Use tissue paper or pink colour paper to make a flower. Cut a small piece, scrunch it up and glue it to a cactus arm.
- Make your cactus a family!
What other plants and animals can you make with toilet paper tubes? Create a garden or a zoo and show us your creations!

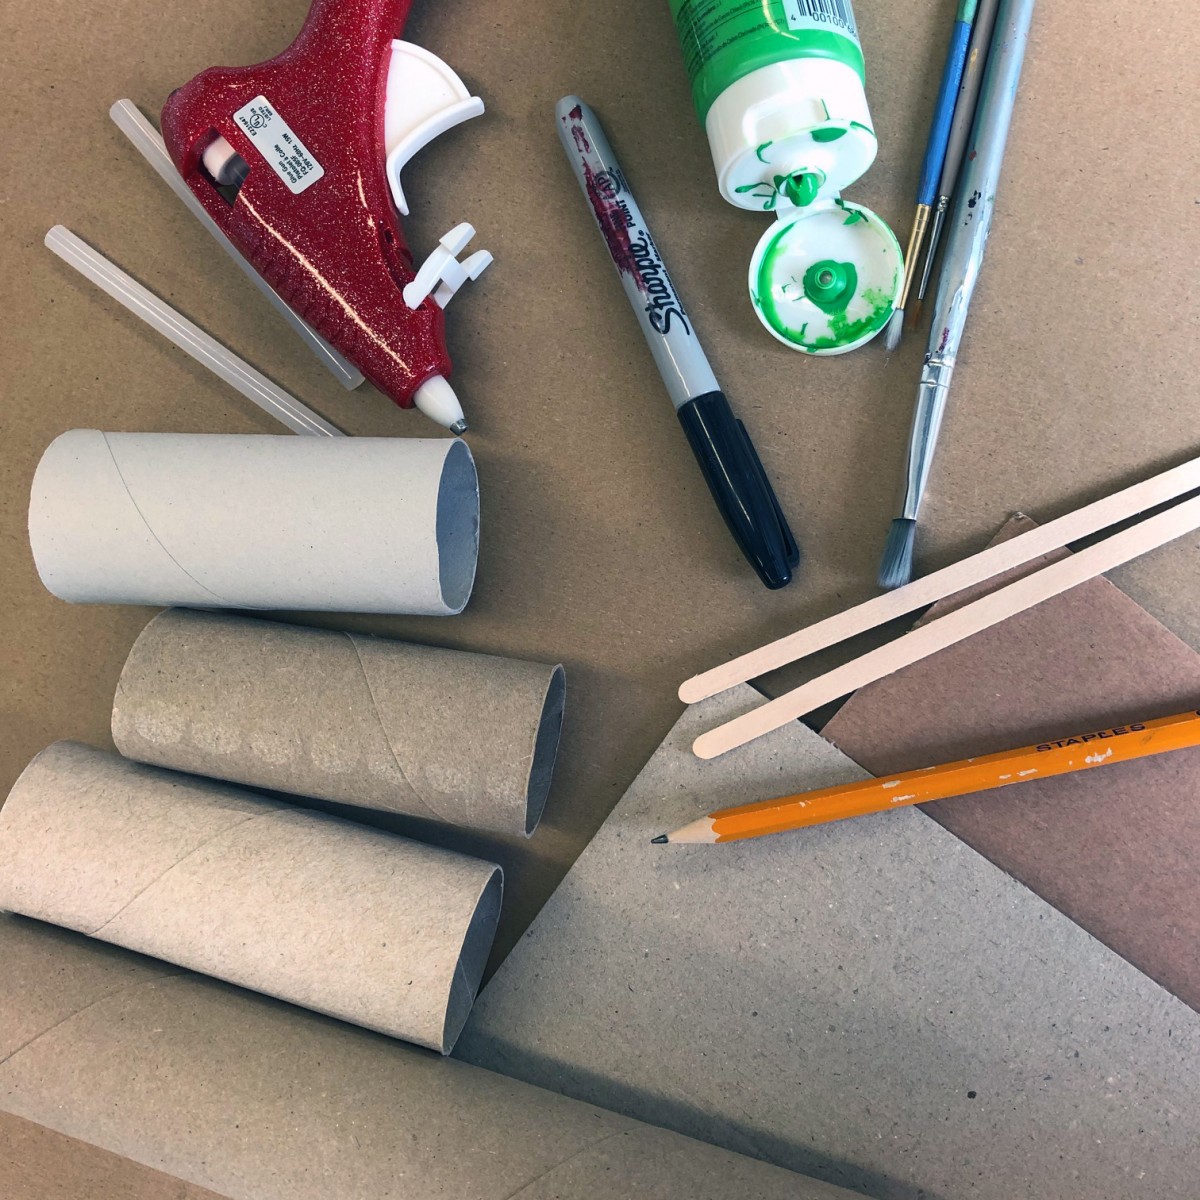 Collect your materials
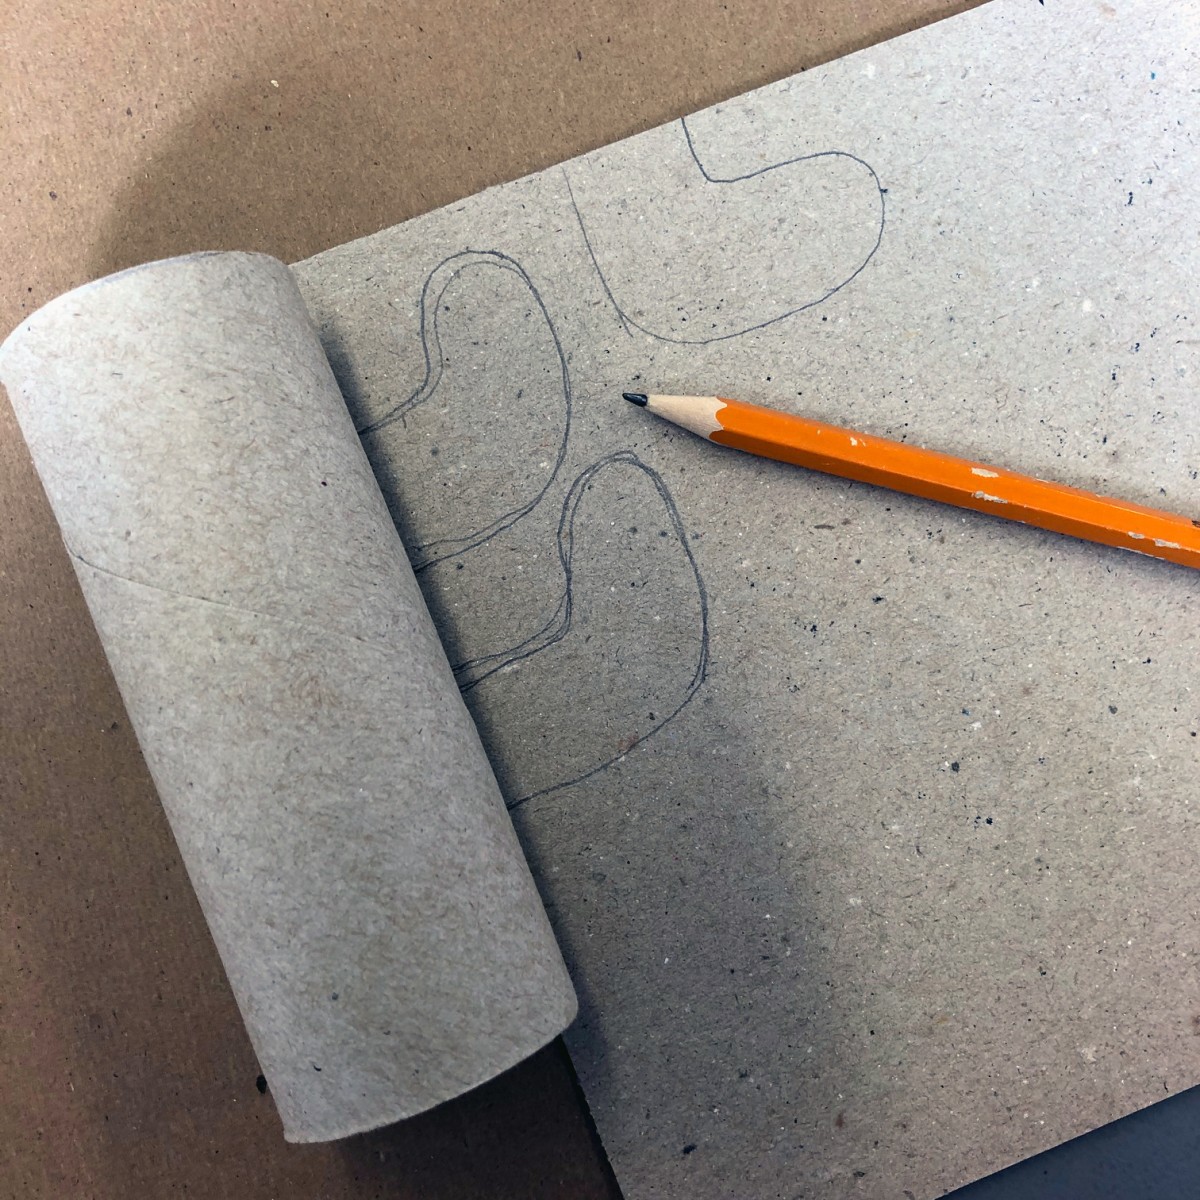 Draw cactus arms on Cardboard
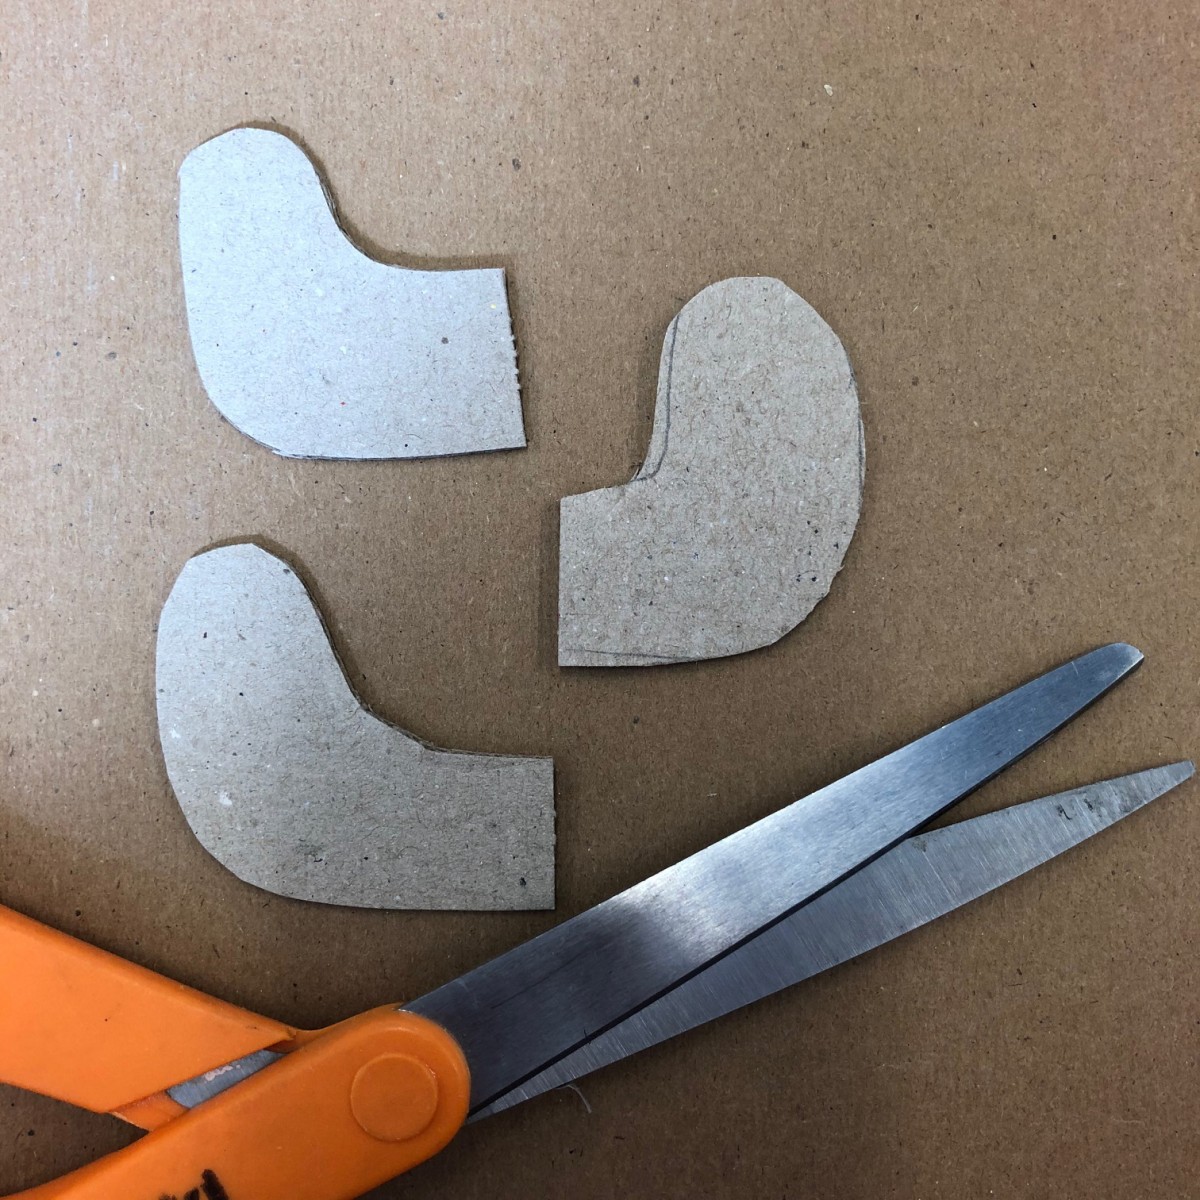 Cut out!
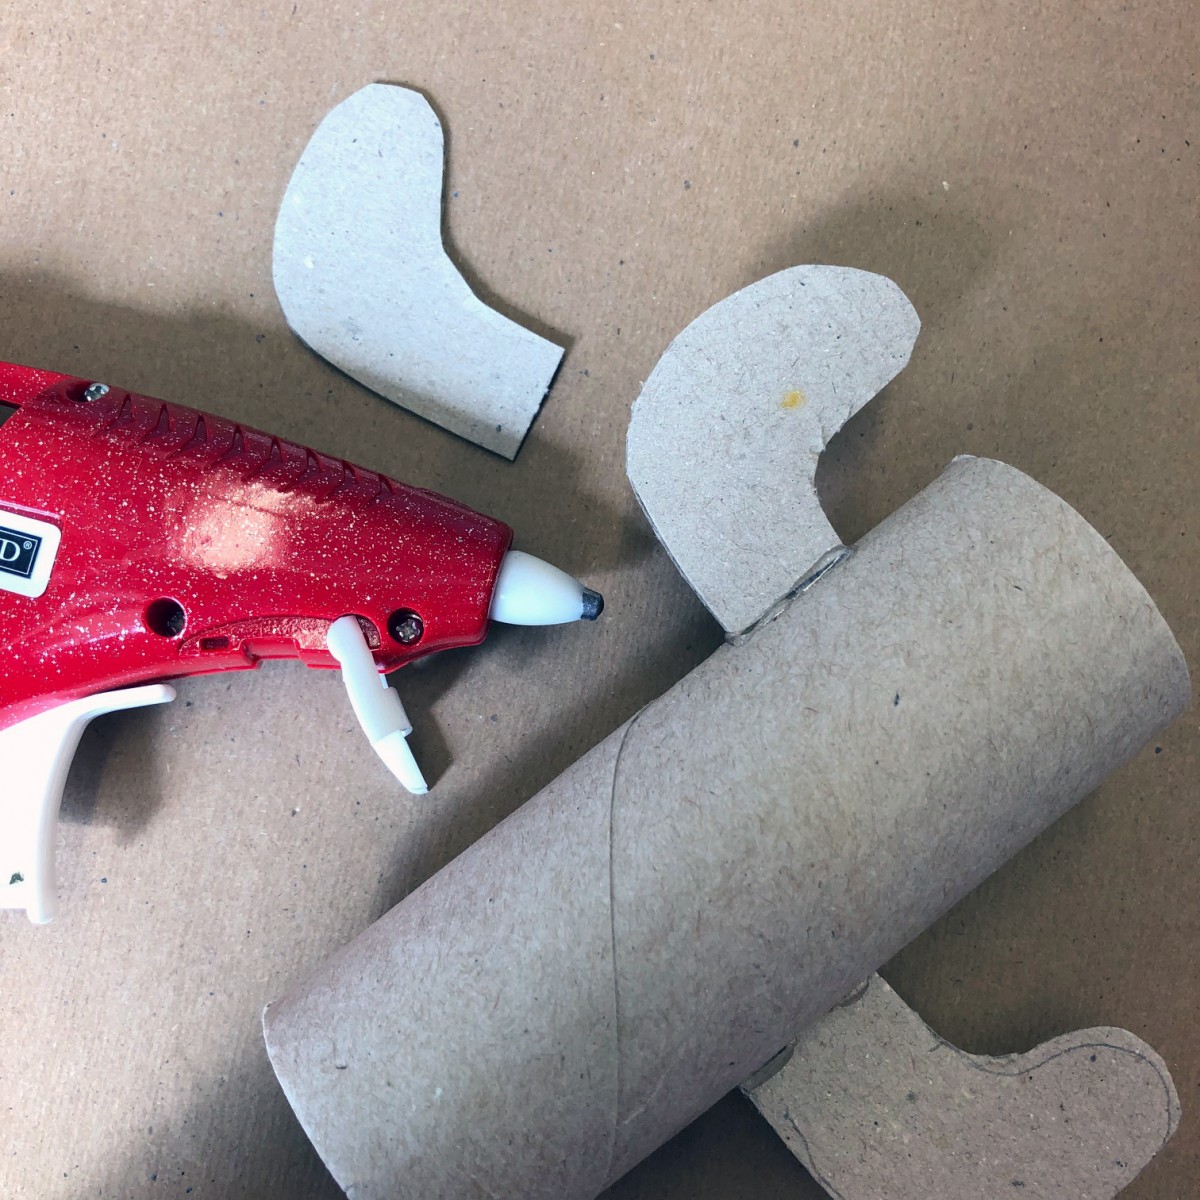 Glue on!
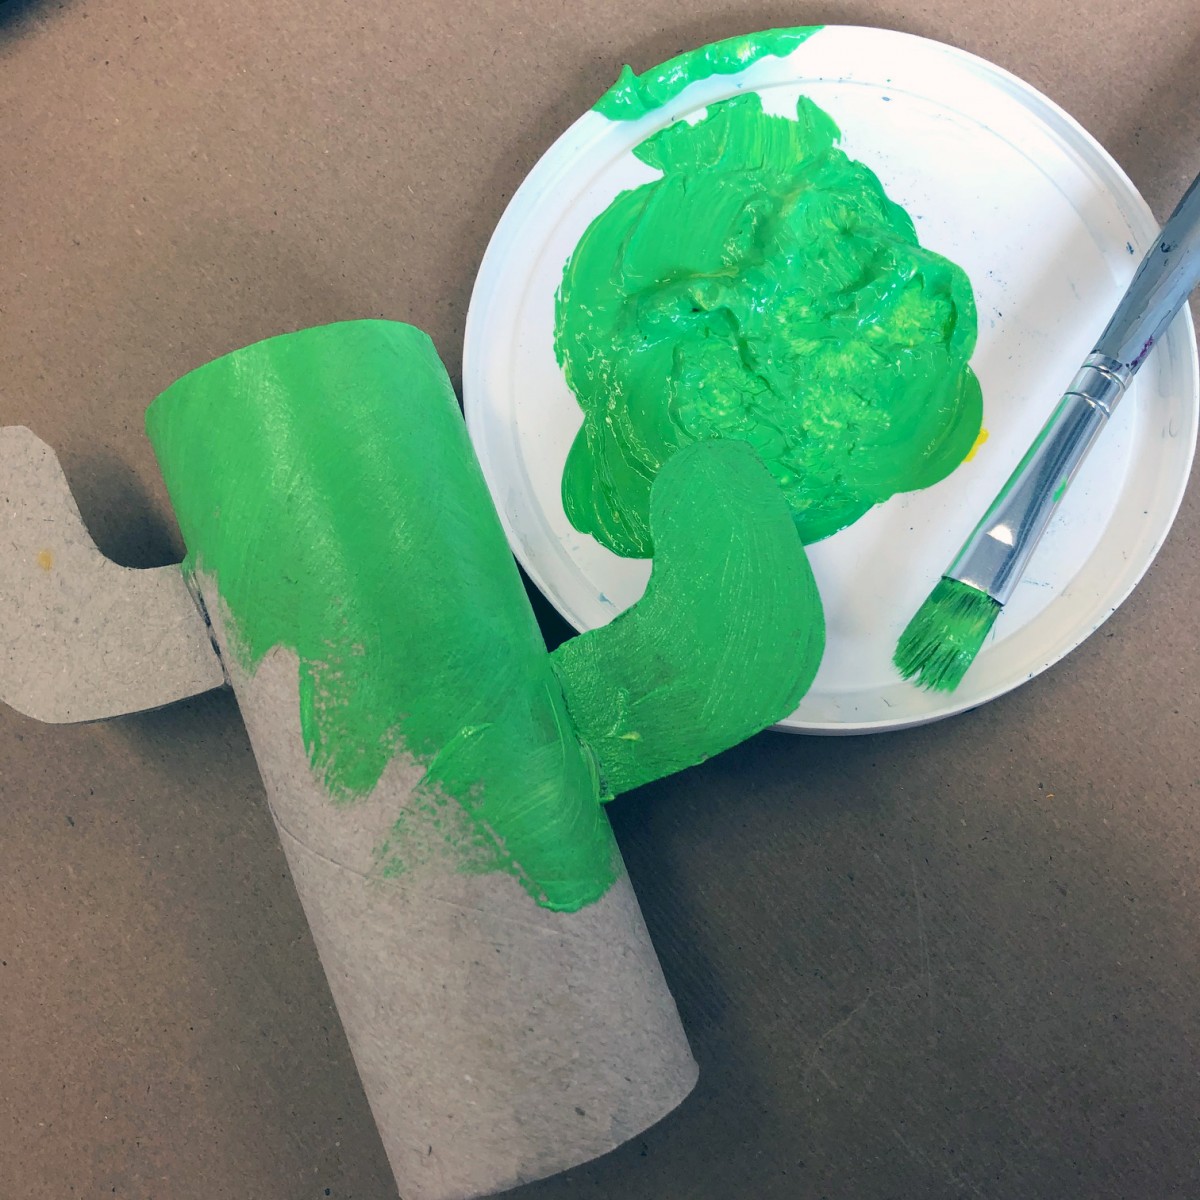 Paint it up!
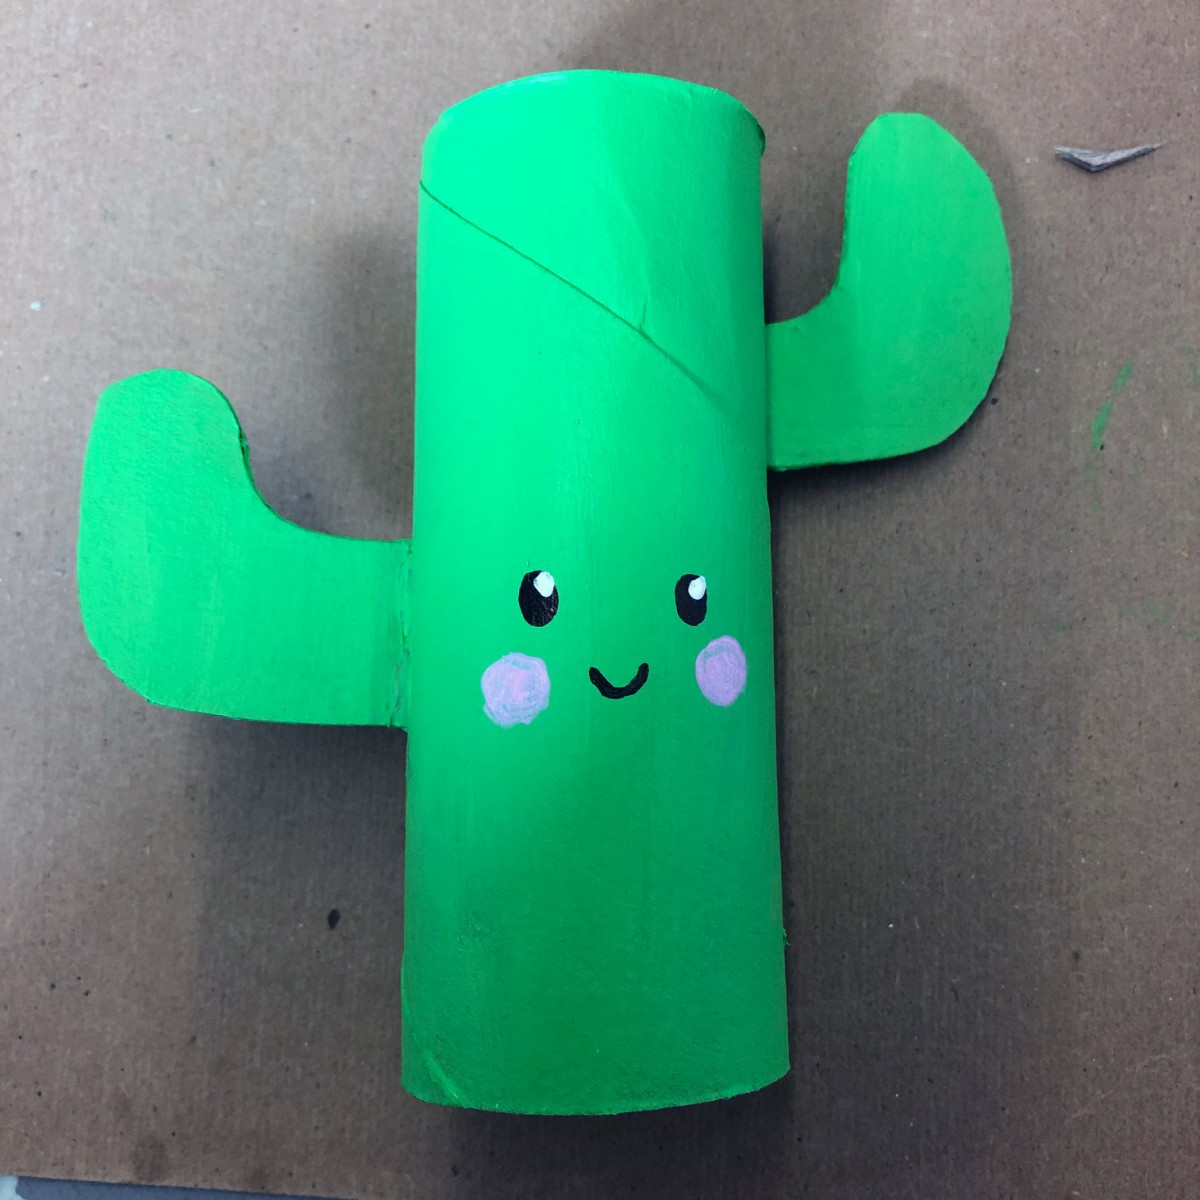 Add a face!
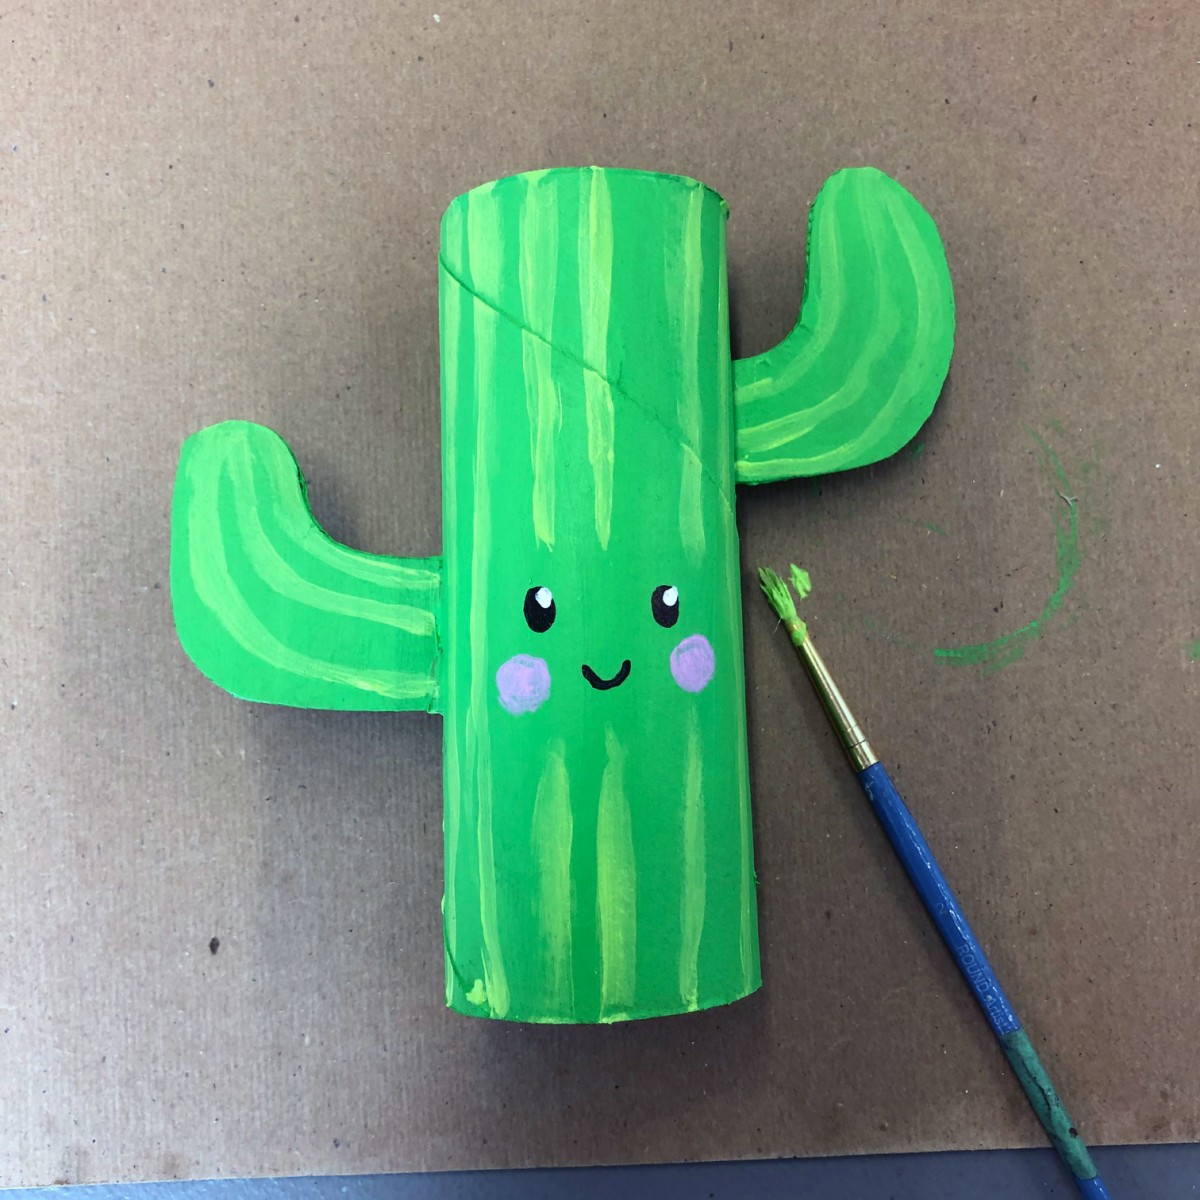 Add ribs!
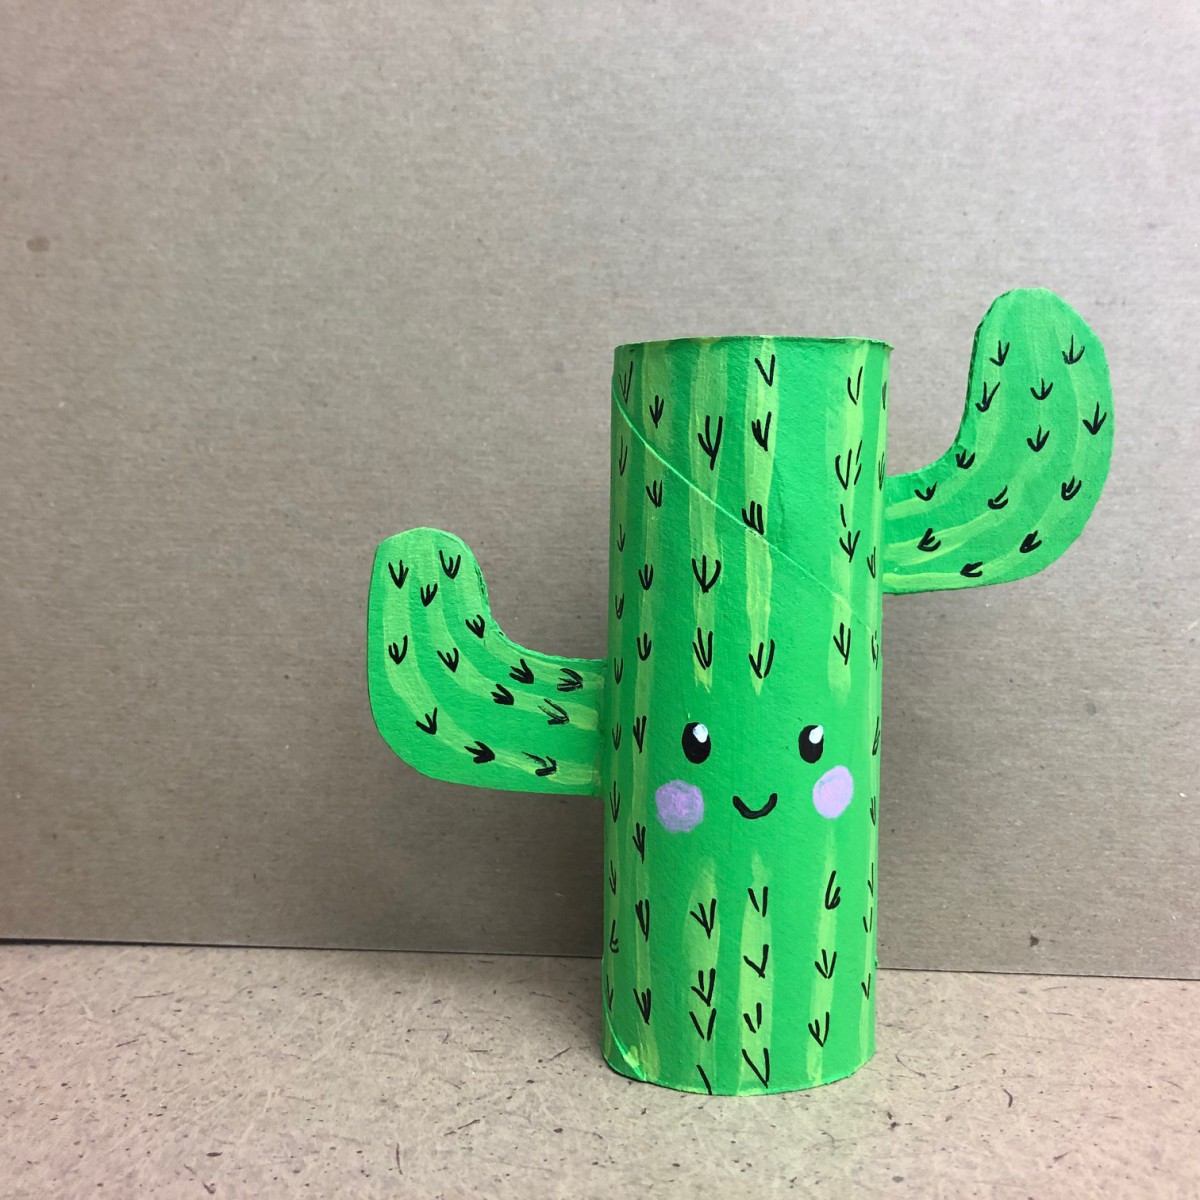 Add Spines!
 What else can you make?
CFCA Art Challenge #6
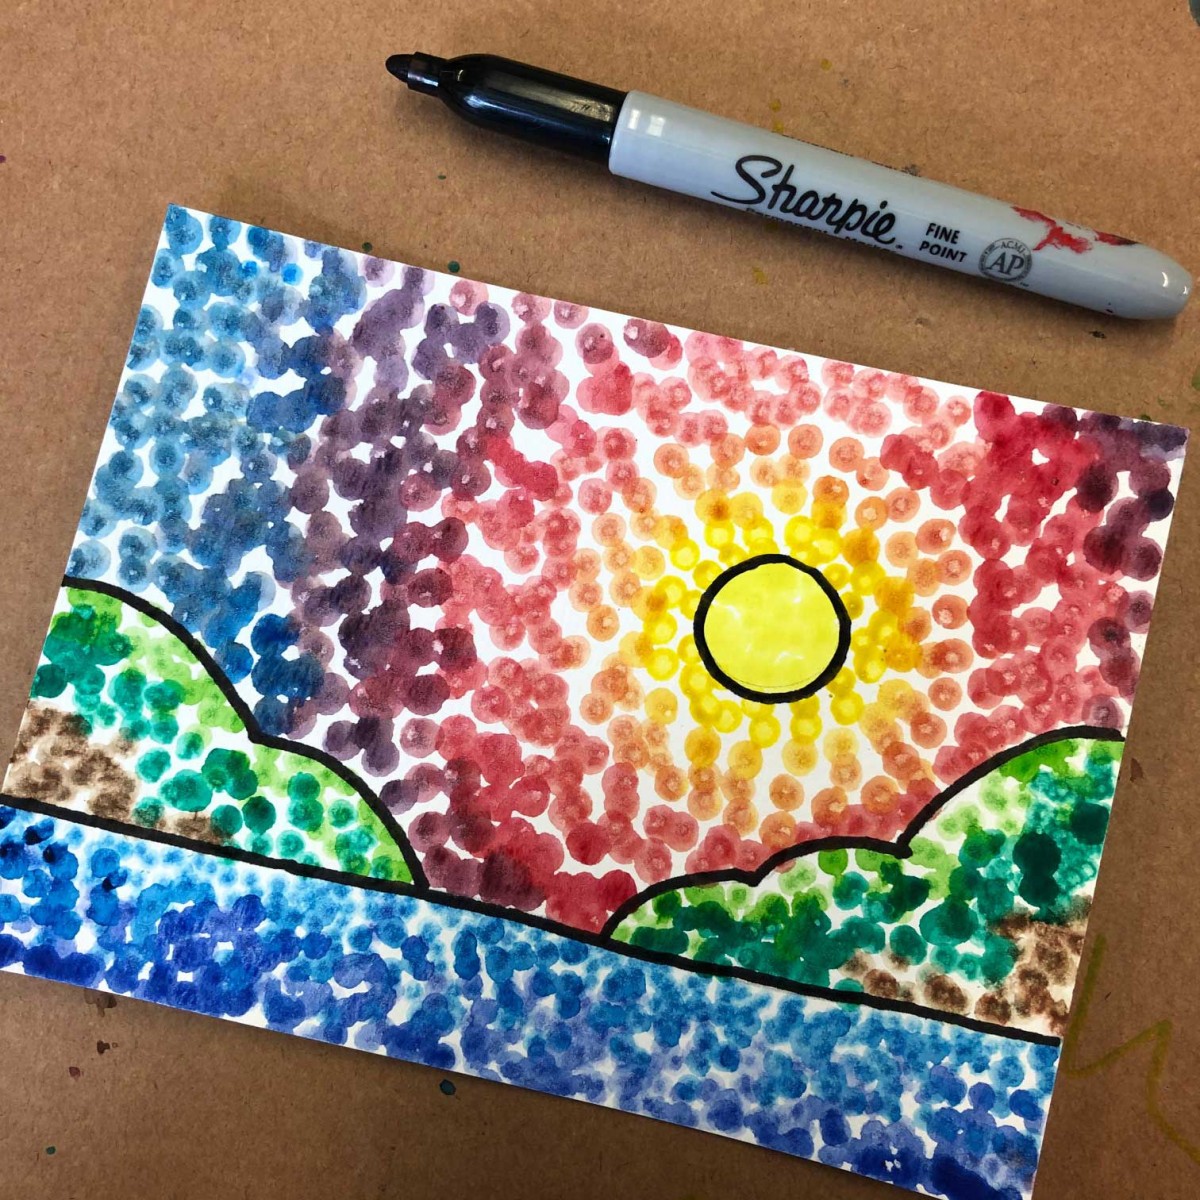
Pointillist Landscape
Pointillism is an art technique that uses small dots of colour to form an image. Colours merge when you step back and your eyes blend them together to make new hues. So if you make an equal amount of red dots and yellow dots, it should look orange when you look from further away. This technique was developed by artists Georges Seurat and Paul Signac in 1886. Give it a try, it looks really cool!
Materials:
- White paper (watercolour paper is best)
- Watercolour paints
- Paintbrush
- Cotton buds
- Pencil
- Cup or jar for water
- Optional: a permanent marker, coloured markers
- Lightly draw your landscape with a pencil on the piece of paper.
- Wet your paints using a paintbrush and use a cotton bud to pick up some colour. Use a new bud for new colours.
- Use your coloured cotton buds to make dots on your paper. Use blues for the water. Use greens and browns for the hills.
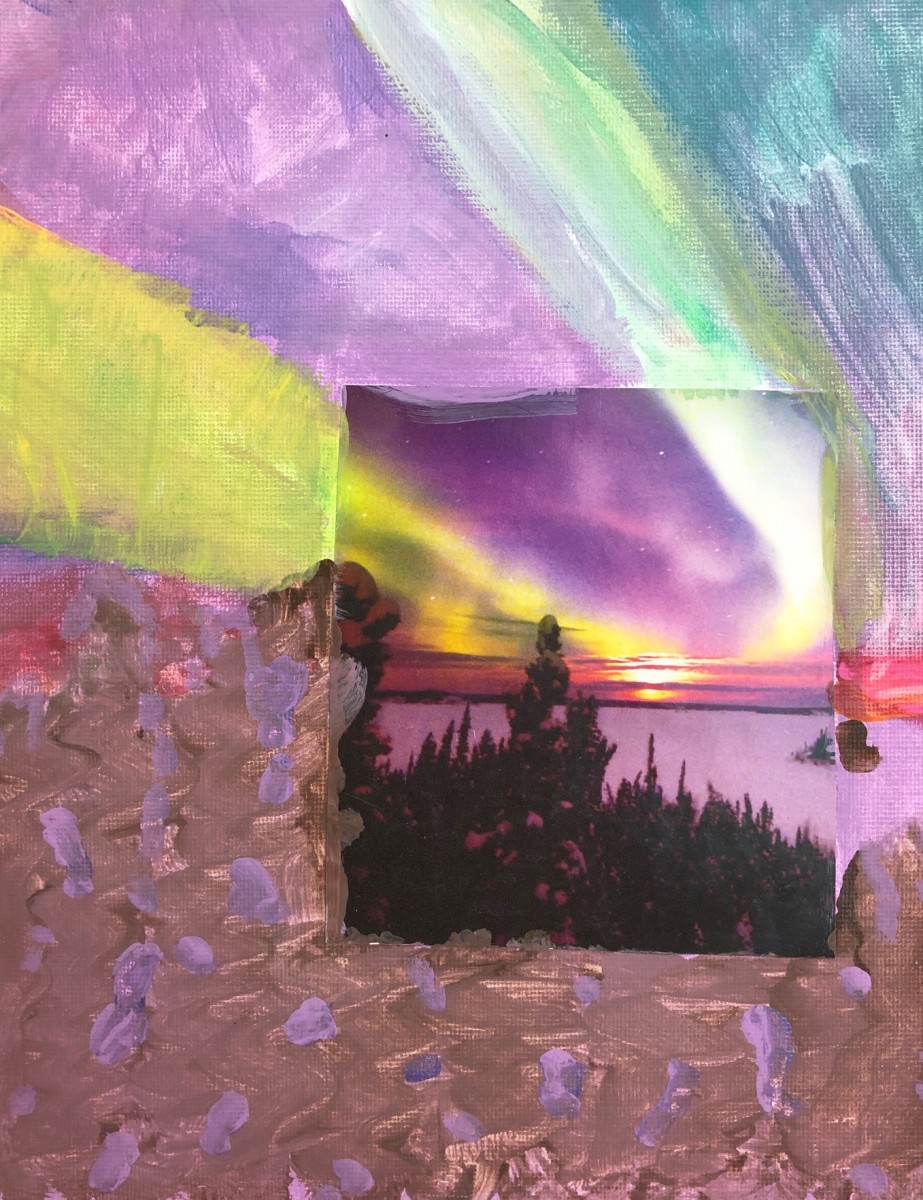
- Use yellow for the sun. You can make a blue sky or add clouds. I made a rainbow sunset sky. I used yellow, orange, red, purple and blue.
- Let dry. I you would like, you can add outlines using a permanent marker or a marker.
- If you do not want to use watercolour and cotton buds, you can use this technique using markers, crayons or other art materials.
- Use this technique with different subjects. What will you make? A flower? A bird? Share your creations with us on our Face book page!
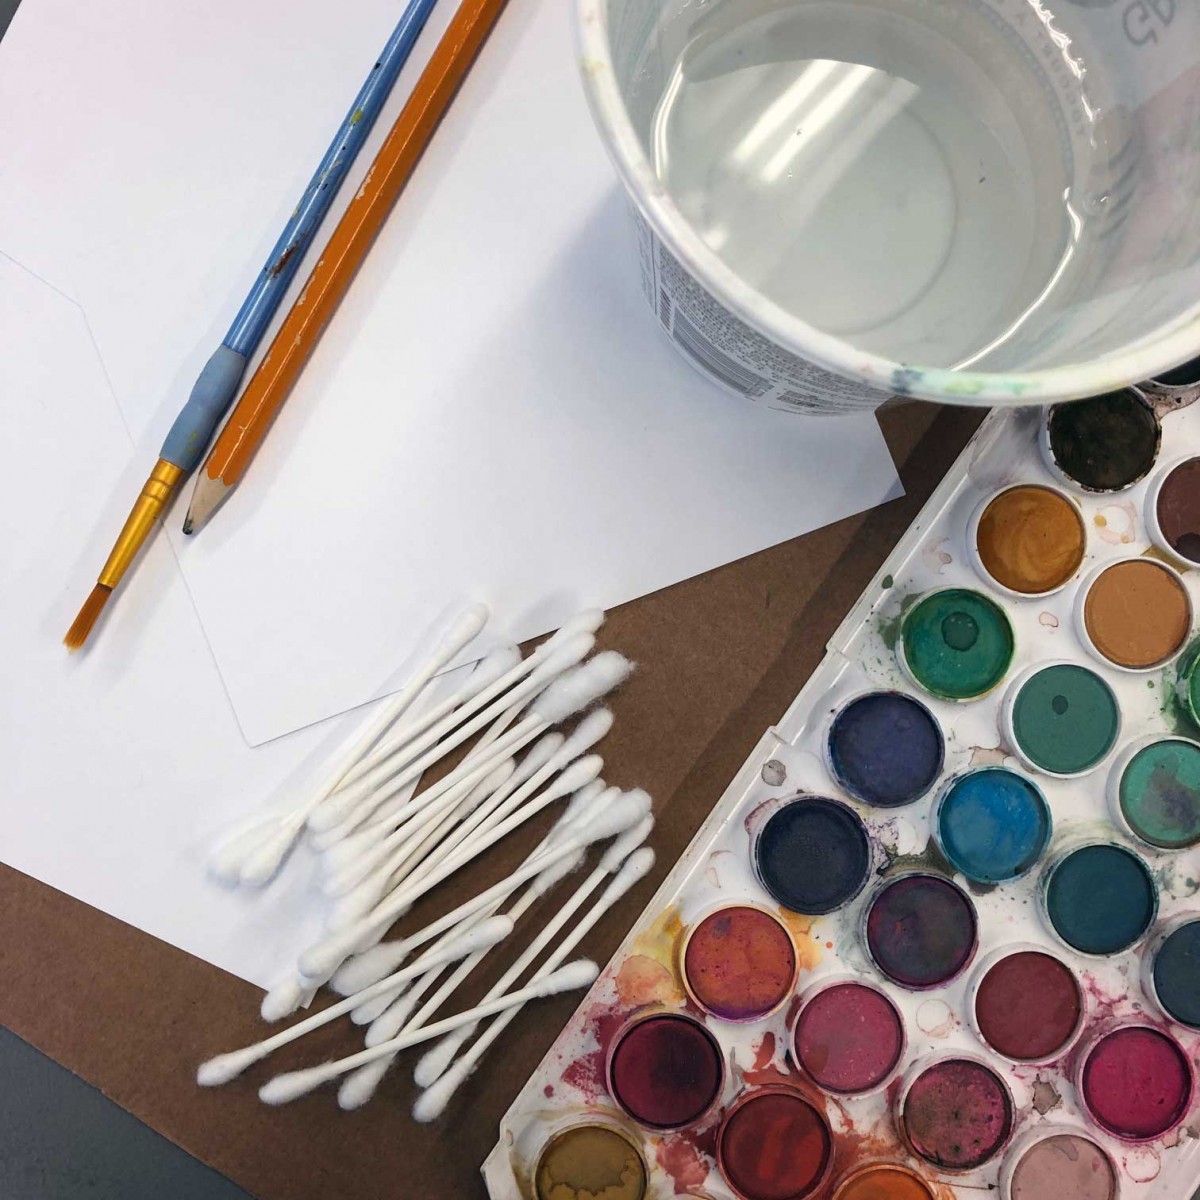 Gather your materials
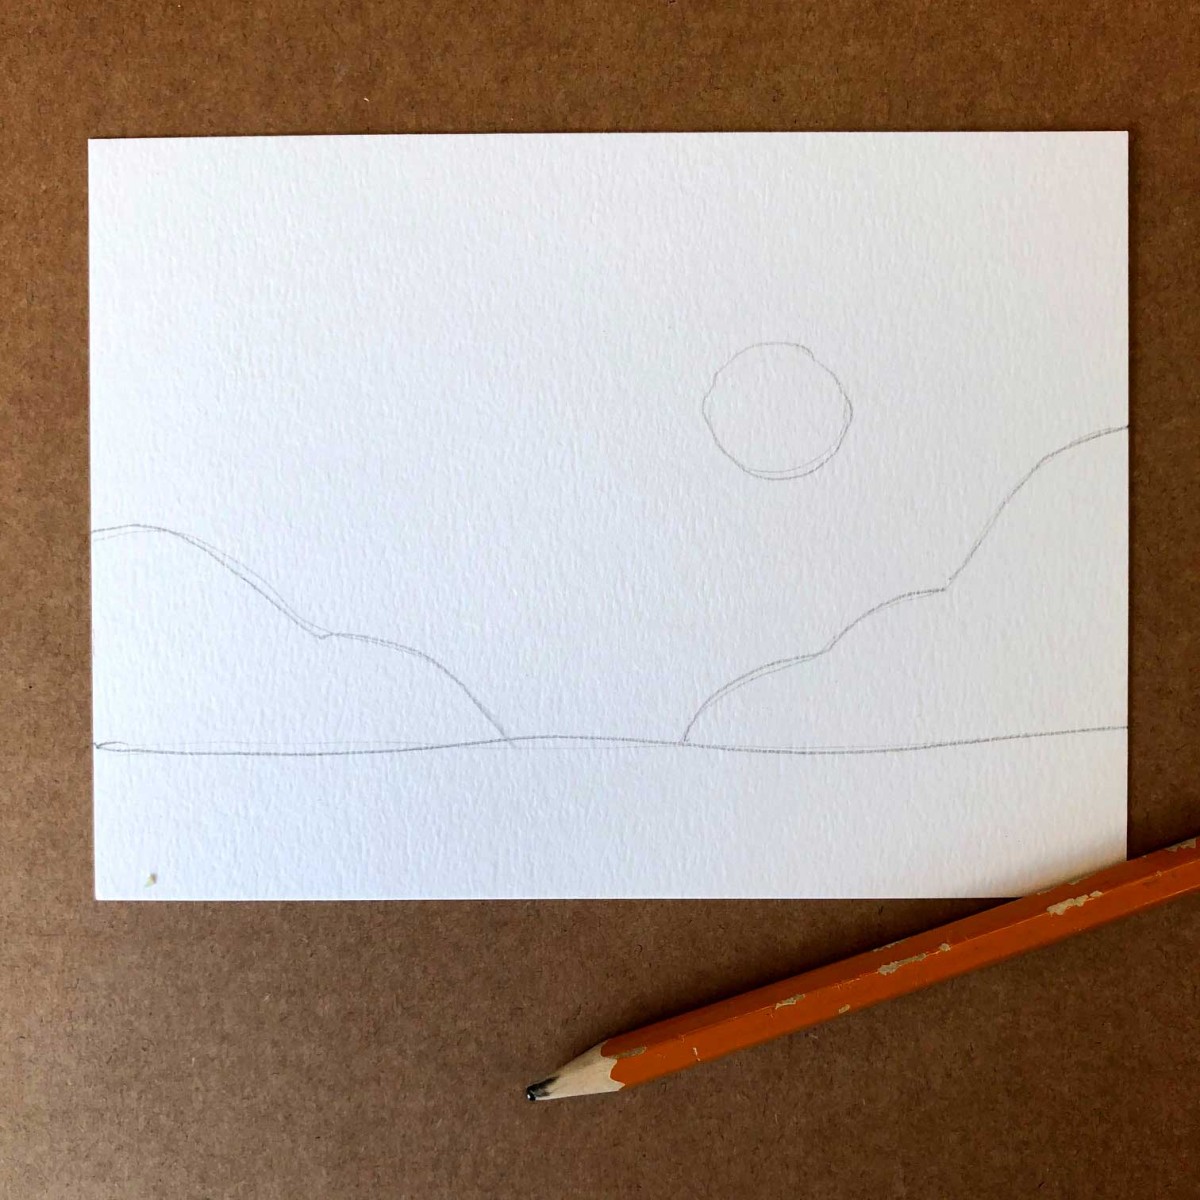 Sketch your outline
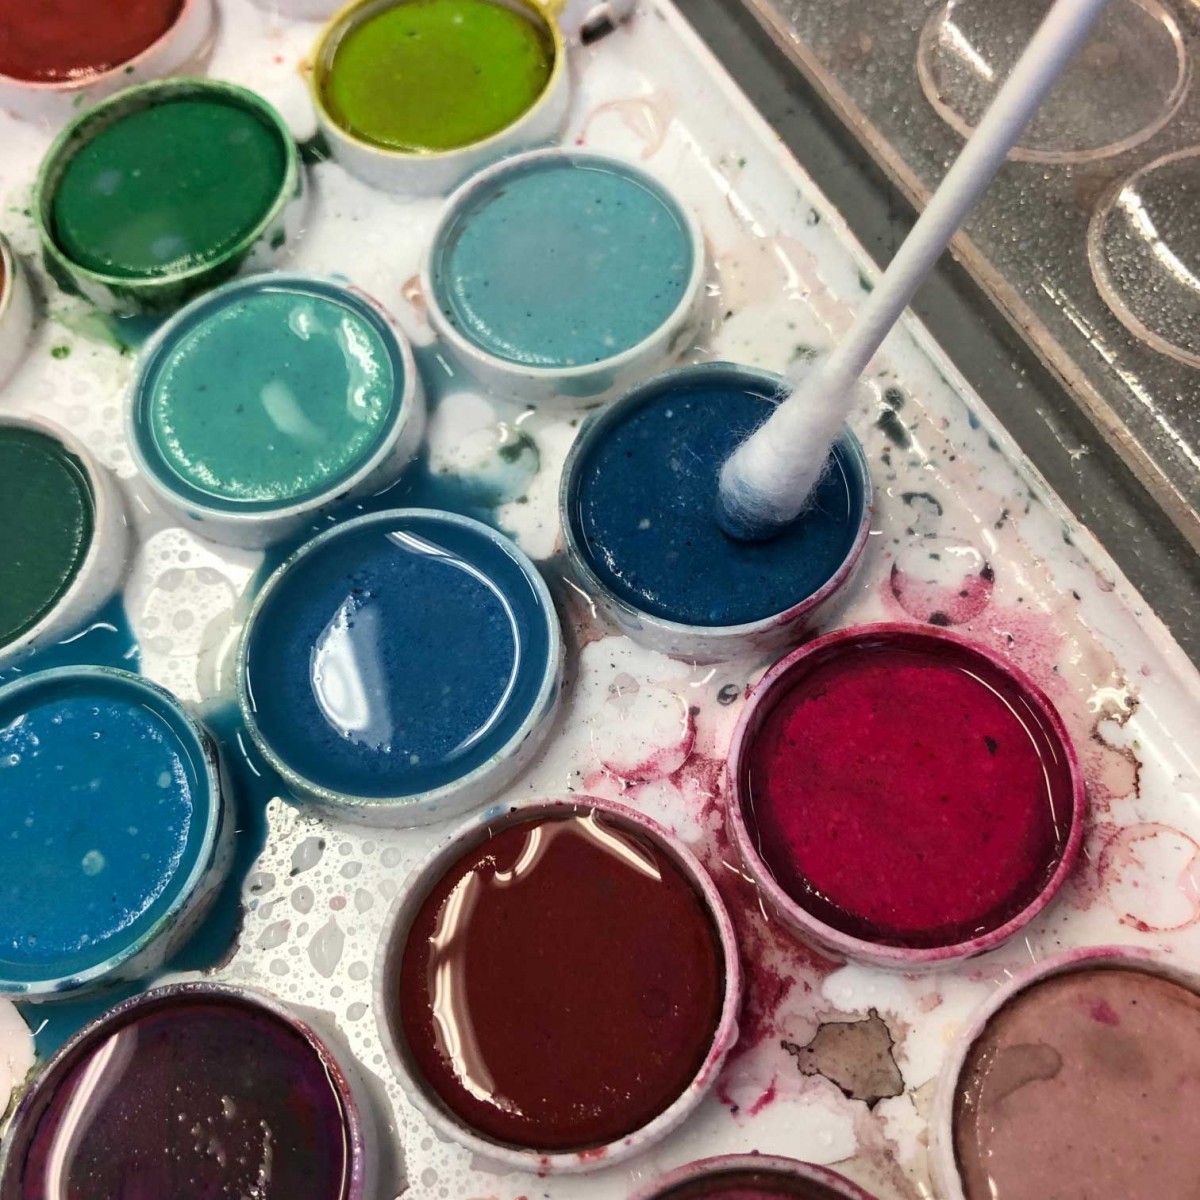 Moisten your paints
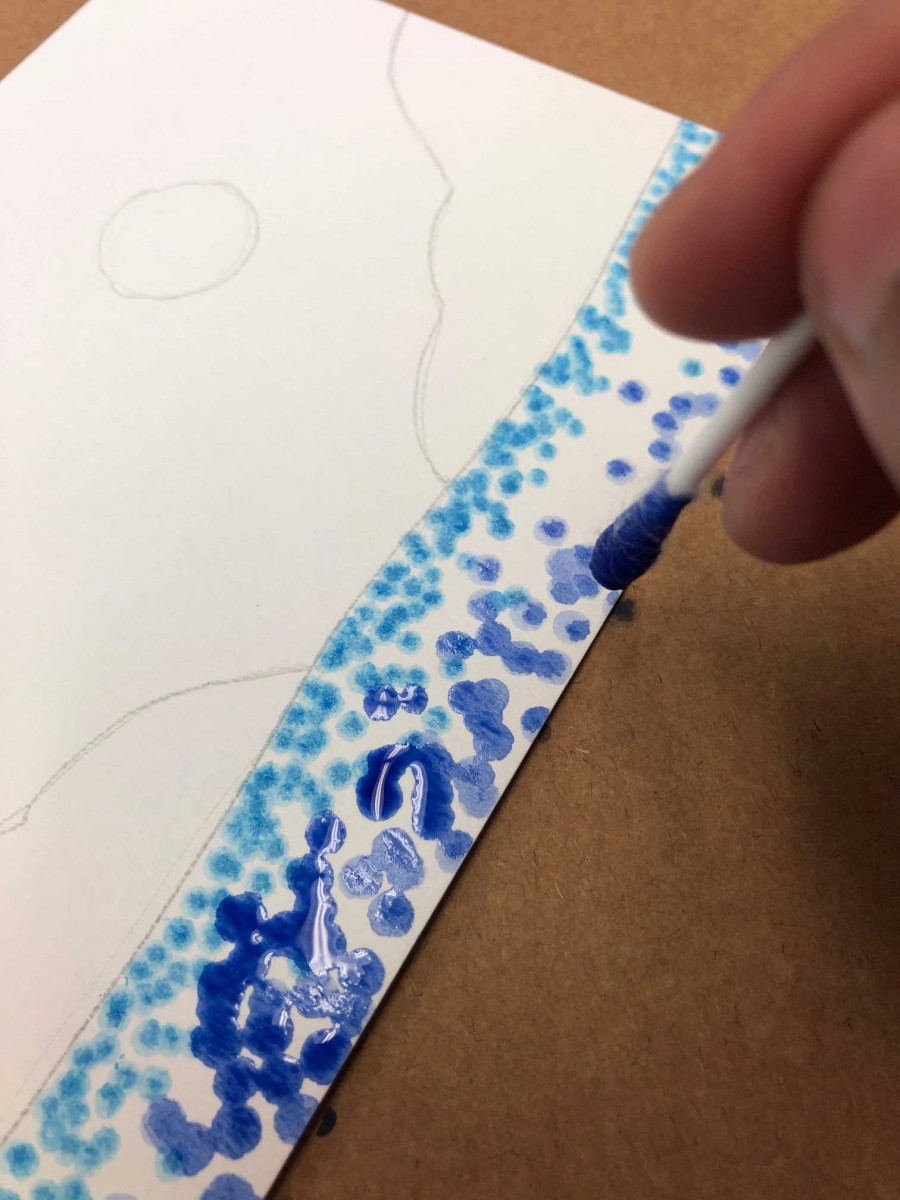 Use cotton buds to apply colour dots
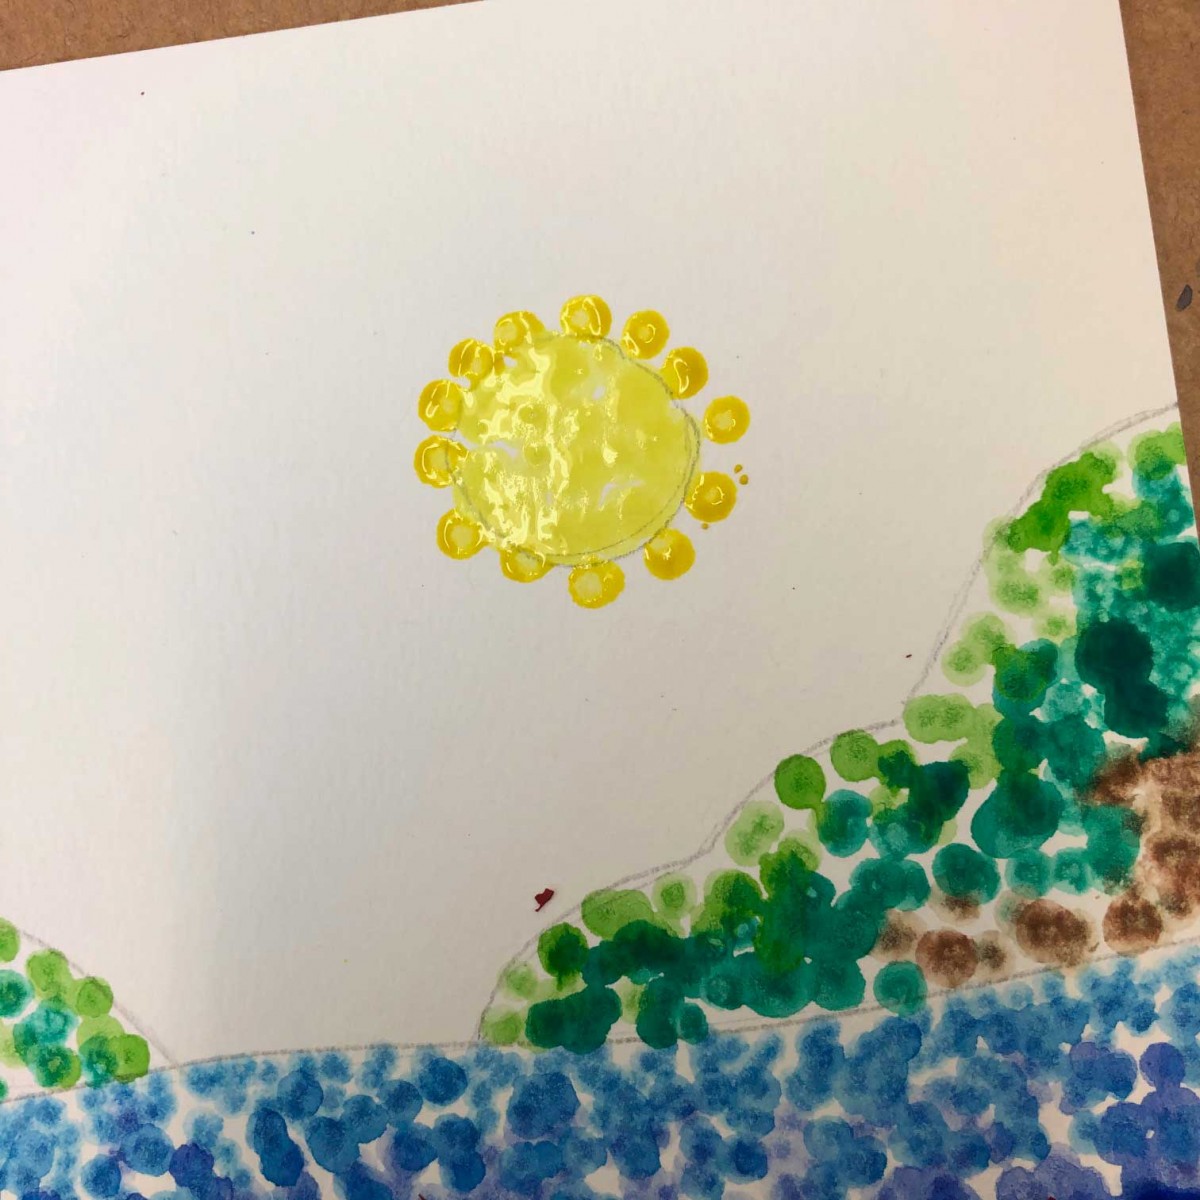 Add more colour!
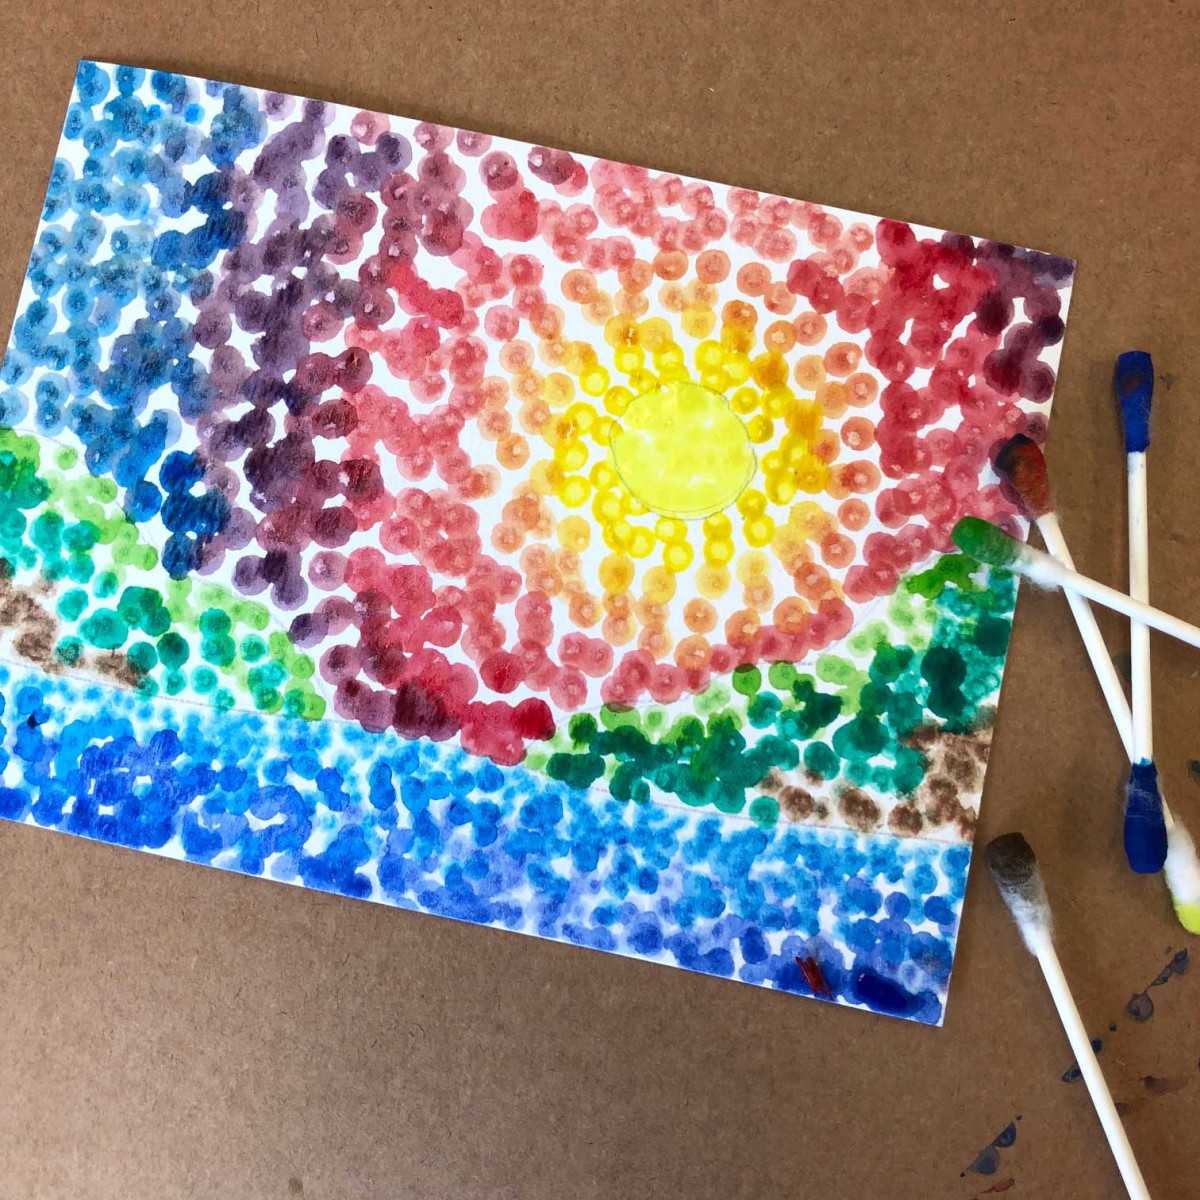 Fill up your paper with coloured dots!
 Add outlines if you wish
 Use other materials such as markers
CFCA Art Challenge #7
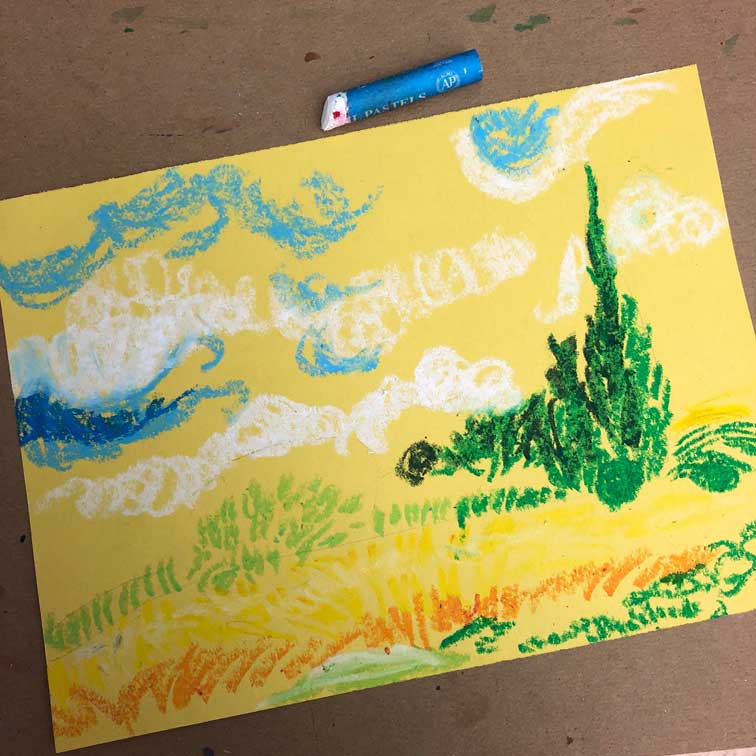
Mark Making with Oil Pastel
Mark making refers to making different patterns, textures, lines and shapes with your art materials. They can be bold and dark or faint and light. Different marks can convey the feeling of movement or solidity. It can make a drawing look fluffy or sharp. In this project i picked a painting by Vincent Van Gogh. His painting use lots of different marks and textures. His swirling skies feel like they are moving and his wheat fields look like they are being blown in the wind. Recreate your favourite Van Gogh artwork using oil pastels and construction paper. The painting I am using as a reference is called “Wheat Field with Cypresses.”
Materials:
- Construction paper. I used yellow for this day scene, if you are making a night scene, try a blue or black.
- Oil pastels
- Reference picture. Find one on-line or in a book, or use the one I used.
- Pencil
- The first thing I did was make a mark making sheet. I used a pencil to make squares on a piece of paper and I filled them in with various different patterns and marks. This helped me to explore the possibilities of the oil pastels and it was fun!
- Let’s start our reproduction! Using your reference photo, lightly draw in rough shapes of the main parts of the picture on your construction paper. For me this means the lines for the ground and the trees.
- Then start to lay in colours. The trees are green and spiky, so I used short spiky lines using light and dark greens.
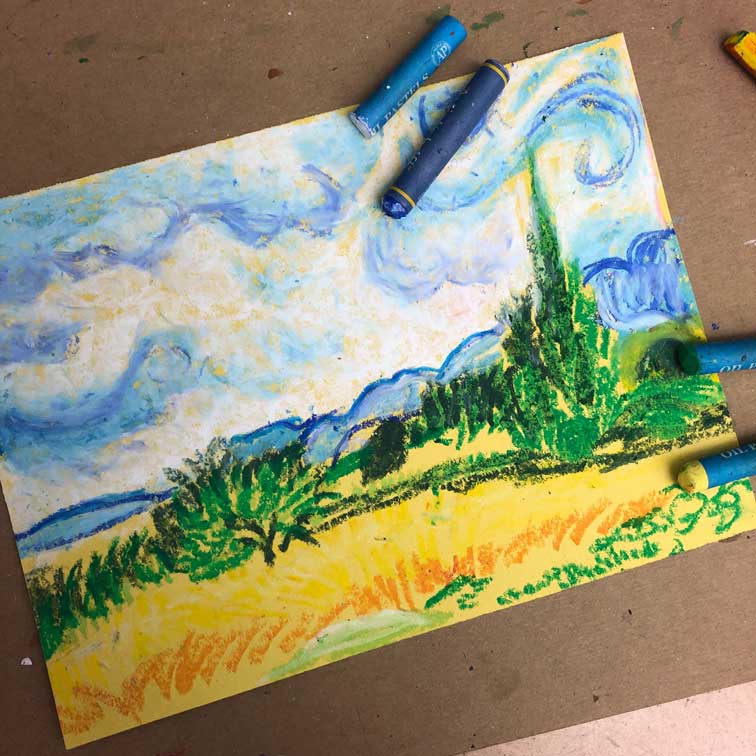
- Start laying down the colours in the clouds and sky. The clouds are fluffy and round, so make big swirly marks in white and blues. Go over the blues with the white. Layer your colours, to help them mix and merge.
- Continue adding colour and marks according to the picture. Use short straight lines for grasses, curving them to show them bending in the wind. Far aways hills may have sweeping expanses of colour, while closer areas will use more broken colour to show details.
- When your piece is almost done use a black to gently darken the darkest areas and other colours for details, such as the red dots to symbolize flowers.
- Share your artwork with us on our Facebook page! We would love to see what you create!
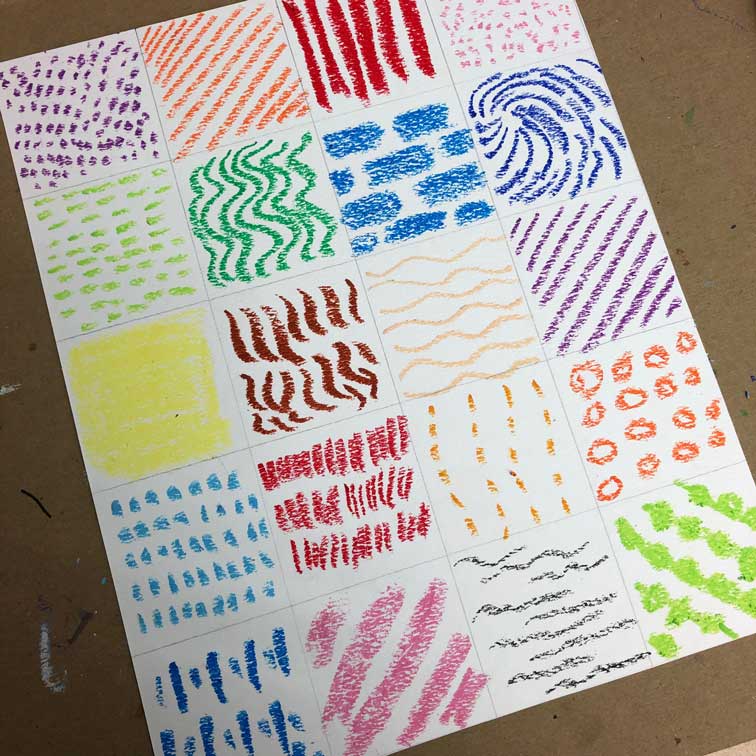 Mark Making Sample Page
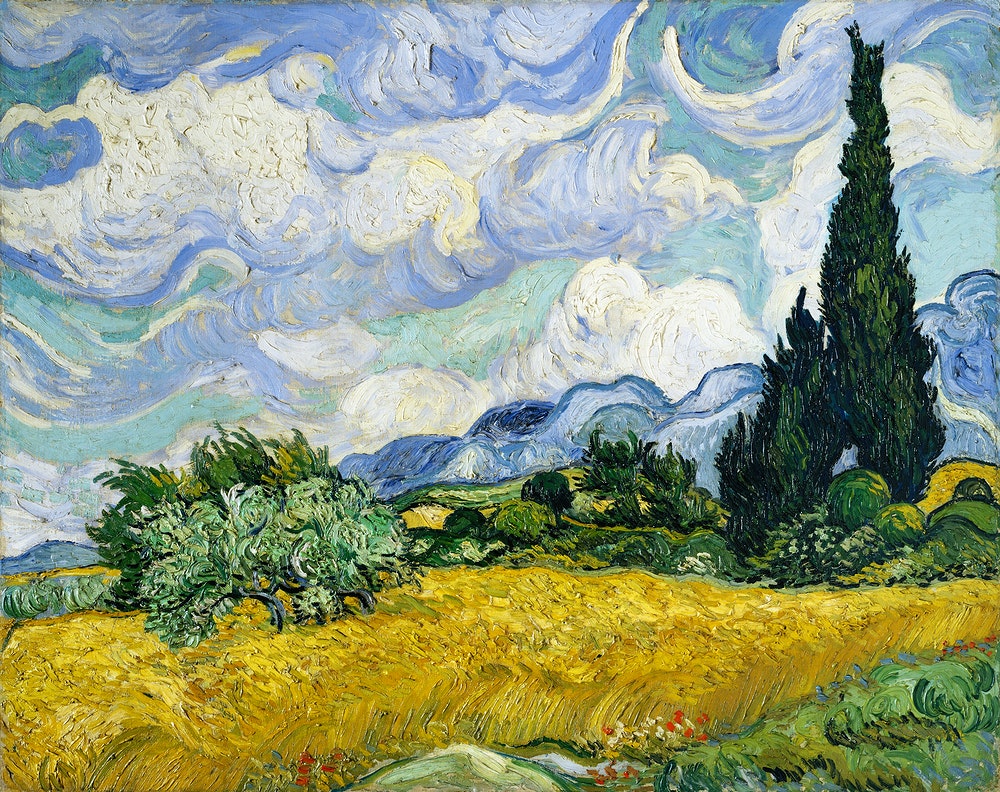 Van Gogh’s ” Wheat Field with Cypresses” Use for reference
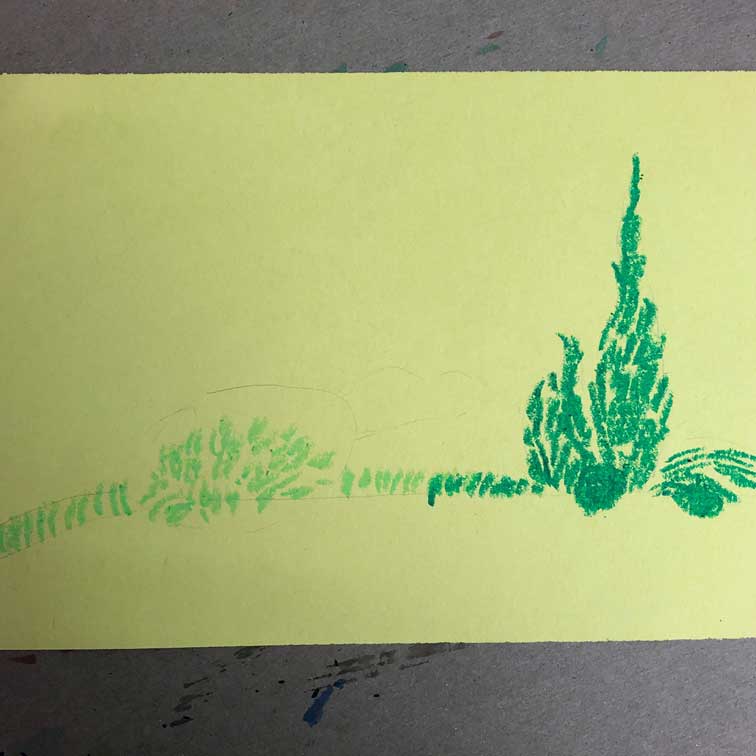 Draw in main areas with pencil, start filling in colour
 Work on the sky and field
 Keep adding layers!
 More layers!
 More layers!
CFCA Art Challenge #8
Styrofoam Printmaking
Materials:
- Styrofoam trays, take out containers. Anything with a nice smooth flat surface.
- Scissors
- Heavy paper to print on. Watercolour paper or cardstock.
- A blunt pencil or pen
- A paintbrush
- A brayer is you have one. It is not essential, but makes it easier if you have one.
- Acrylic or tempra paint or a stamp pad
- Use the scissors to cut out the flat area of you styrofoam. Cut the edges nicely as they will be the edges of your print. This is your printing plate.
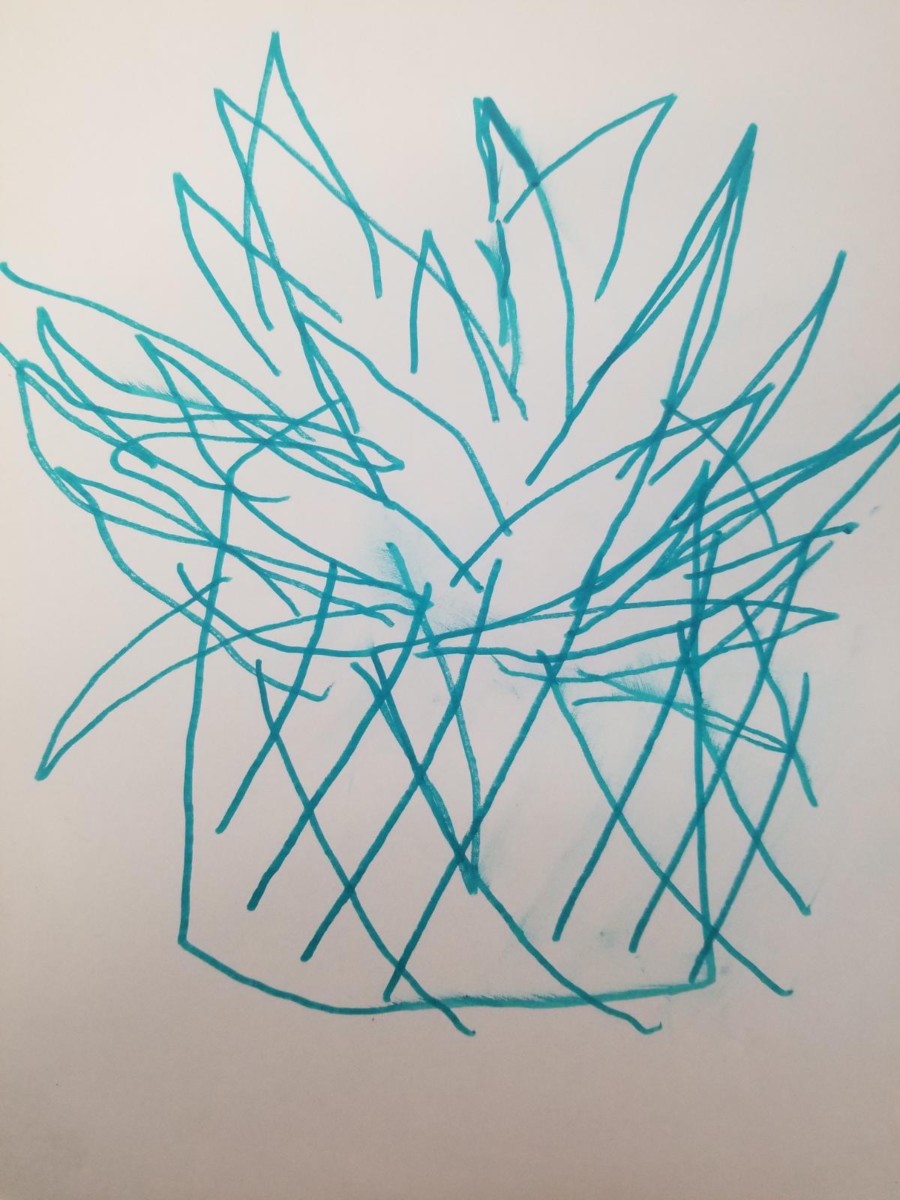
- Now to decide what to print! I chose an abstracted plant shape. You can make anything you can imagine! Remember that if you want to write words, you will need to write them backwards to make them print the right way.
- You can use a permanent pen to lightly draw your image first or just make it up as you go. Use the blunt pencil or pen to scribe the lines into your foam plate. Press gently, enough to push down in to the styrofoam but not to go all the way through. You want to to score lines through the top layers. Complete your drawing and add details if you wish.
- To use paint, you can use a brayer to make an easy smooth application of paint. I used a paintbrush. Use a thinner paint and brush across the plate. Try not to build up too much paint in the lines.
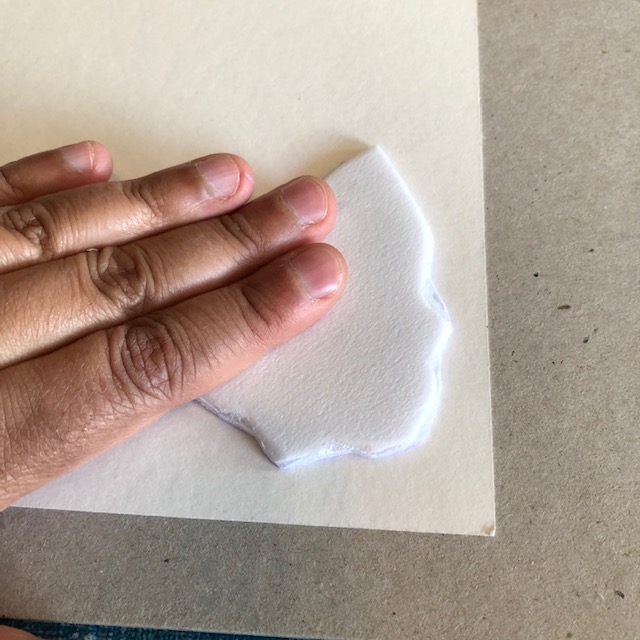
- While the paint is wet, place it paint side down on the heavy paper. Use a clean brayer or your hand to smooth the back of the plate. Press down evenly all over the plate to make sure all of your images transfers.
- Carefully peel back your plate from one corner. You have made a print!
- You can reuse your plate many times. You can wash it off and let it dry or you can use it right away. Try using several colours on one plate or printing on coloured papers.
- You can also use a stamp pad instead of paint. I made smaller print plates and cut around them to make my own stamps. Just press the stop pad to the styrofoam and print as above. Easy!
- Share your creations with us on our Facebook page!
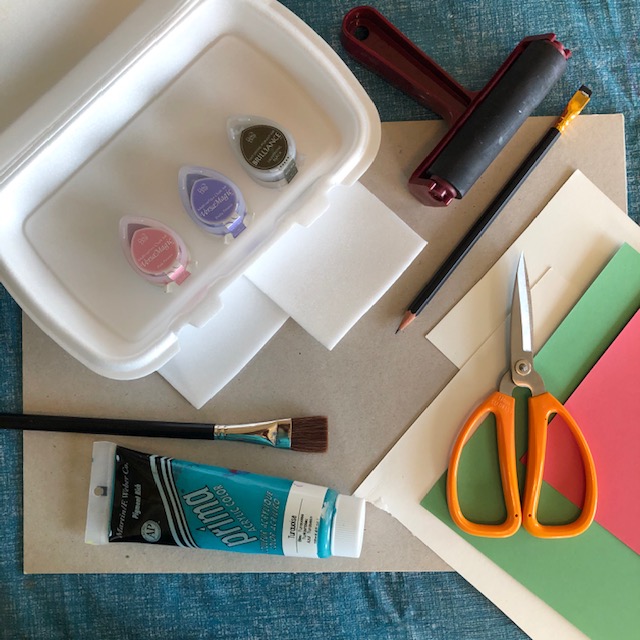 Collect your materials!
 Cut out your flat styrofoam piece
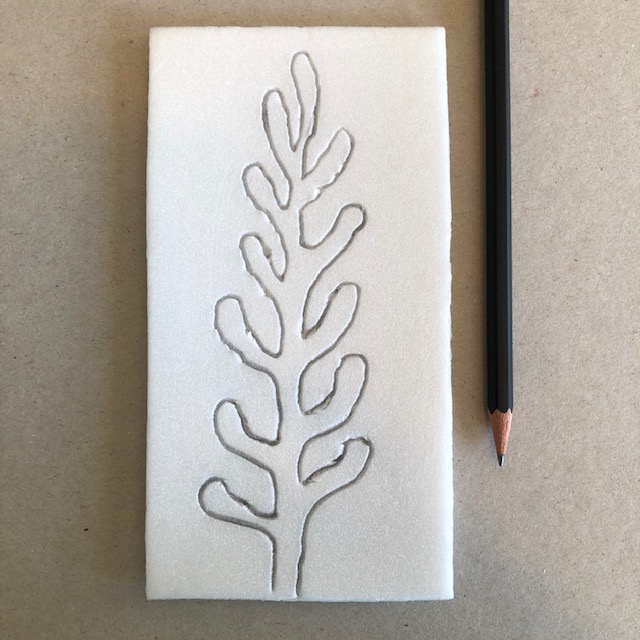 Scribe your design
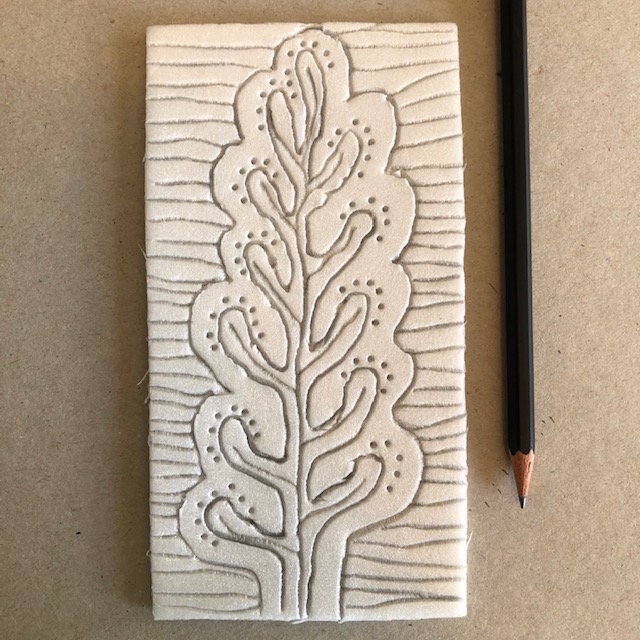 Add details
 lightly paint your surface, avoid filling the lines
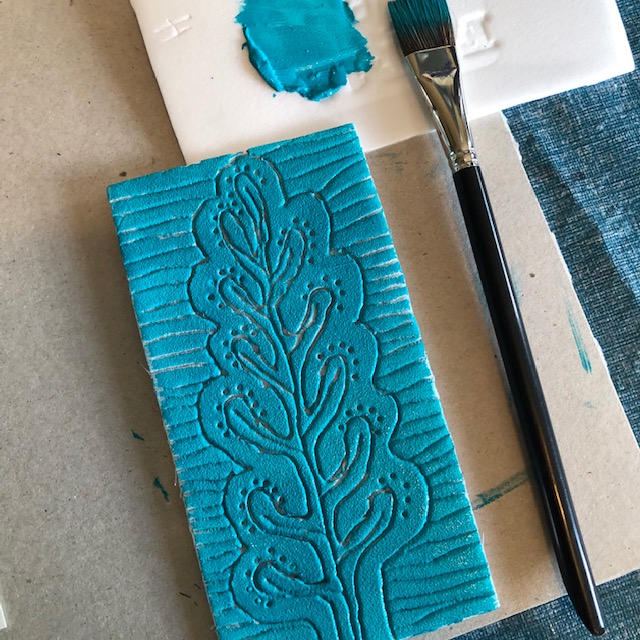 Ready to print!
 Use a brayer or…
 use your hand to rub the back
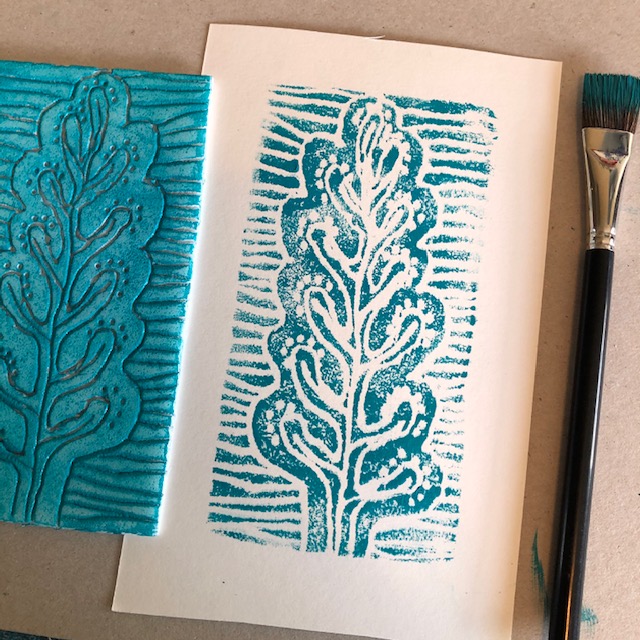 Your finished print!
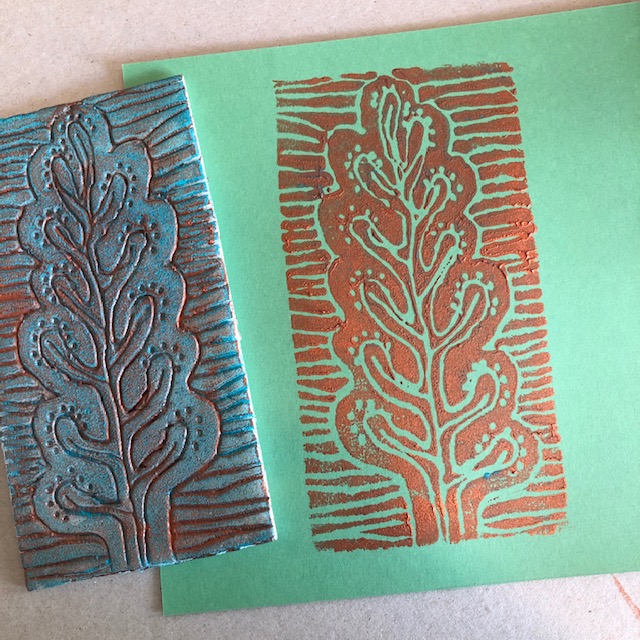 Try different coloured paints and papers!
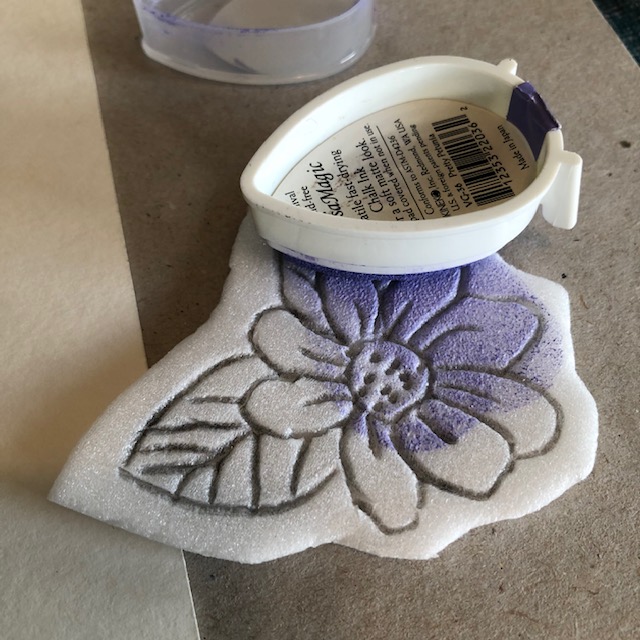 Using a stamp pad to colour.
 Press down.
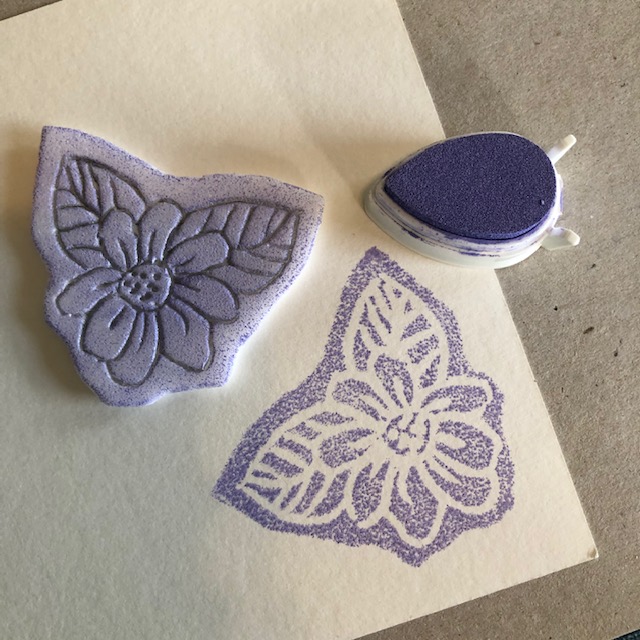 Your completed print!
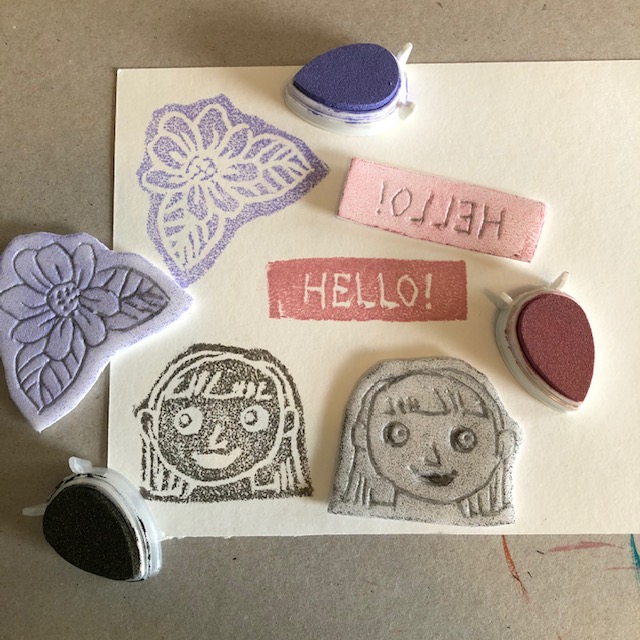 Some more examples!
CFCA Art Challenge #9
Watercolour Seal
Materials:
-Round brushes big and small
-Pencil
-Watercolour paper
-Watercolour paint
-Paint palette
-Water jug
-Masking tape
1.Start by taping the paper down to the table top in a landscape format. This will keep the paper flat when it gets wet.
2. With a pencil, draw a big triangle for the body in the middle of the paper. Attach another smaller triangle towards the top of one side. This will be the seals head.
3. Two small, longer triangles along the bottom of the big triangle will become flippers.
4. Draw a half circle midway down the largest triangle on the opposite side of the head. This will be the shape of the seals back.
5. Give the seal a rock to lay on by drawing a bumpy curve under the seal shapes.
6. Go over your drawing using the outline of the shapes to create your seal. Add details on the face: a triangle nose, a circle eye and a small “c” shape for an ear.
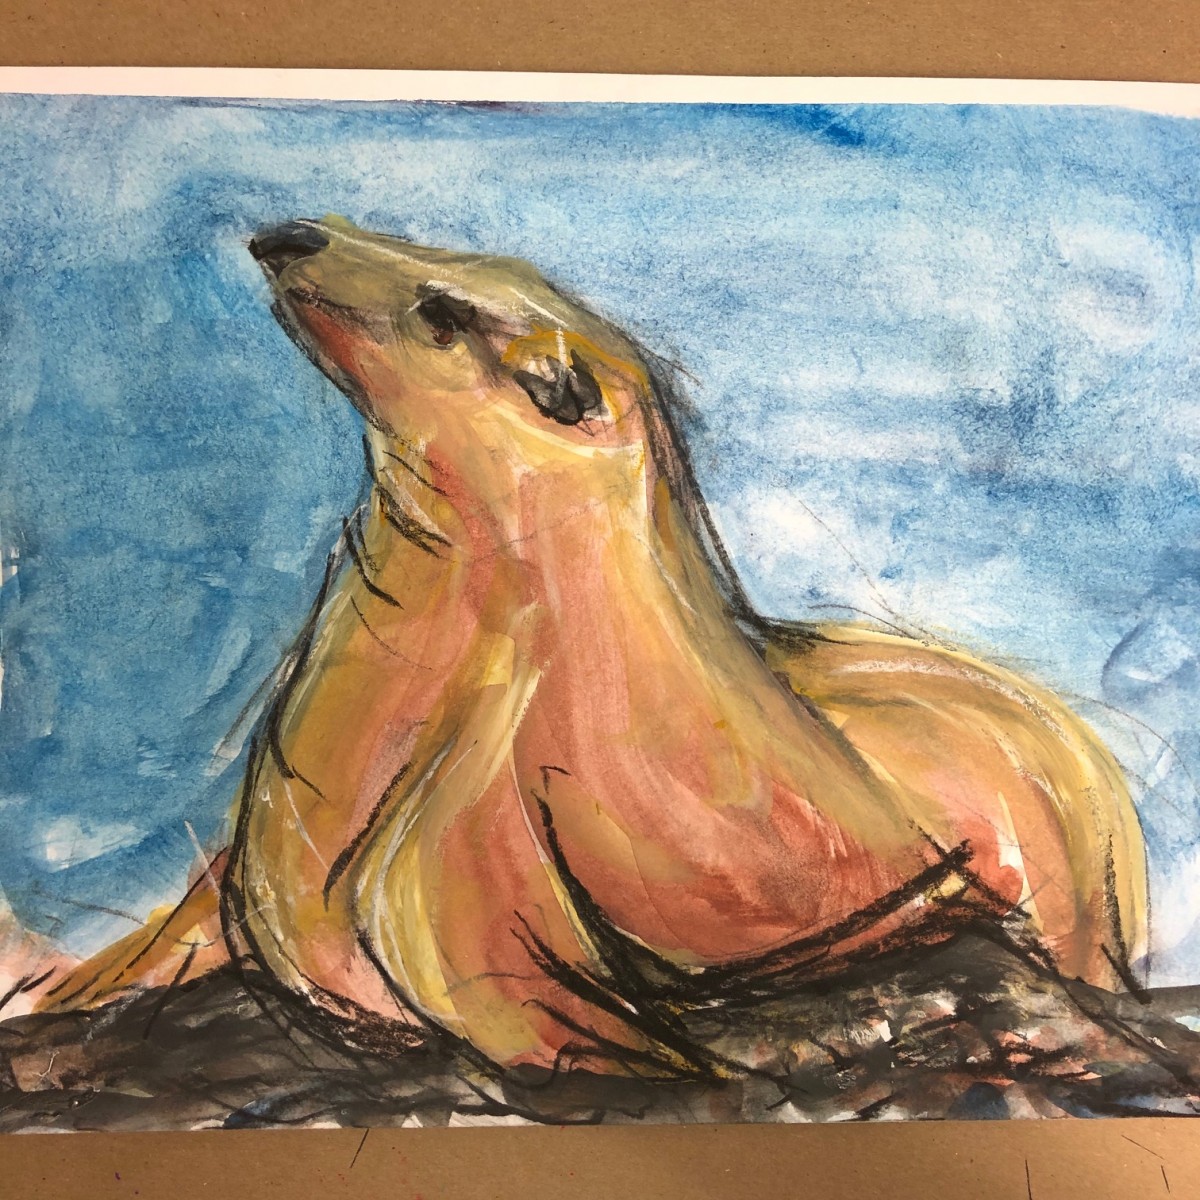
7. For the sky, use your large brush and clear water, wet the background. Then use blue paint in strokes. Wetting the background first should help the paint spread evenly. Try using different shades of blue and see how they blend together on the wet paper.
8. Use a brown or yellow ochre colour to fill in the seal. Use brown and black to paint the rocks.
9. Use black watercolour or a marker to add details to the face and to outline the full shape of the seal. You can use white paint or a white pencil crayon to add whiskers if you would like too.
Let dry and then remove the tape carefully.
10. Share your creations with us on Facebook! We can’t wait to see what you make!
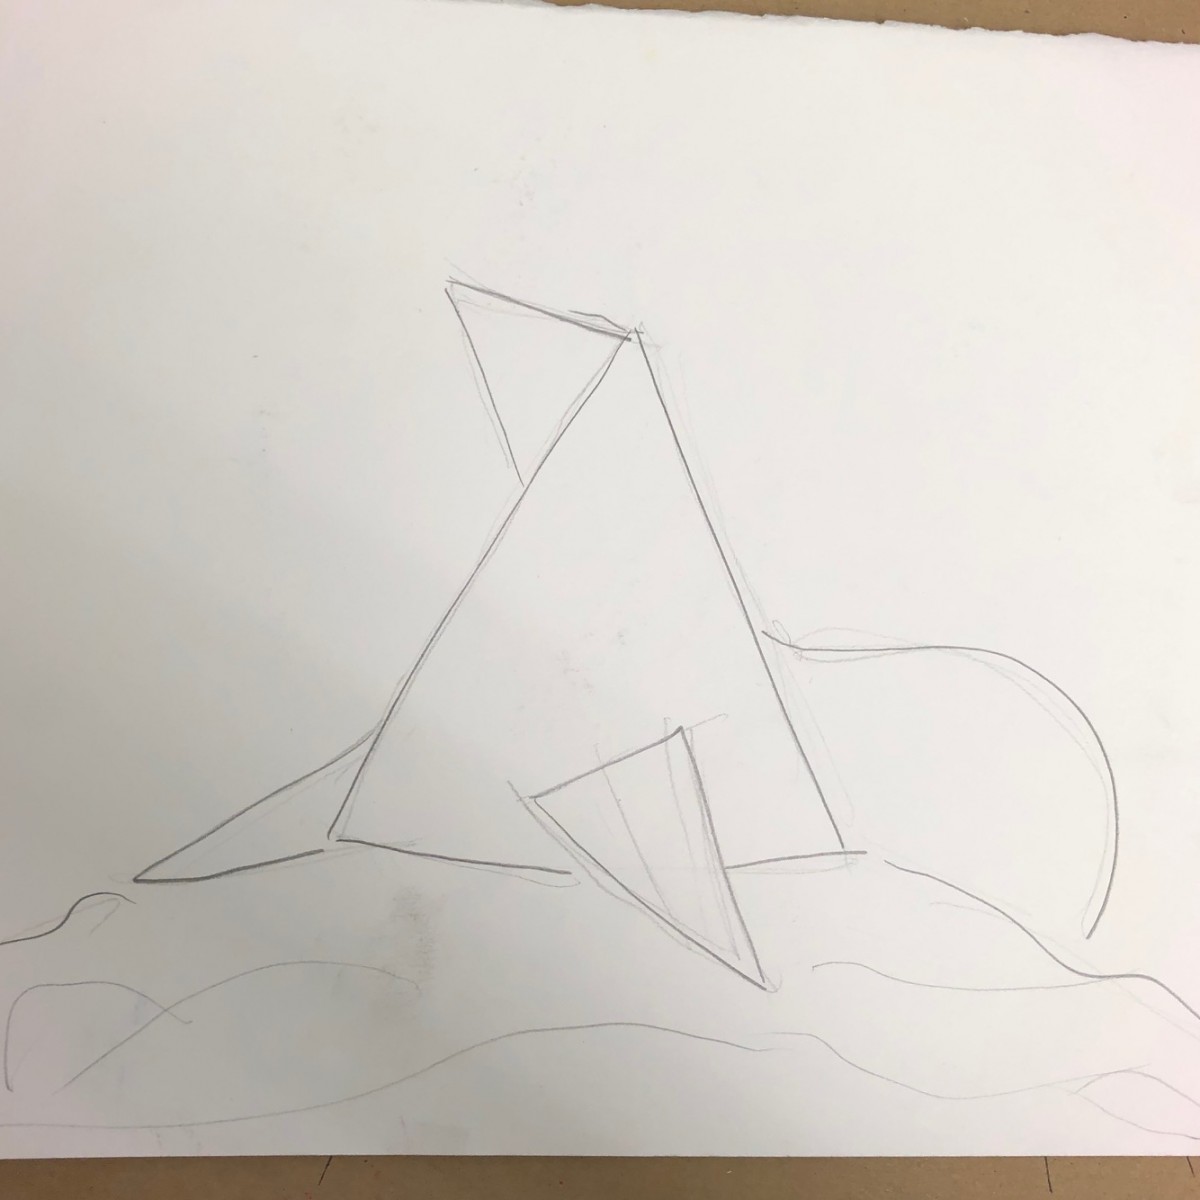 Draw your triangles
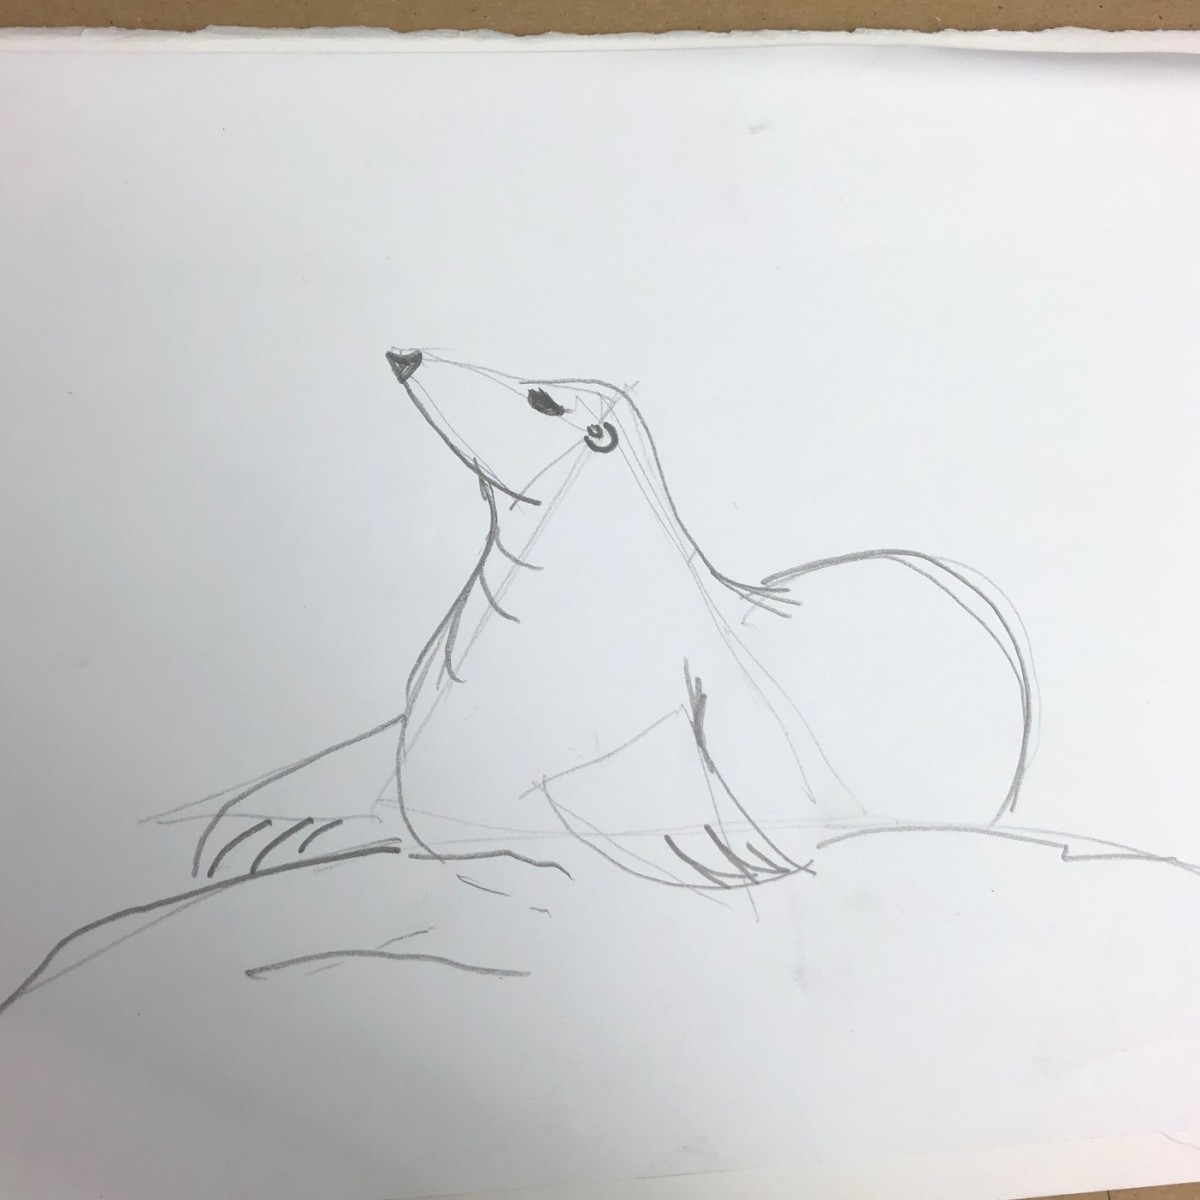 Use your shapes to draw your seal
 Paint the Seal!
 Another example!
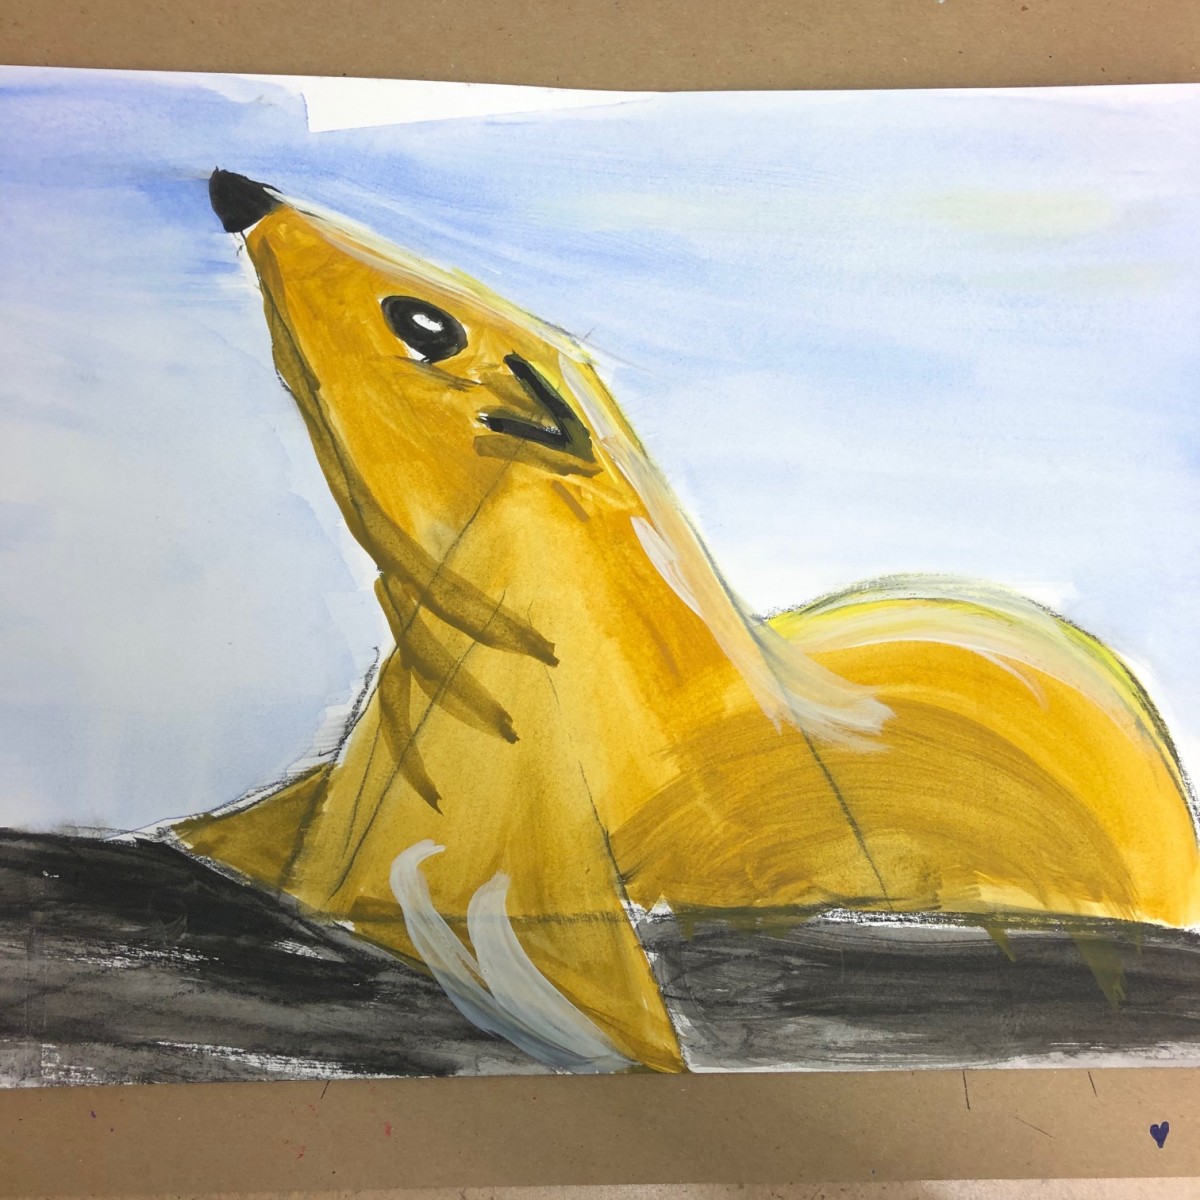 And another!
CFCA Art Challenge #10
.
“Finish the Picture” Mixed Media Project
Materials:
-Old magazines
-Scissors
-Paper glue
-Paper or painting canvas
-Colouring supplies, crayons, markers, pastels, pencil crayons or paint. Use whatever you have!
1.Look through the magazines and select a small image that you like. Cut it out and make sure it only covers a small portion of your paper or canvas.
2. Glue it down on the paper, leaving room around it for you to continue the picture.
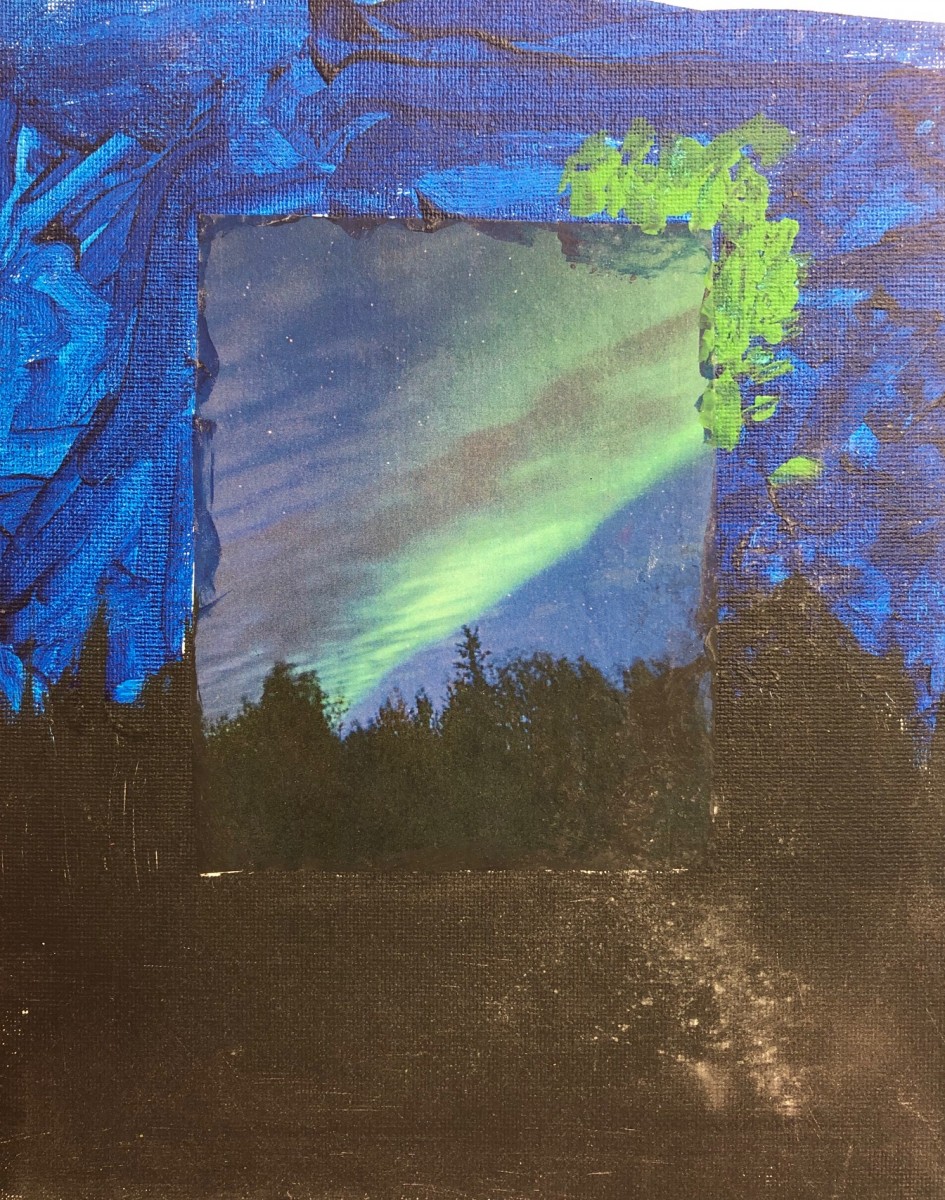
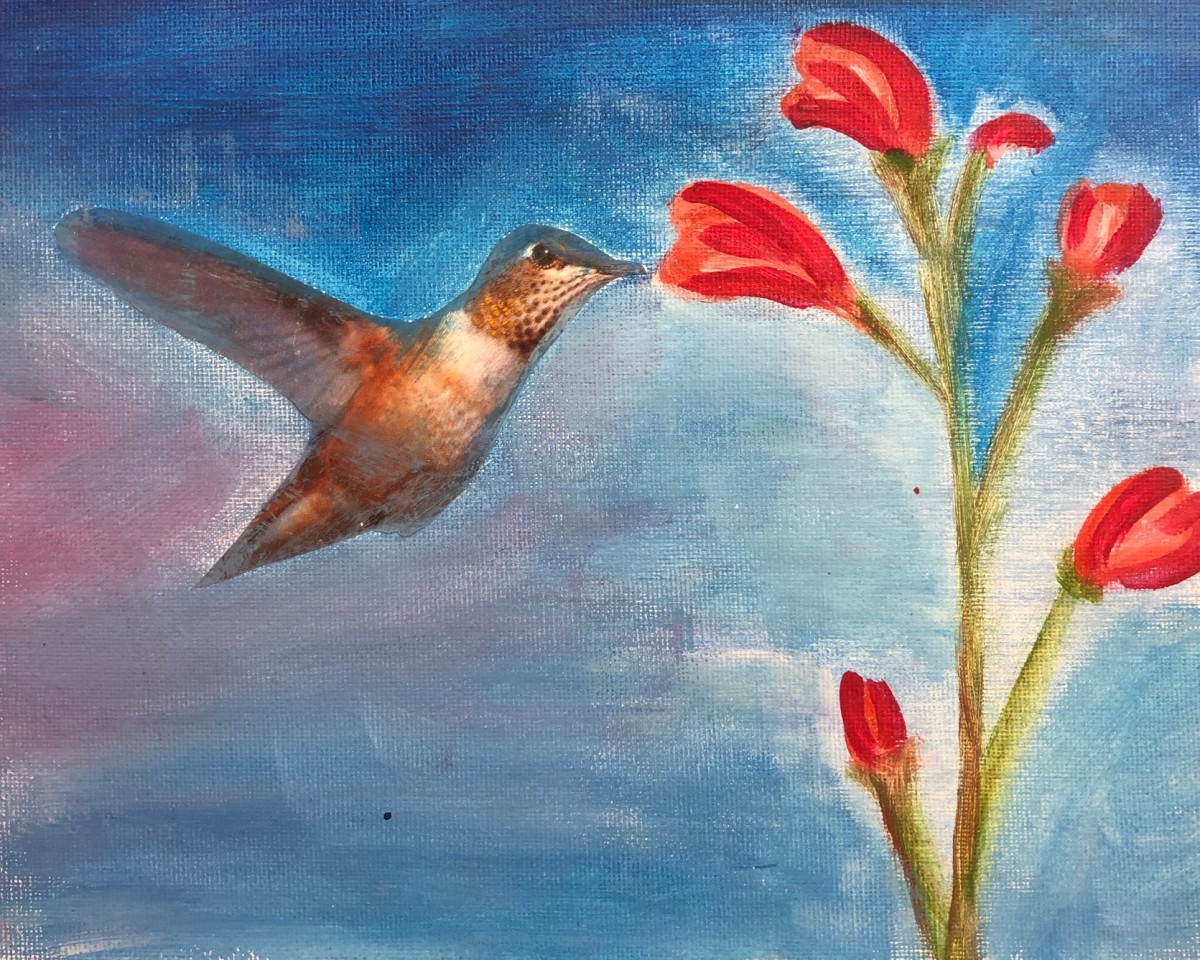
3. Using your selected drawing or painting media, continue the image. Try to match colours of your drawing to the colours in the picture. If you have a landscape, try to image where the trees or water continue off past the picture. You can add different elements, such as the flower in the hummingbird example. Fill the paper to make one complete image. Draw or paint right up to the edge of the cut out picture, it’s ok to go over the edges.
CFCA Art Challenge #11
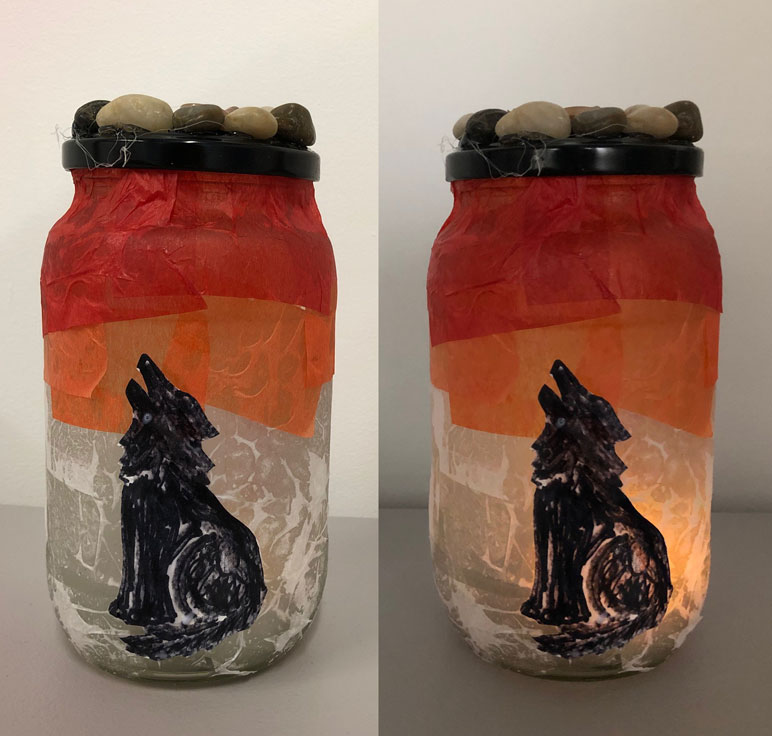
Decorated Jar Lantern
Materials:
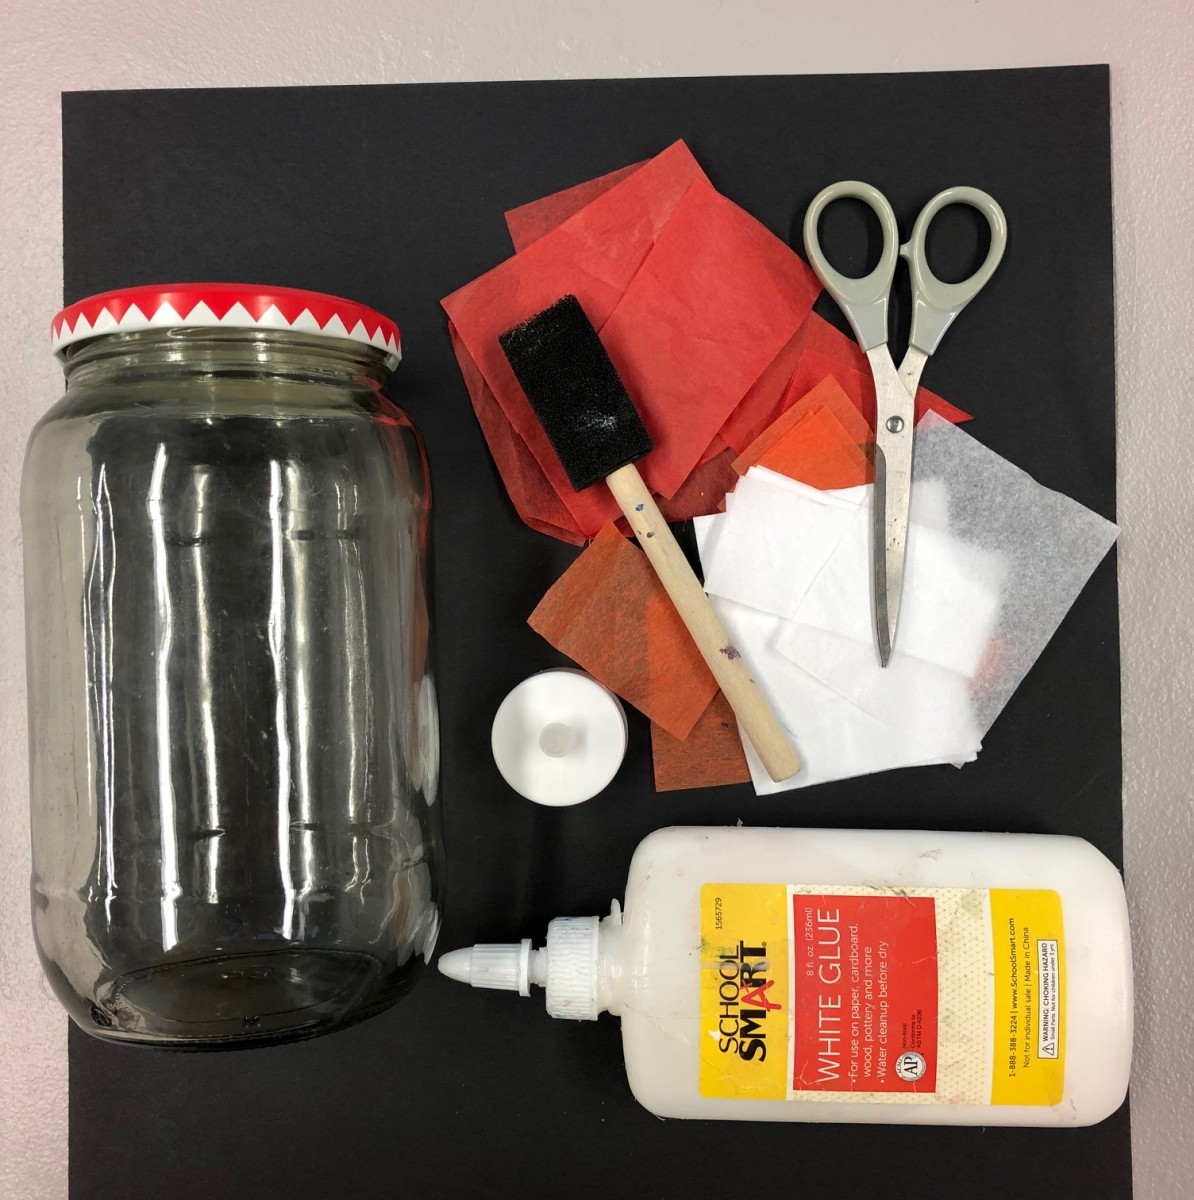
-Clear glass or plastic jar with lid
-Tissue paper or patterned napkins (layers separated)
-Dark coloured construction paper
-Scissors
-White glue
-Brush for glue
-Small container for glue
-Rocks, buttons and other decorative items
-Battery operated light ( DO NOT USE A REAL FLAME)
Step 1: Make sure your jar is clean and free of labels.
Step 2: Pour a little white glue into the container and add the same amount of water and mix it up with the brush.
Step 3: Cut or tear tissue paper or napkin layers into small pieces or strips. Cut our shapes from the construction paper. We cut out a wolf shape.
Step 4: Use the brush to put glue on the jar, add a layer of tissue paper and gently brush glue on top to smooth it down. Add more tissue until the jar is covered. Add your construction paper cut outs in the same way.
Step 5: While the jar is drying, you can decorate the lid! Use the white glue straight from the bottle to glue on rocks, buttons or any pretty decorative items you may wish. This might take a while to dry, so set your jar and lid in a safe spot to dry over night.
Step 6: when everything is dry, put a battery operated light inside and use your lantern to light up your bedroom at night or take it camping and use it in your tent! It can also make a great present for a parent or grandparent!
CFCA Art Challenge #12
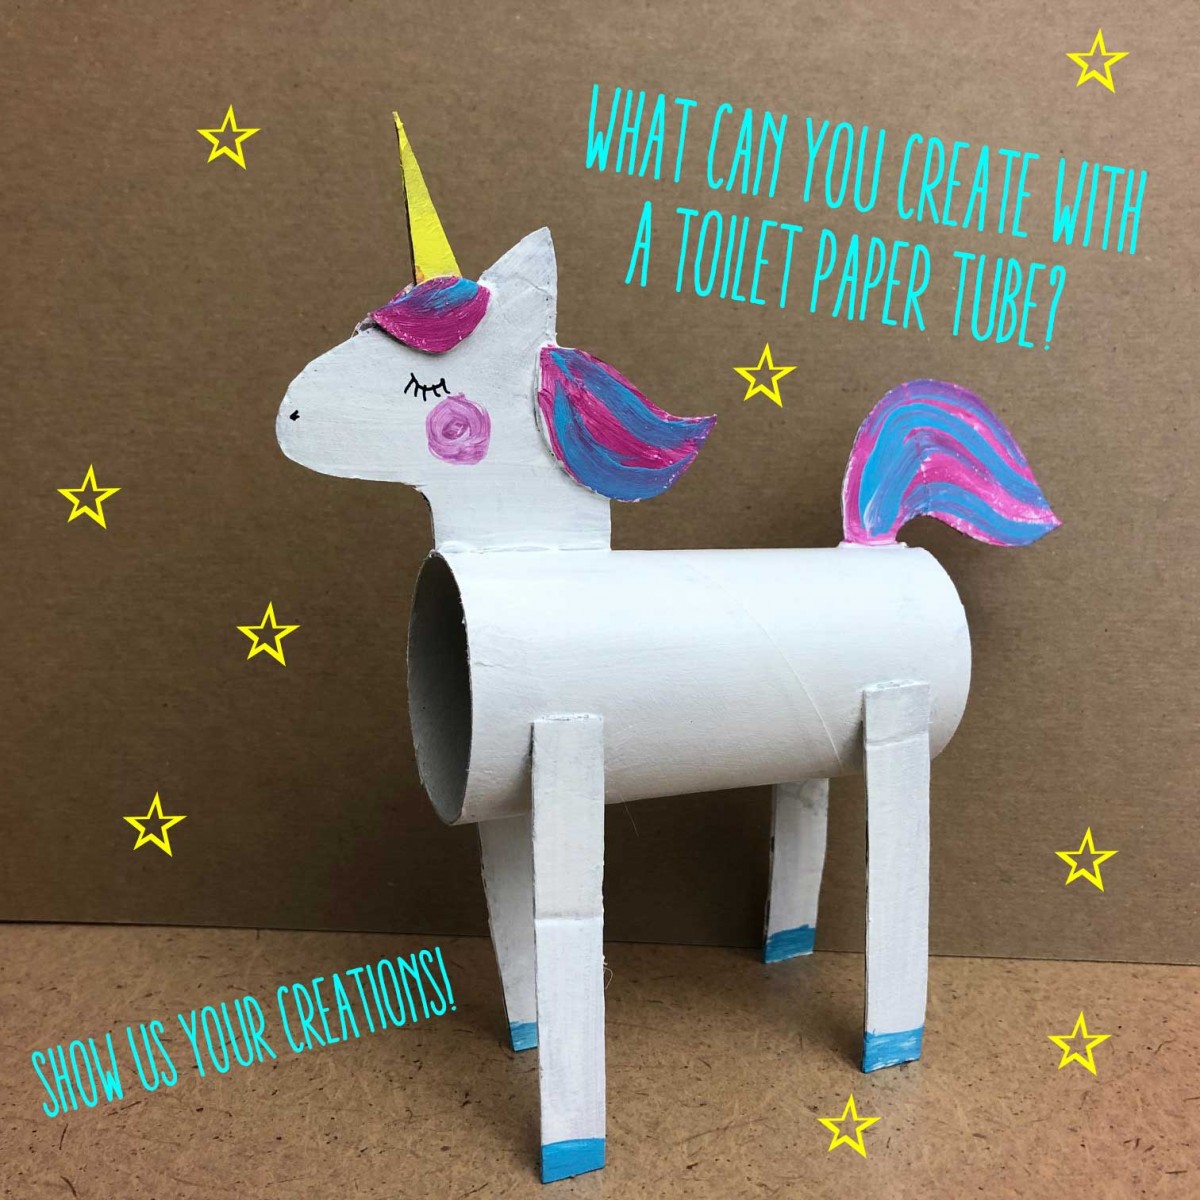
Paper tube Owls
Materials:
-Toilet Paper Tube
-White Paper (drawing paper, computer paper) and/or coloured paper, old book pages and so on.
-Scissors
-Markers
-Gluestick
-Ribbon or string
Step 1: Place your paper tube on the paper and mark out how big a rectangle you need it to cover your roll with a little overlap. Cut out this paper rectangle.
Step 2: With your rectangle laying with the long sides at the top and bottom, draw eyes and a beak with markers slightly above the centre of the page. Add feathers to the rest of the page. You can make feather shapes or go abstract like the green owl in the sample image. Use the cut off piece of paper to draw the wings, make two heart shapes and colour them in. Try making the body lighter and the wings darker to make them stand out.
Step 3: Cover the back of the body piece with glue stick. Starting on one short edge, lay your paper tube on it and roll it up. Use your fingers to smooth the paper as you go. Glue the wings on the sides.
Step 4: Punch a hole in the back of the tube near the top. Thread a piece of ribbon or string through the hole and tie a knot.
Step 5: Hold the owl in your hands and us your thumbs to press down a notch in the back of the owls head. Then make one from the front. These will make the feather tufts on the owls head.
Step 6: Make some friends for your owl, hang them up on a branch and enjoy!
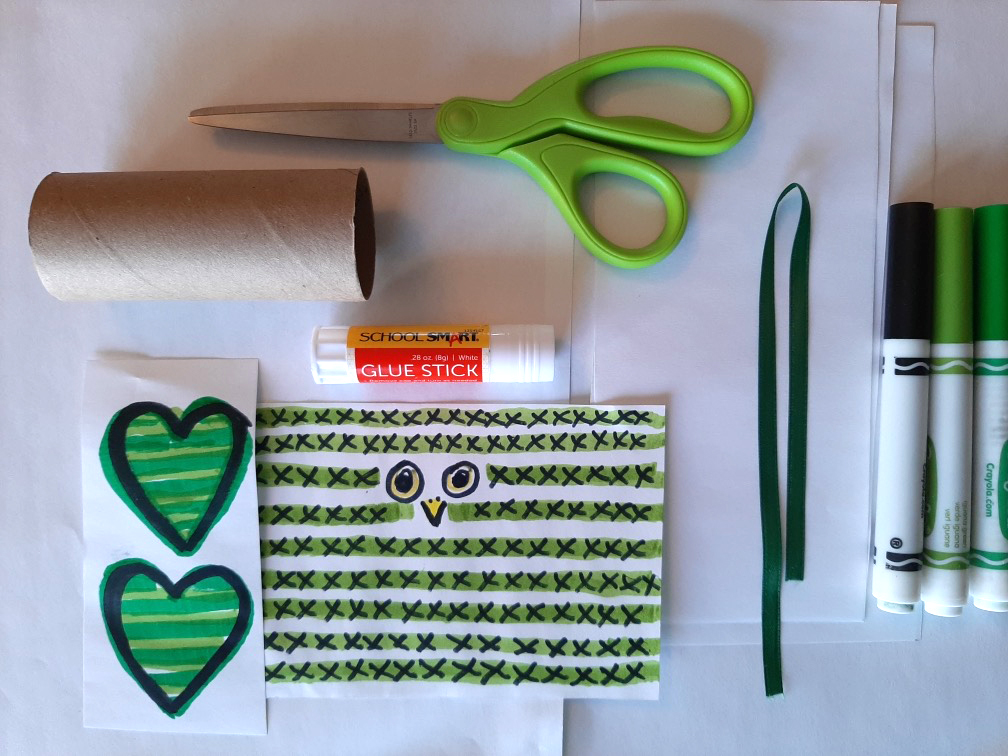 Materials
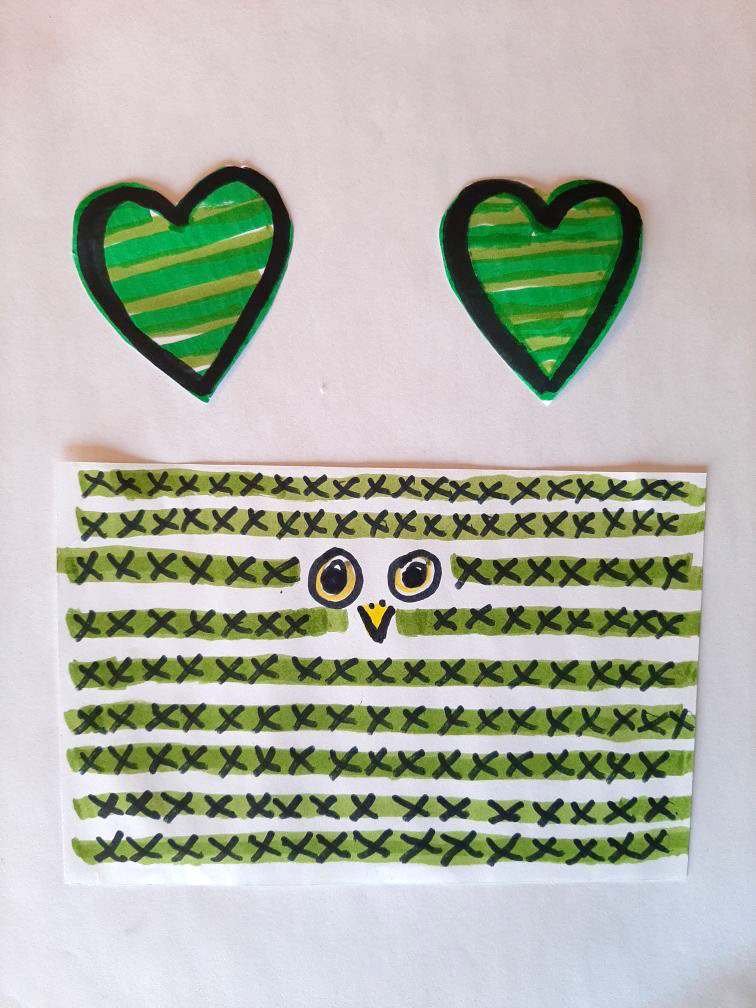 Decorate
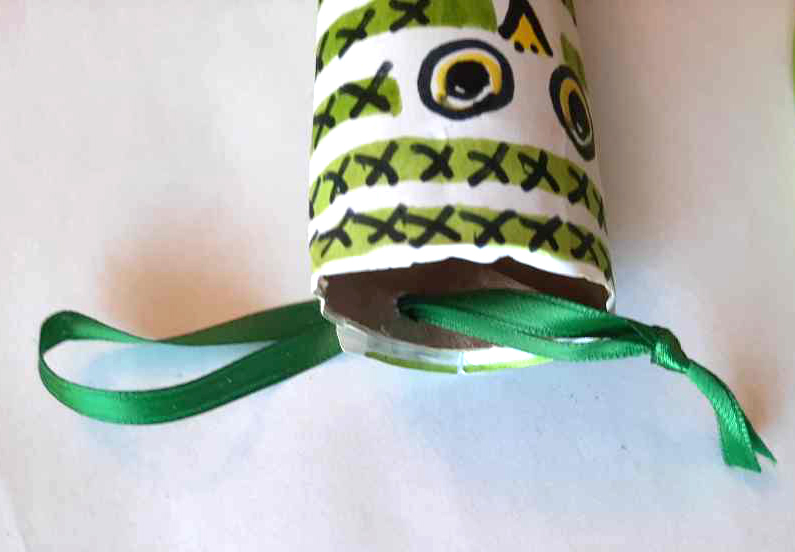 Add a ribbon
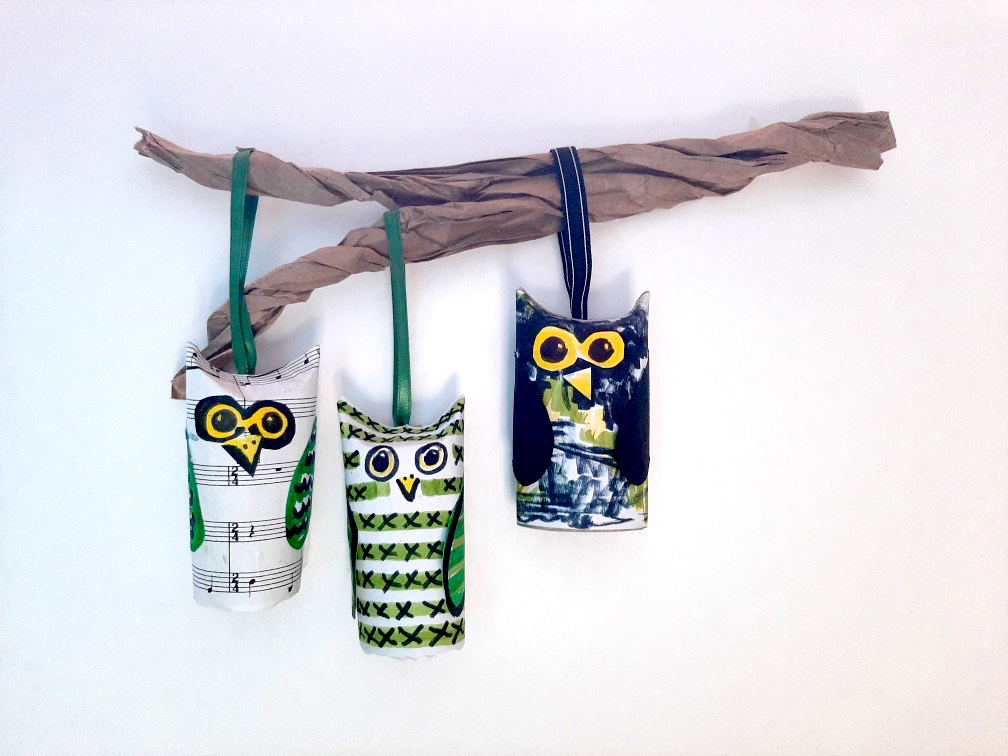 Hang and Enjoy!
CFCA Art Challenge #13
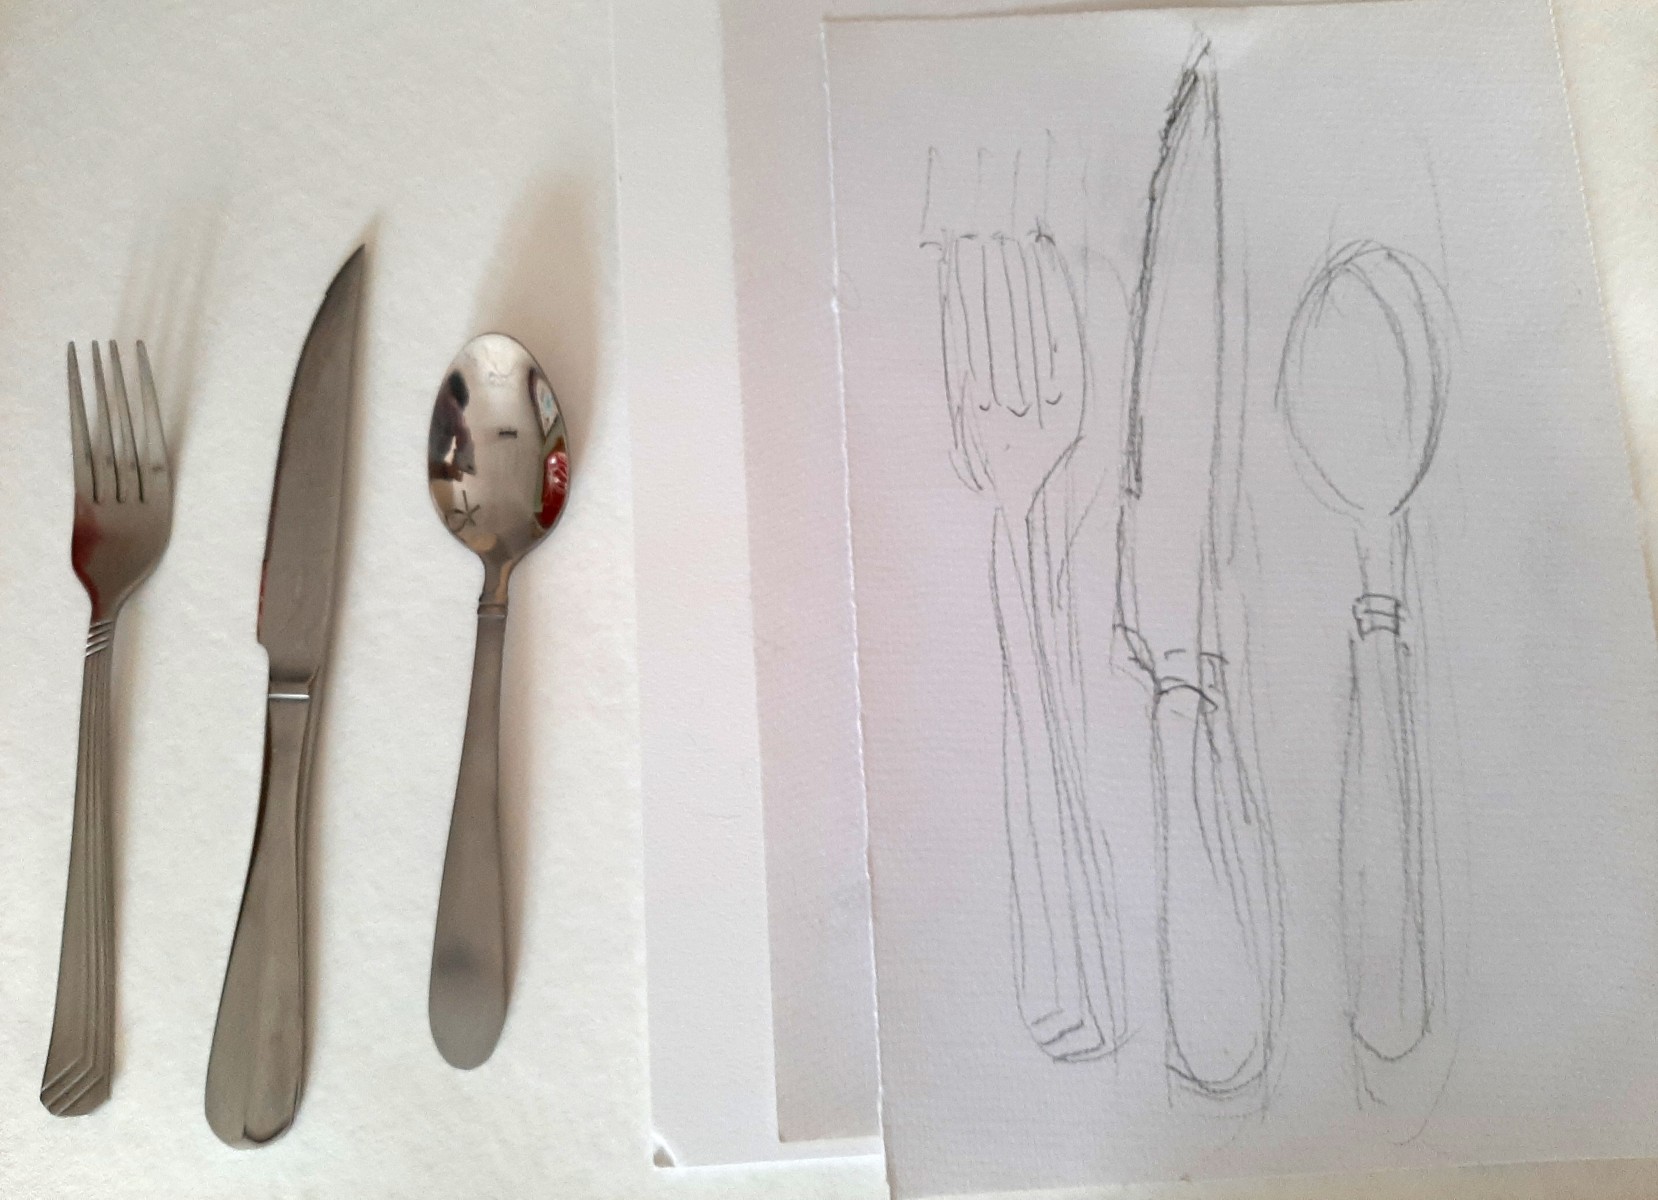
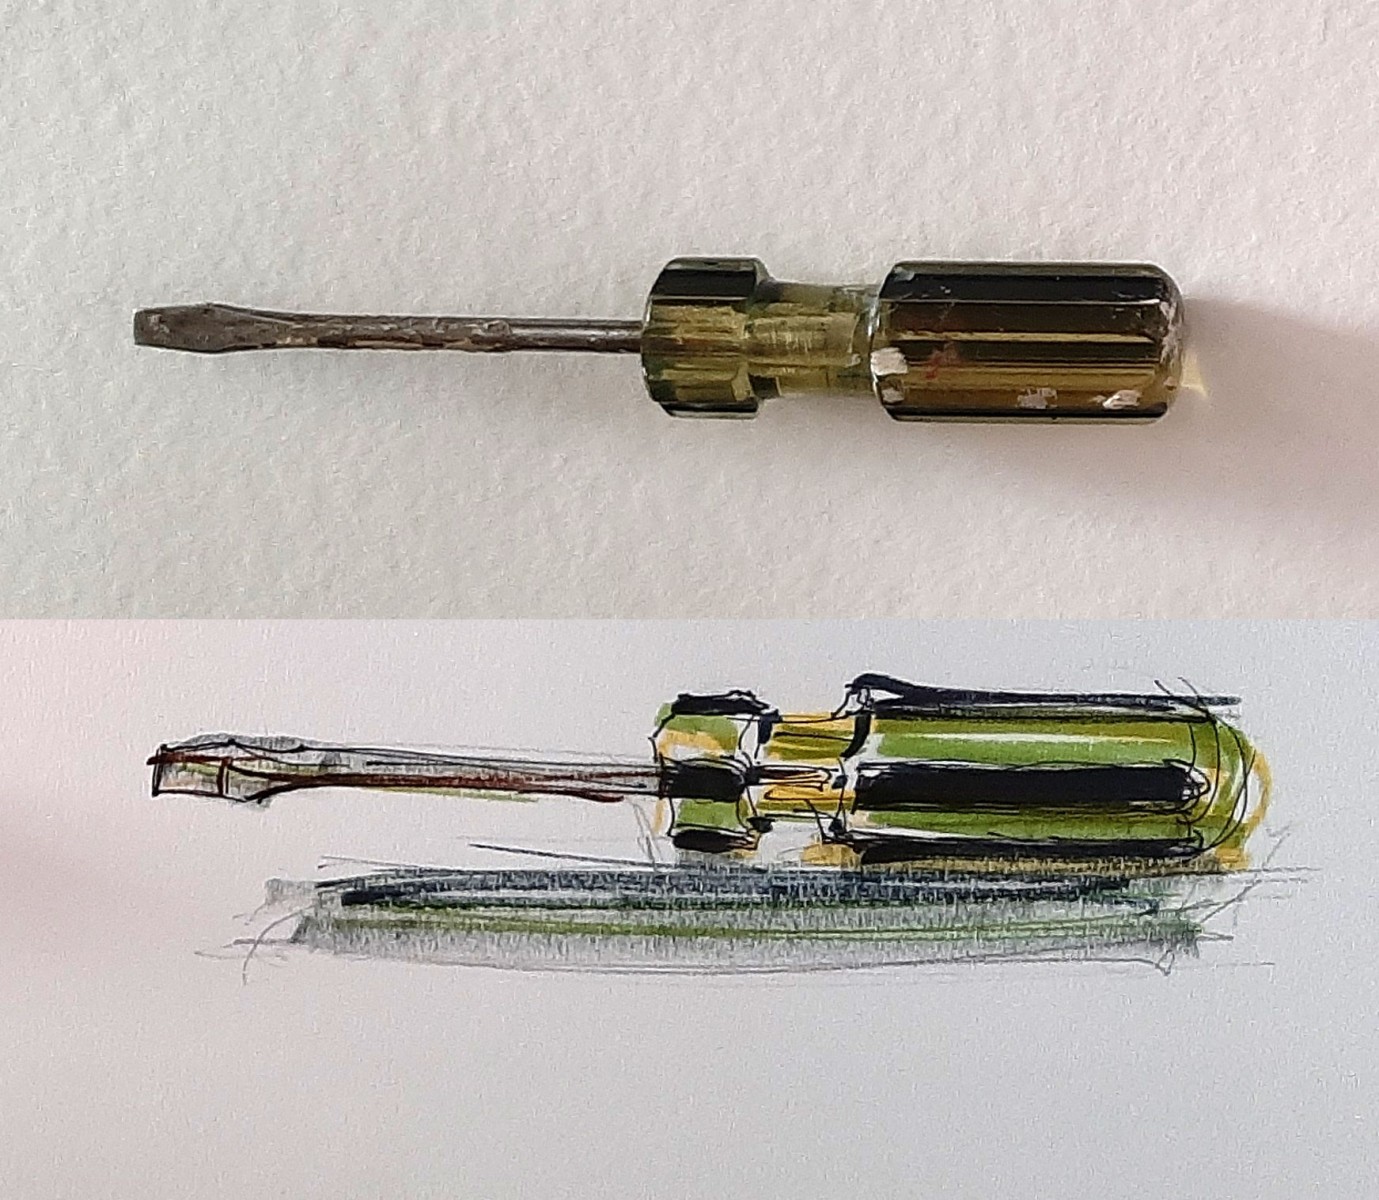
Drawing Everyday Objects
Materials:
-Everyday objects from around the house (we used a mug, some utensils and a screwdriver)
-White paper
-Pencil
-Markers or crayons
Step 1: Place your object on a flat light coloured surface.
Step 2: Look at your object and use the pencil to sketch its outline. Look carefully and try to replicate its curves and shapes.
Step 3: Use a black marker and trace over your pencil lines.
Step 4: Look at the object to find its light and dark places. Sometimes it helps to squint.
Step 5: Use a lighter colour colour in your shapes, leaving the lightest areas white. Use a darker hue to shade in the shadows. Don’t forget the shadow on the table!
 Materials
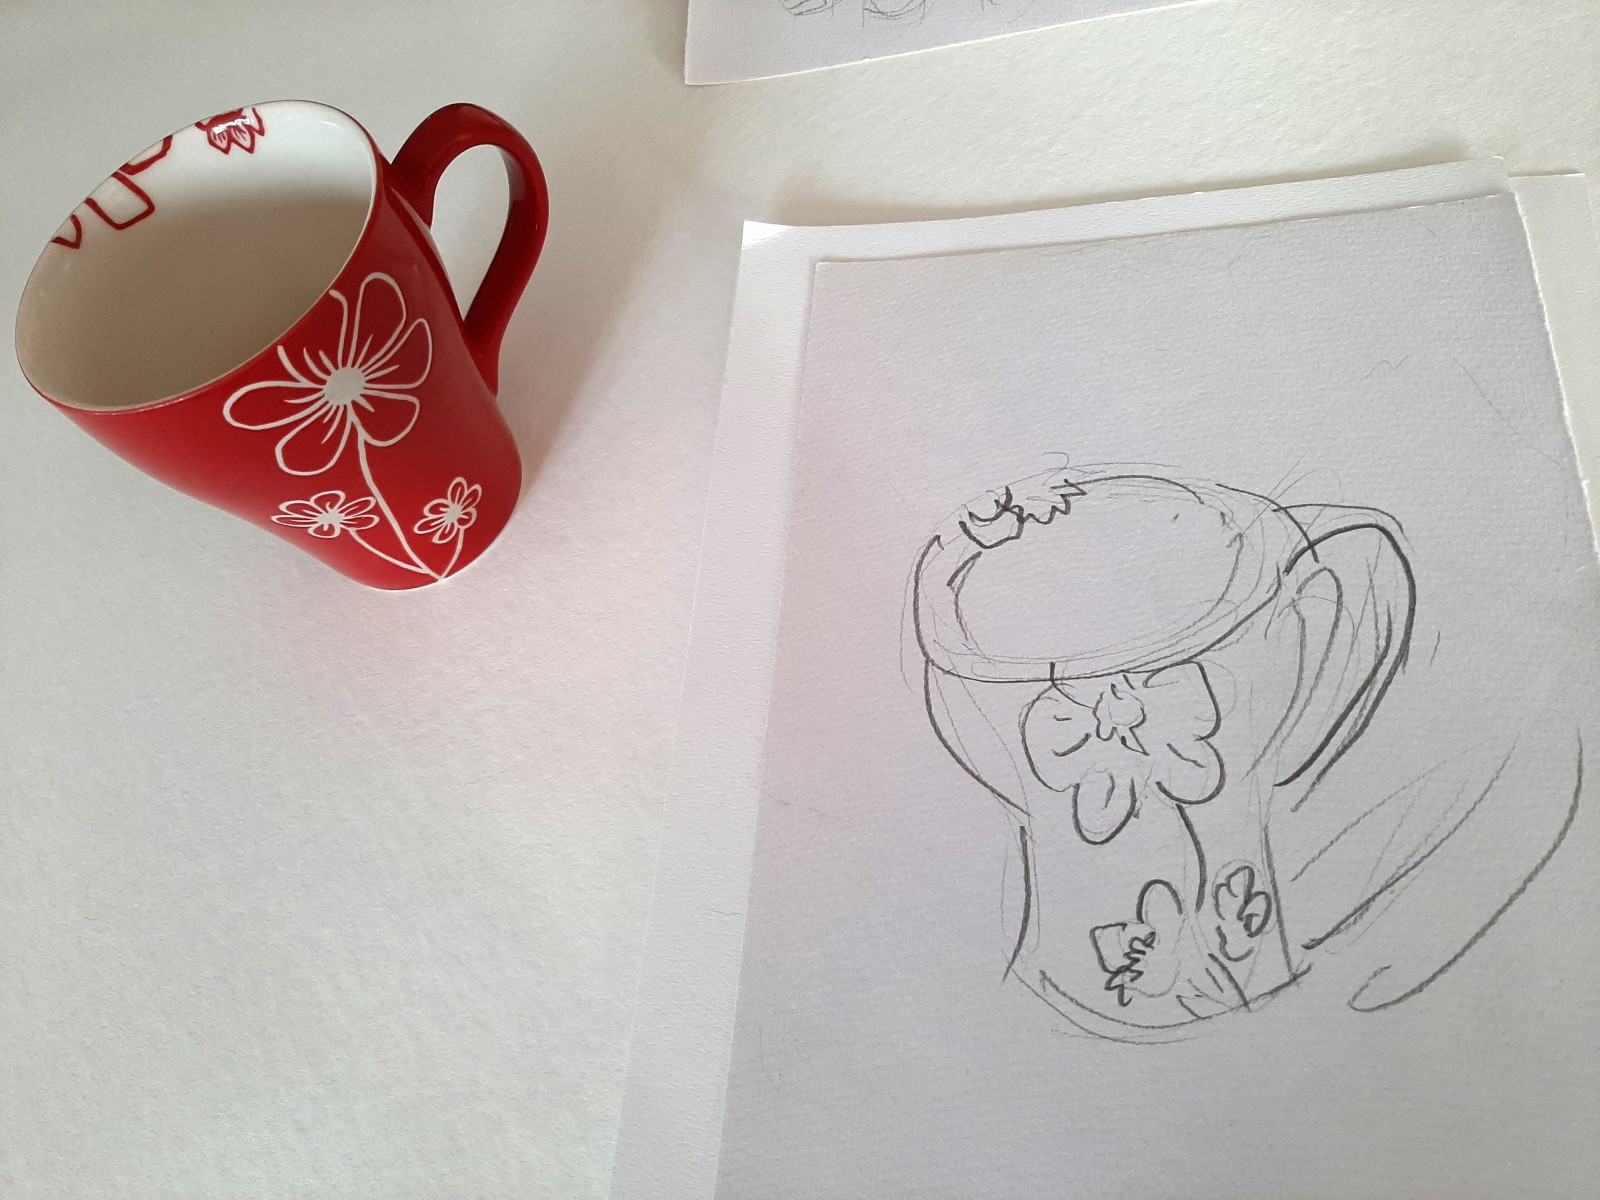 Sketch the object
 Colour it in!
 Sketch
 Sketch
 Coloured in
CFCA Art Challenge #14
Make a Heart Piñata!
Materials:
-Corrugated cardboard from a box
-scrap paper, card stock
-Pencil/marker
-Crepe paper streamers or tissue paper
-Scissors
-Tape (masking tape is best, but use what you have)
-Ruler or straightedge
-Ribbon or string
-White glue
-Individually wrapped candies or whatever you would like to stuff your piñata with
Step 1: If you are using an old box, cut it apart so it is flat.
Step 2: Using scrap paper to make a heart template. Fold in half, trace a half heart shape and cut out. Trace this heart twice onto your card board. Make it as big or small as you would like. The example is about 25cm high and 30 cm wide. (Image B)
Step 3: Cut out your two matching card board hearts with scissors. (Image C)
Step 4: Now we need to make the sides. Look at your cardboard, you will need long strips with the corrugation lines going across, so that it can be curved (Image D). I used the flaps from the box in the example. I used a ruler to mark straight even lines. Mine are about 12cm wide, but you can make them bigger or smaller depending on your preference and your materials. Cut them out, don’t worry if they are not perfect!
Step 5: Curve the edge pieces. (Image E) Fold the middle of one of the pieces. (Image F)
Step 6: Place the folded side piece into the top of one of the heart pieces and start taping the side to the heart edge to edge. (Image G) Add more side pieces if you need to, by taping them together. (Image H) Go all the way around, bending the sides at the point and going around. As you come near the start, leave a piece unattached and cut it just a little longer then then where you started. (Image I) This will be a little door to add candy when we are done.
Step 7: Do the same thing on the other side to attach the remaining cardboard heart. Use the door to put your hand inside to position it while taping if you need to. Your piñata base is done!
Step 8: Use the point of the pencil to punch a little hole into the centre top side piece. This will be where the heart comes together at the top. Using string or ribbon tie a short loop, then tie on a small piece of cardboard. (Image J) The cardboard will keep the string secure and prevent it from pulling out. Thread the loop through the hole from the inside and secure with a piece of tape. (Image K)
Step 9: Time to prepare your fringe! I used crepe paper streamers for the example, but you can also use tissue paper. To use tissue paper, first you will have to cut it into streamer like strips about 4cm or 5cm wide. Neatly fold your strips or your streamers into a manageable length and use your scissors to cut a fringe. Only cut about 3/4 of the way through the paper every cm or so apart. (Image L)
Step 10: Starting on the bottom, squeeze or brush the glue in a line across the shape. Glue the top edge of the fringe onto the piñata. (Image M) Keep adding fringe all the way up, overlapping the layers. You can add different colours or keep it all the same. (Image N) Keep all the fringe going in the same direction.
Step 11: When the side is covered, (Image O) let it dry. Then trim the edges off. (Image P)
Step 12: Repeat steps 10 and 11 on the other side.
Step 13: Start covering the sides of the piñata. Start at the bottom of one of the sides (Image Q) and go up the side to the top leaving the string free. (Image R) Then do the same on the last remaining side. Leave the edge of the door without fringe. Let dry and trim off edges.
Step 14: if you want to you can cut shapes or letters out of card stock and glue/tape them on. You could add a face, more hearts or a name. I added the initials of my name and my sweethearts name. Decorate however you wish!
Step 14: Stuff your piñata with treats! (Image S) Close the door by tucking the flap inside, it should hold itself closed.
Step 15: Enjoy your piñata with your loved ones! You can hang it up and take turns smashing it, or you can get your candy out using the door and display your piñata to reuse over and over!
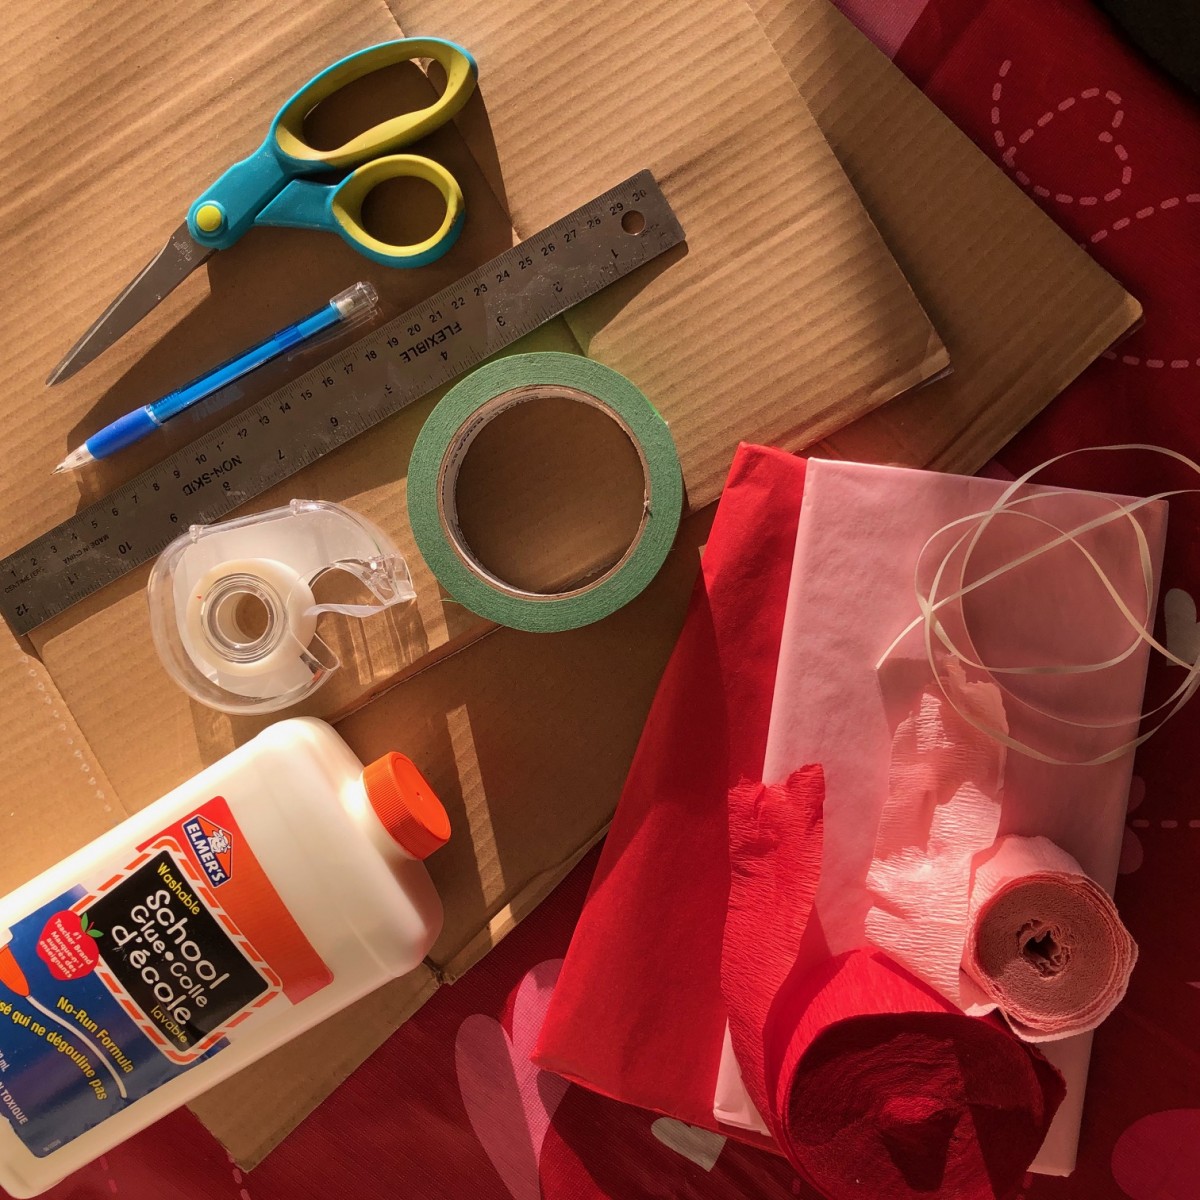 Image A: Gather your supplies!
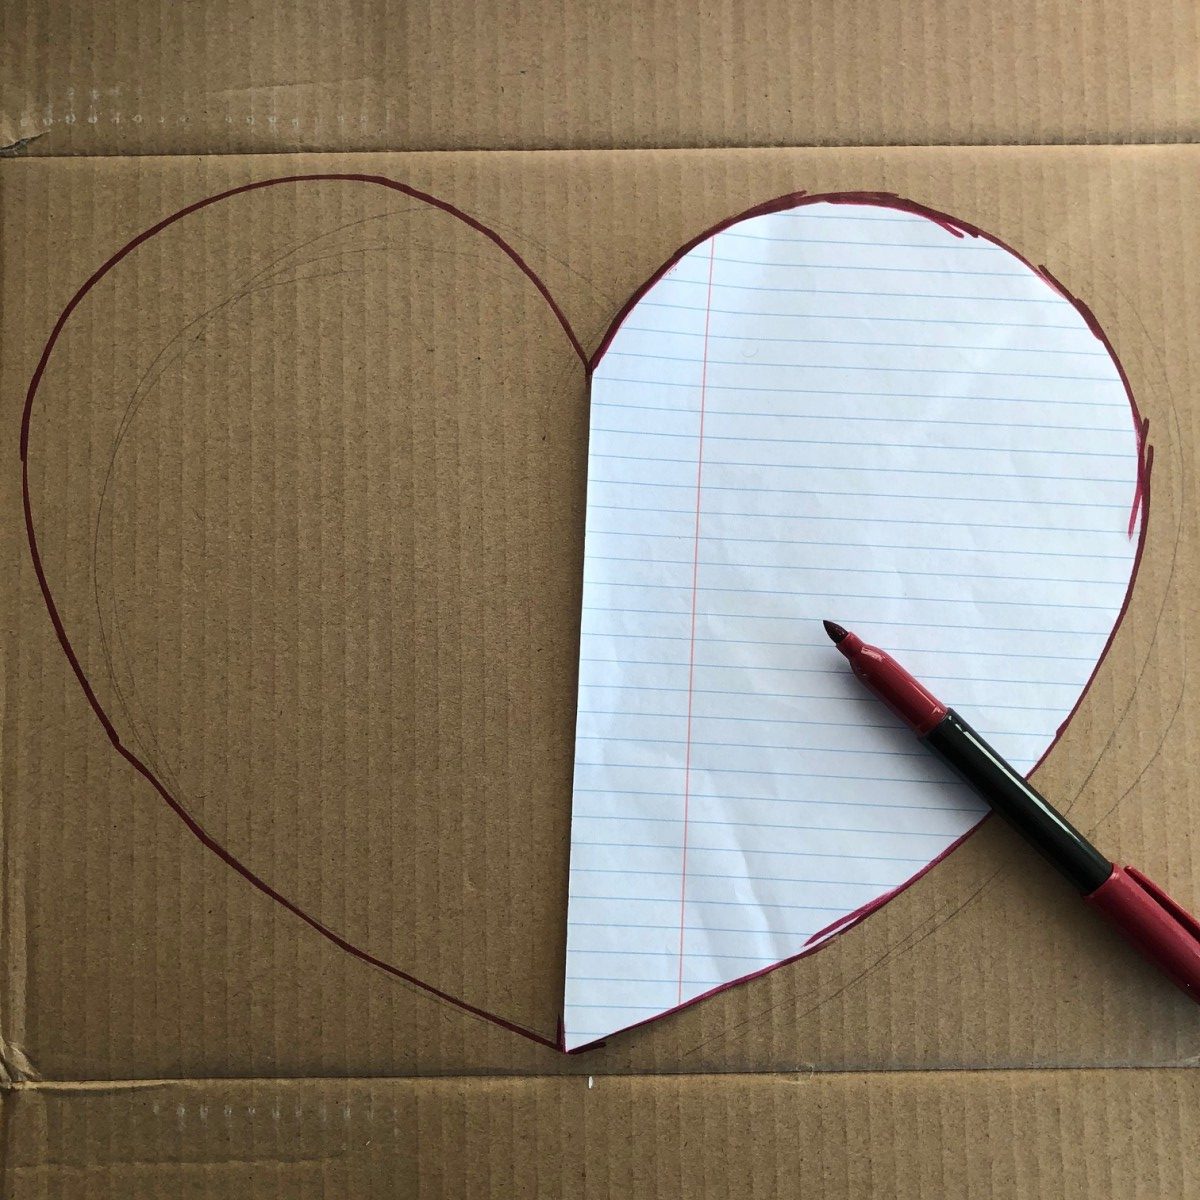 Image B: Trace your shape.
 Image C: Duplicate and cut out.
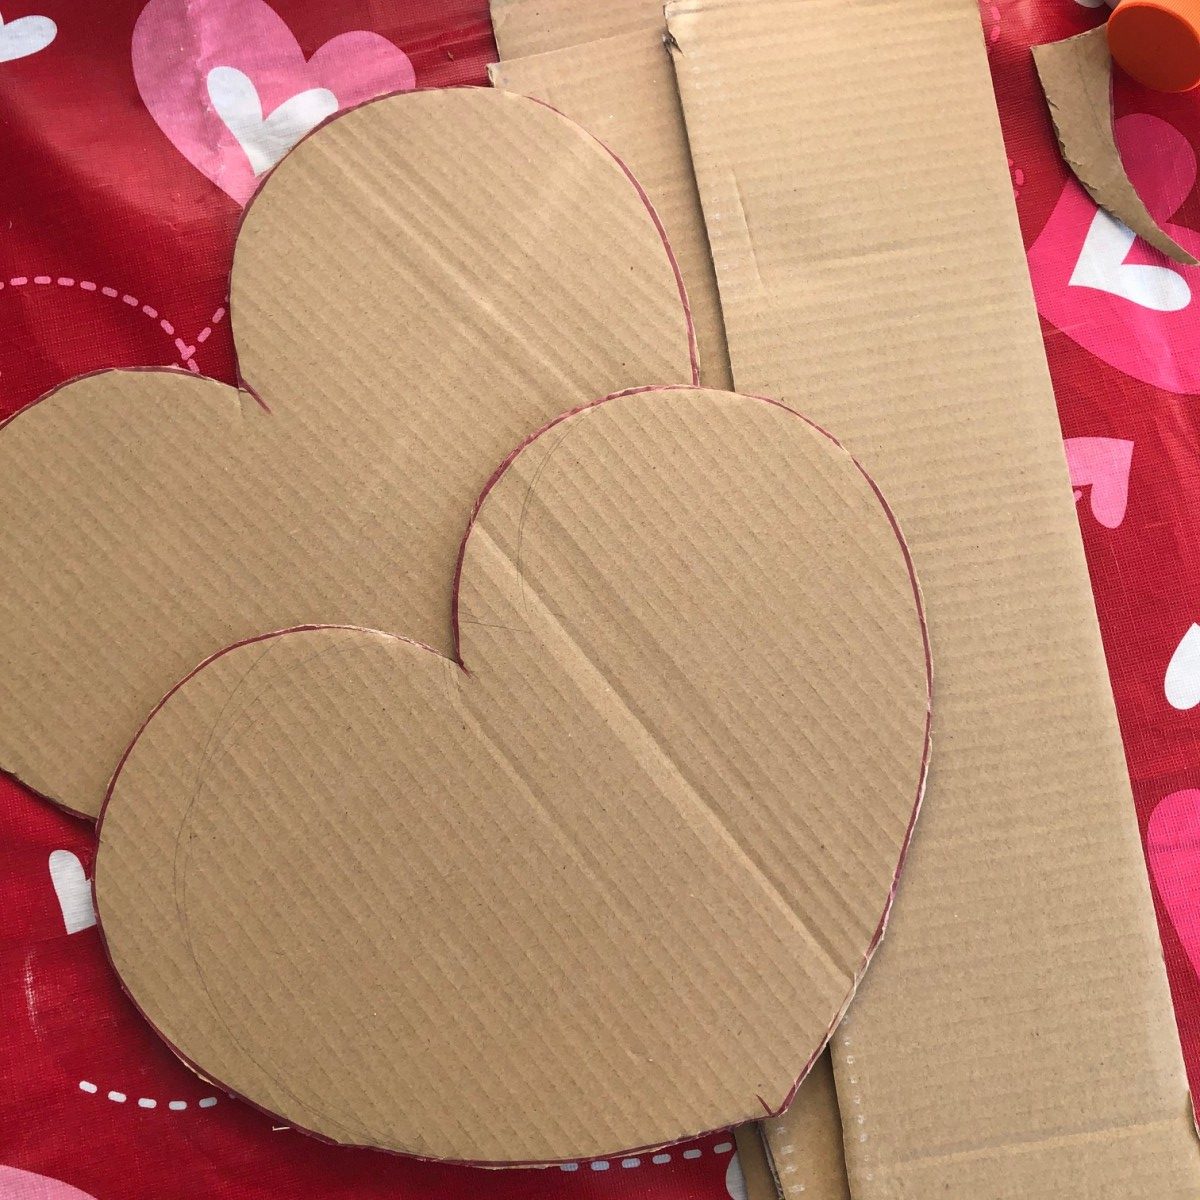 Image D:Cut out side pieces.
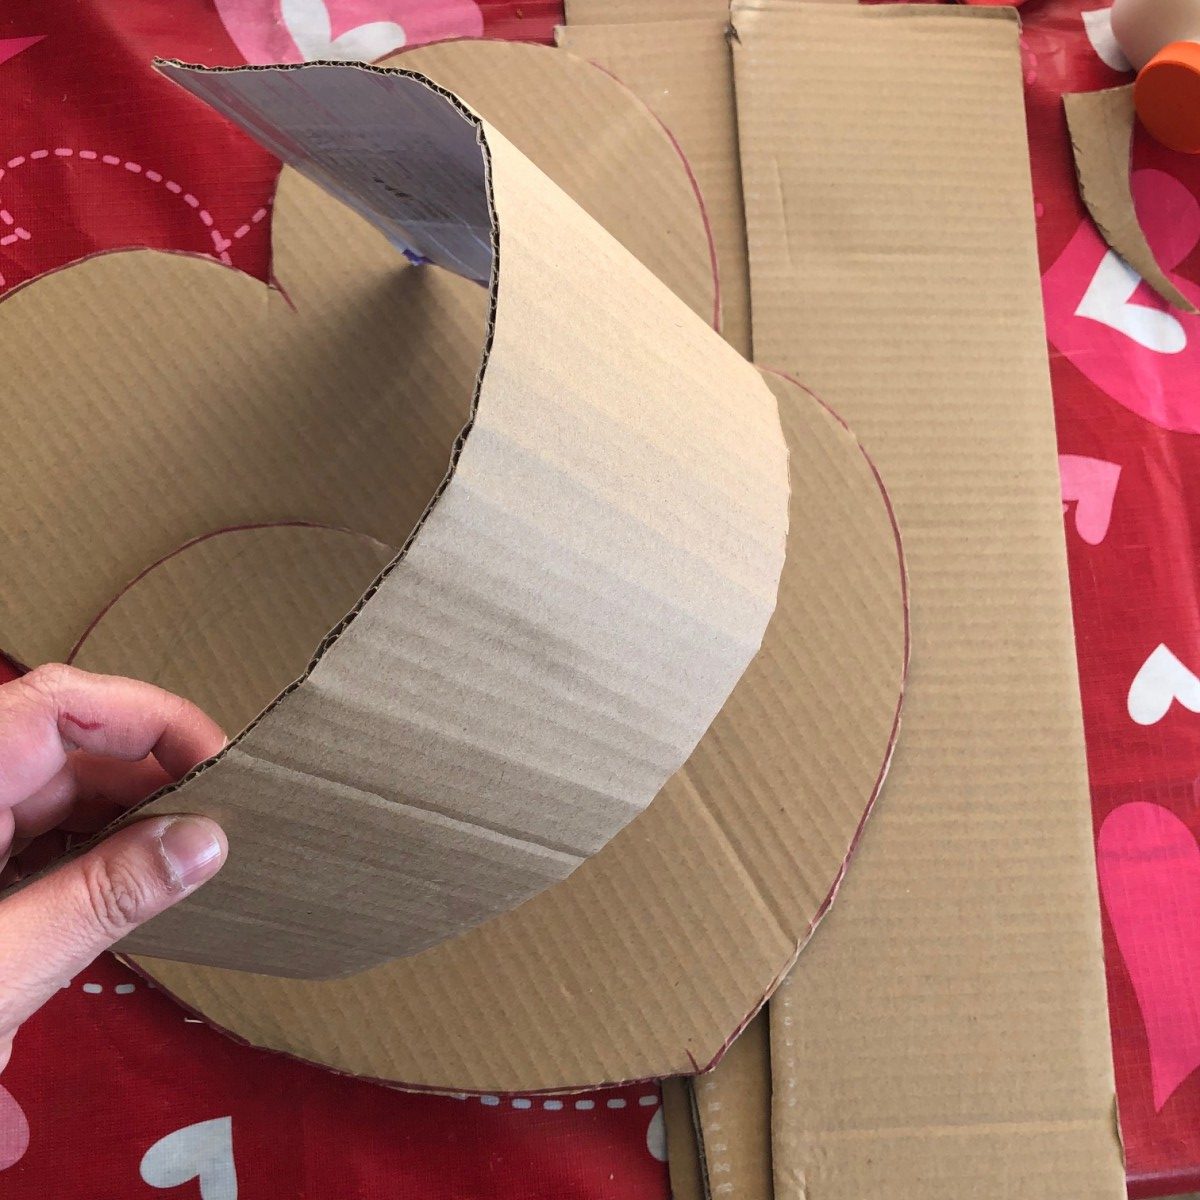 Image E: Curve your side pieces.
 Image F: Bend the top of the side piece.
 Image G: Start attaching.
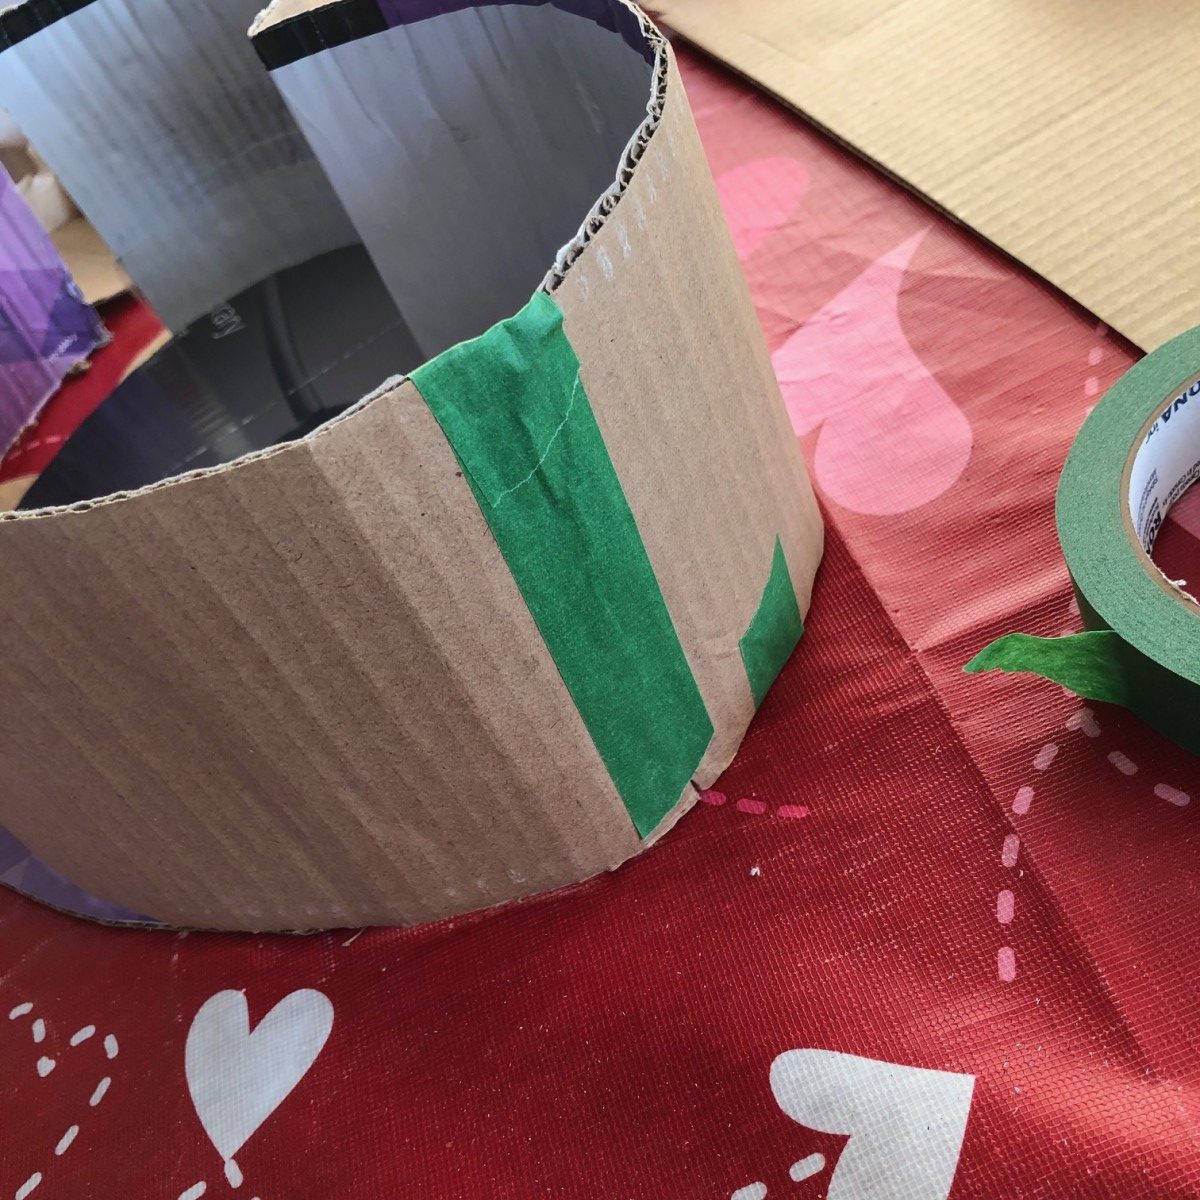 Image H: Adding pieces to the sides.
 Image I: Leave a door.
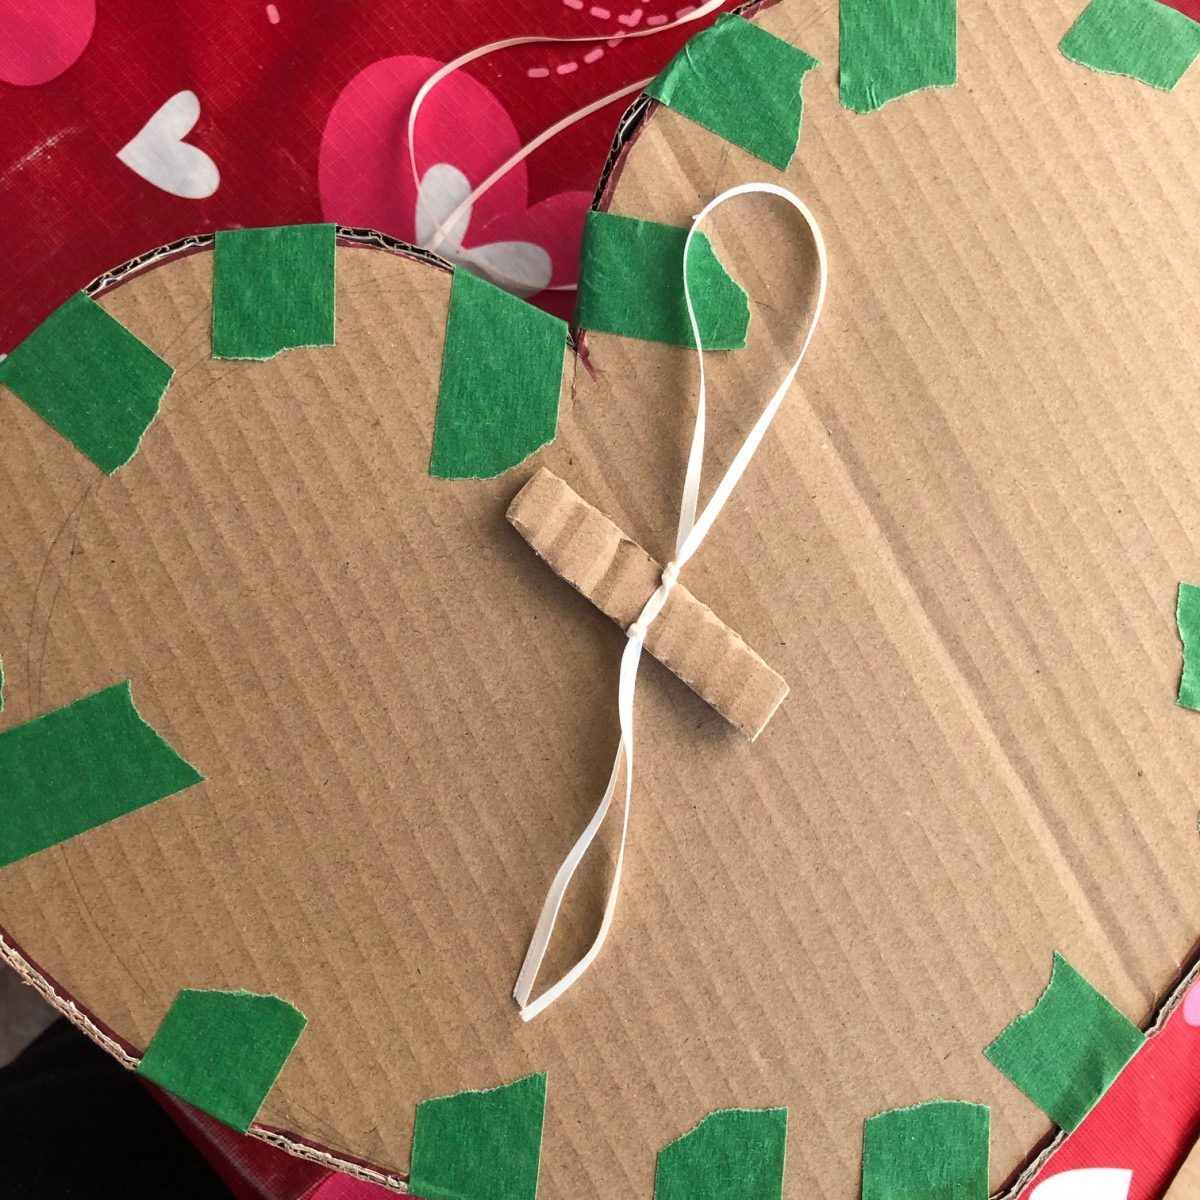 Image J: Make a hanger.
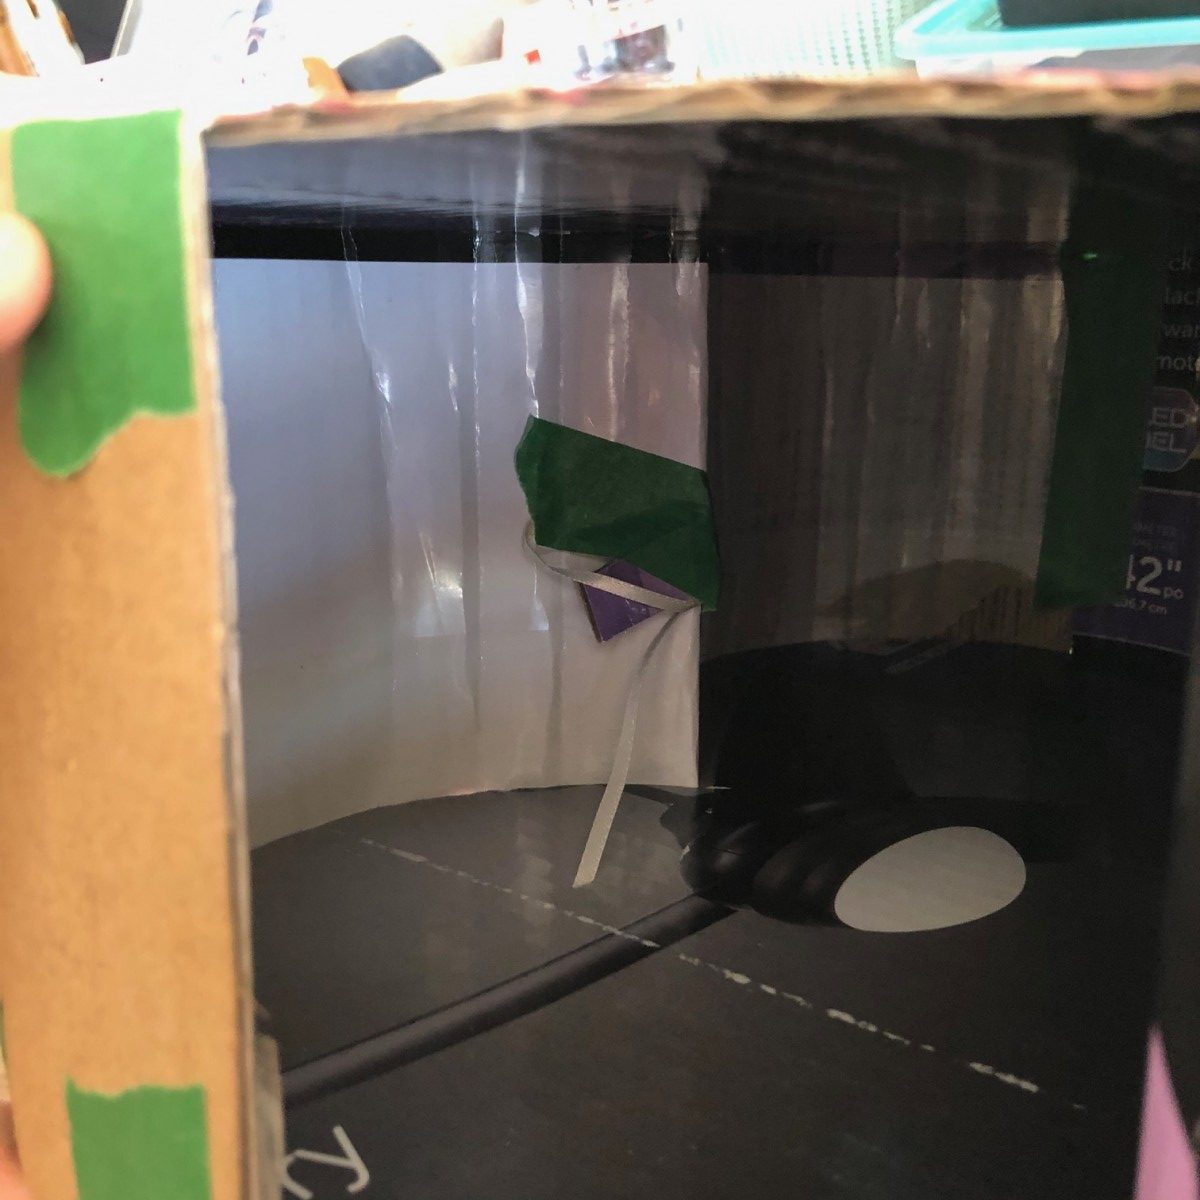 Image K: Attach hanger and secure inside.
 Image L: Make your fringe!
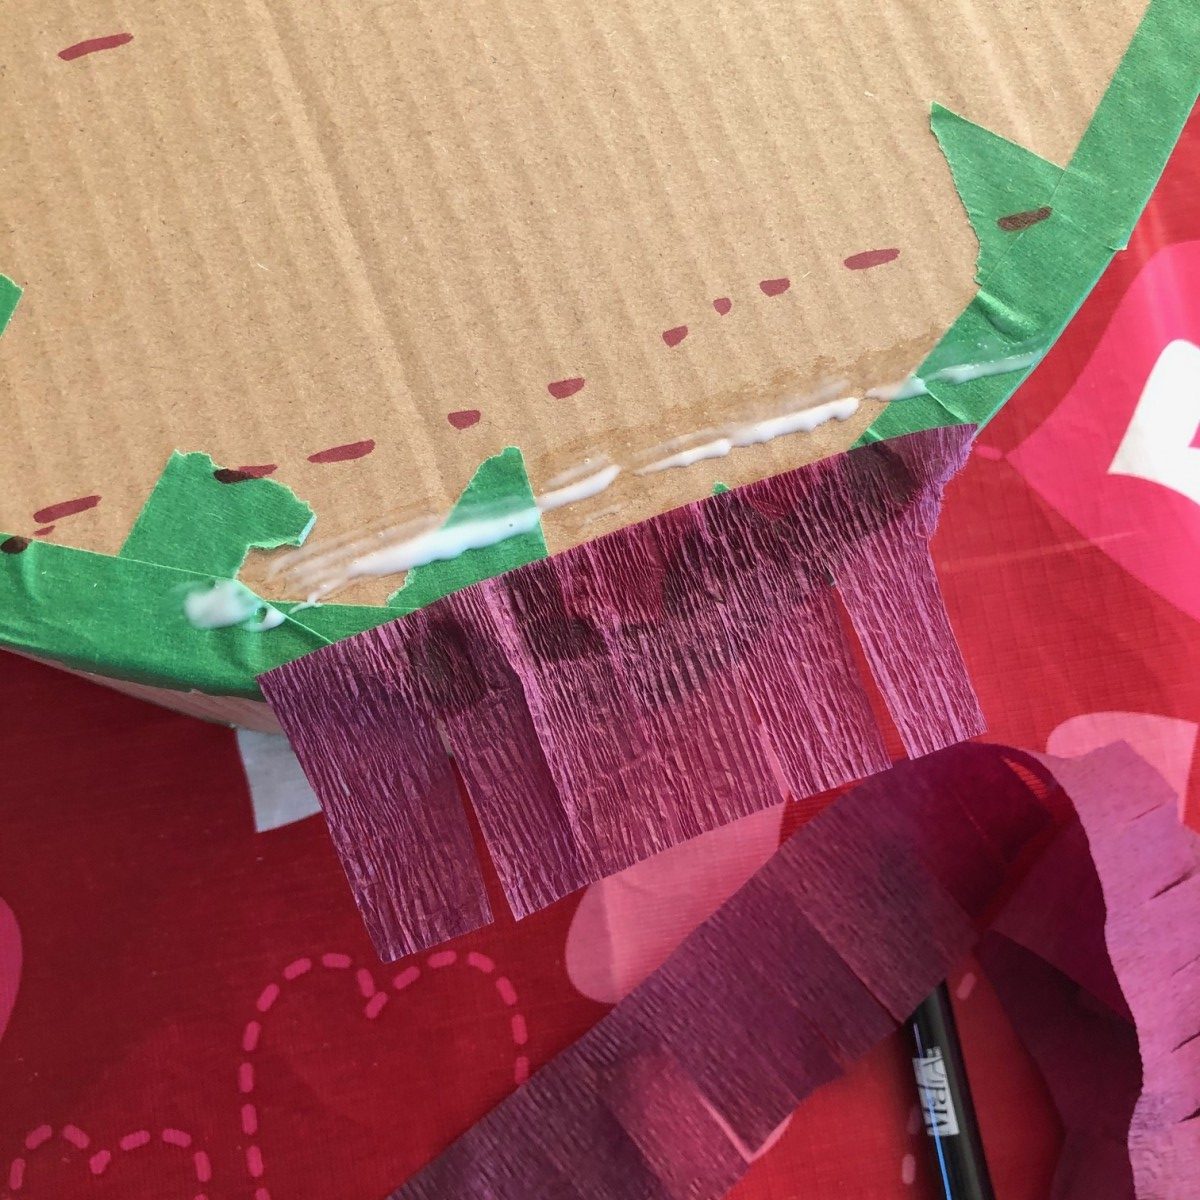 Image M: Attach fringe starting at the bottom.
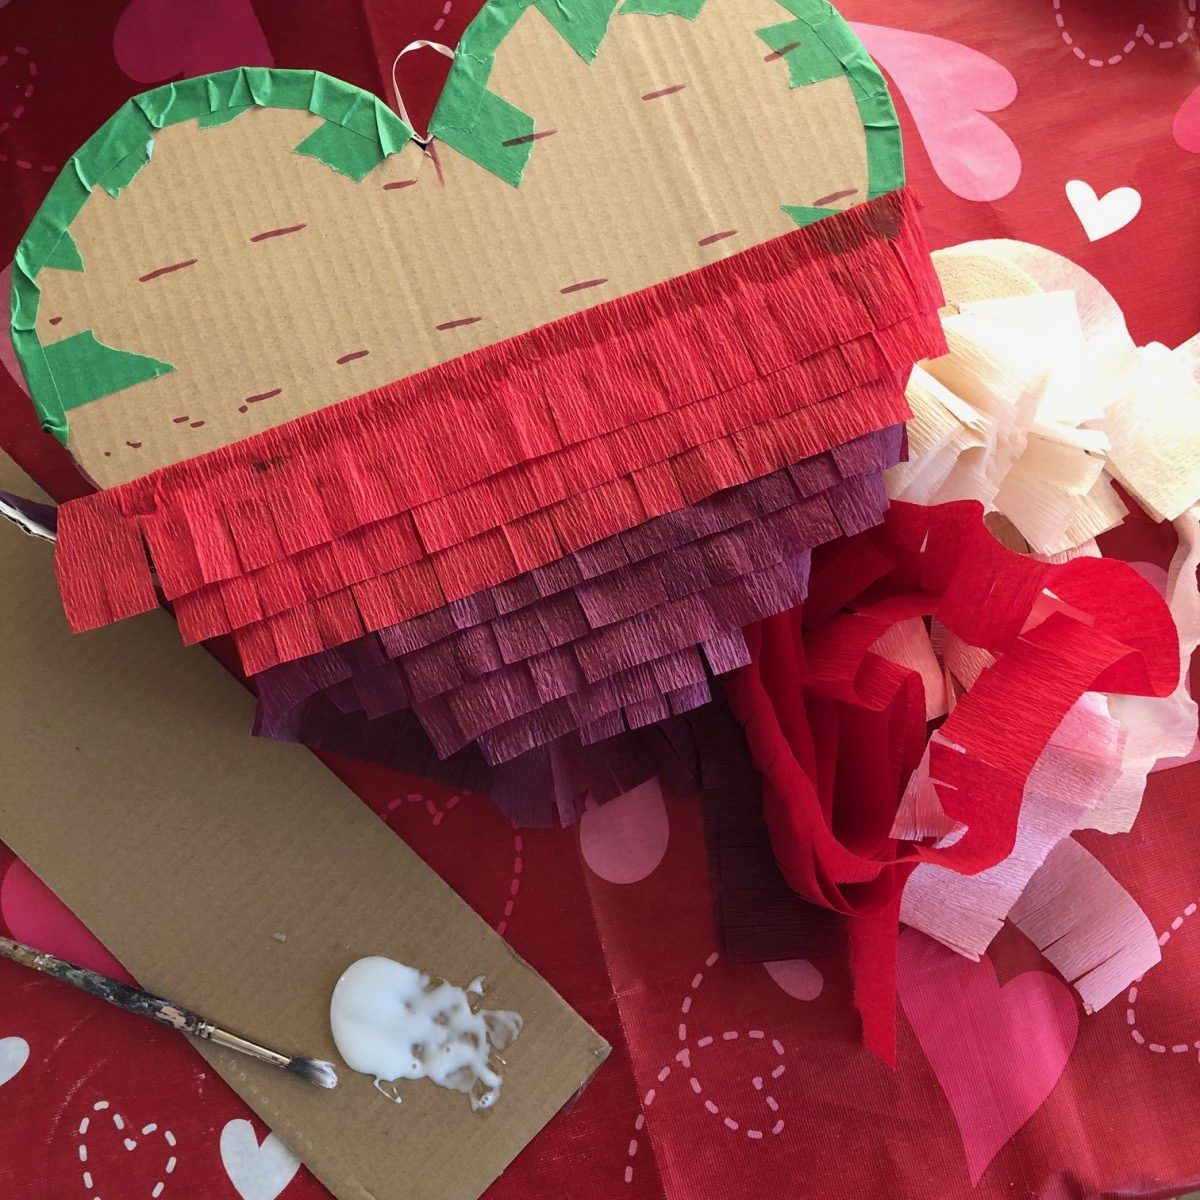 Image N: keep adding fringe!
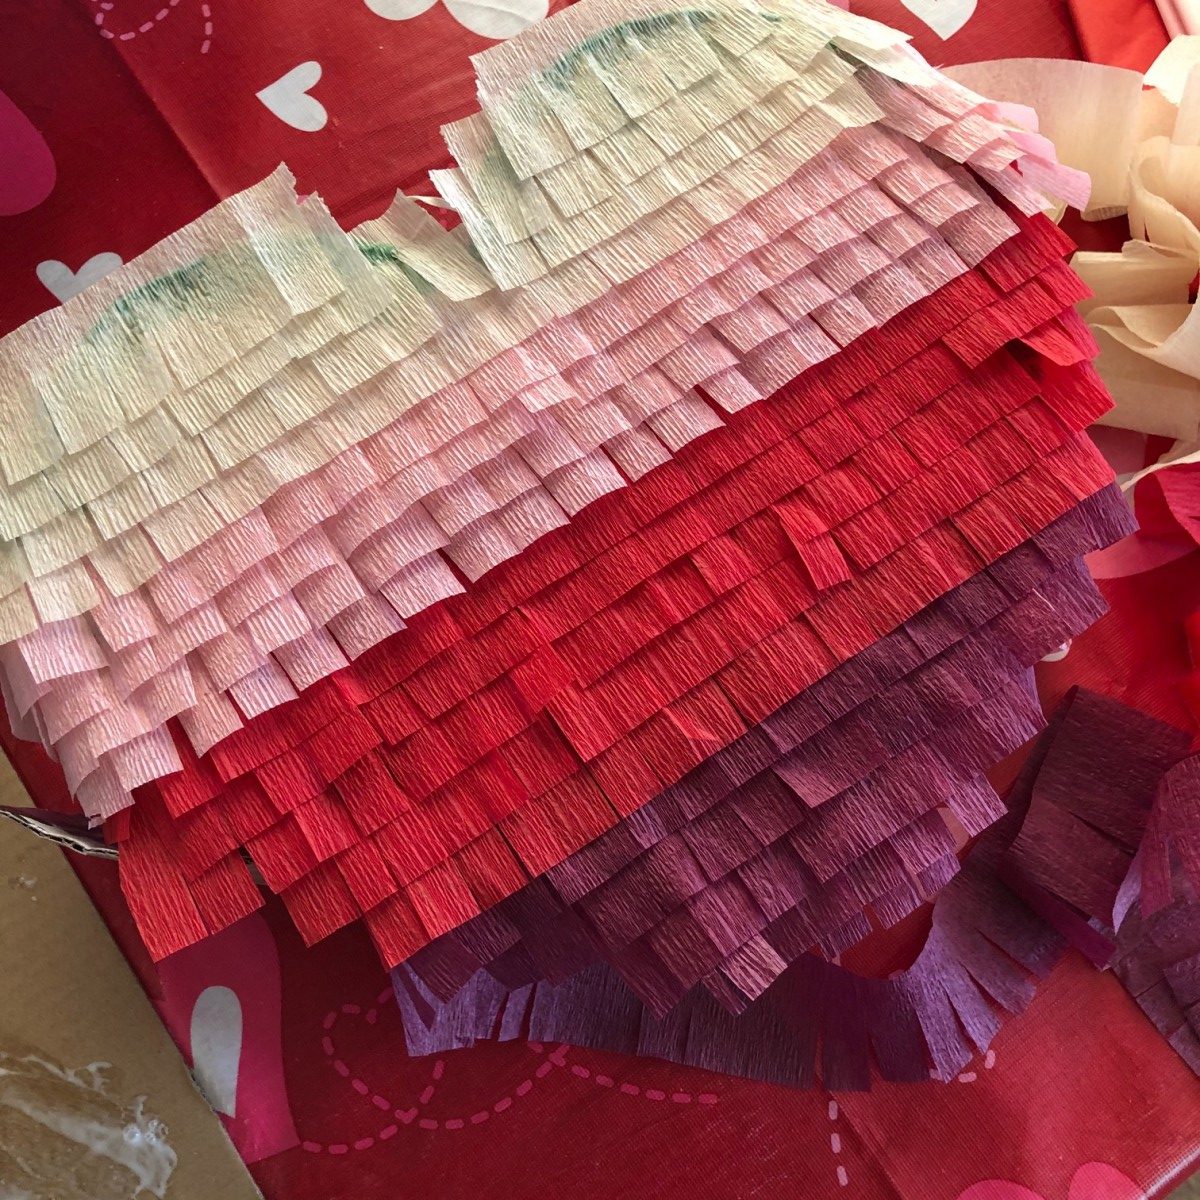 Image O.:Fringe glued!
 Image P: Trim the edges.
 Image Q: Cover sides starting at bottom.
 Image R: Top of heart.
 Image S: Fill with candy and shut the door
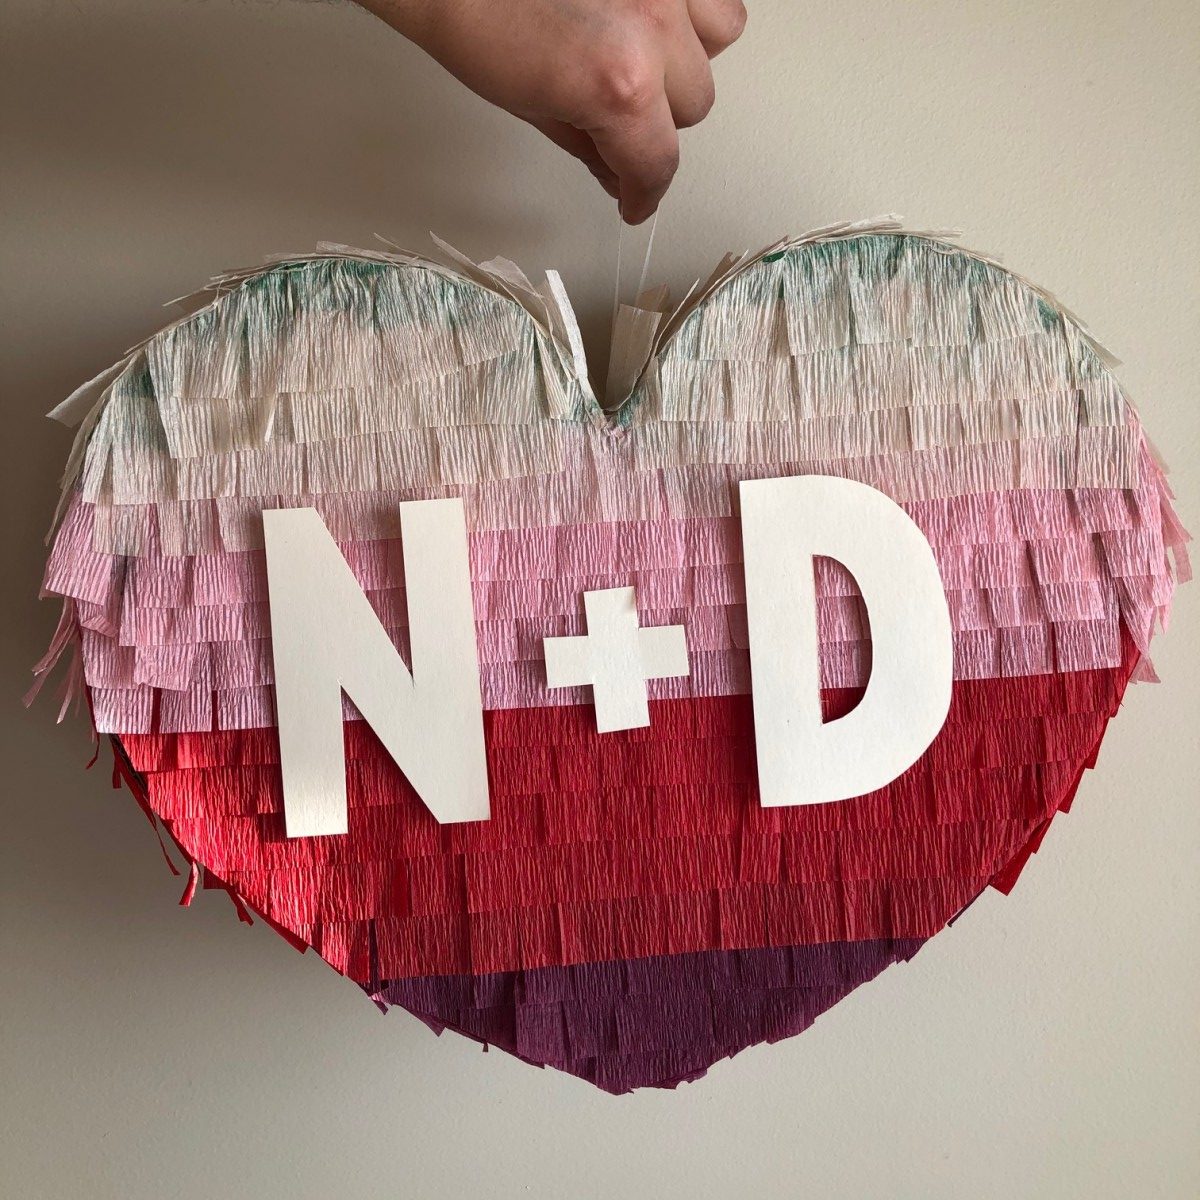 Image T: Add cut outs and hang!
CFCA Art Challenge #15
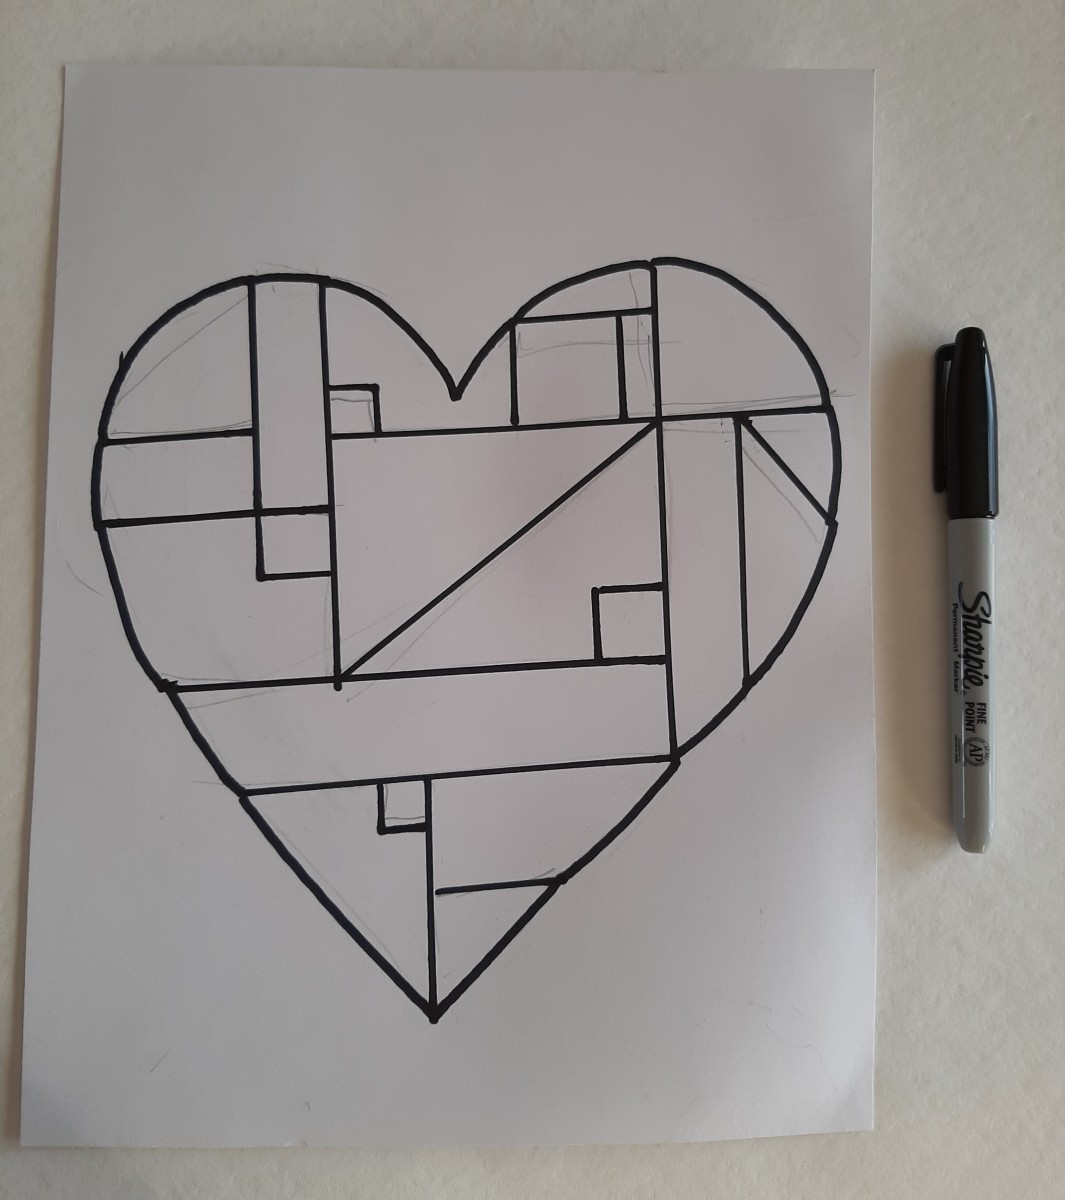
Mondrian Valentines
Abstract artist Piet Mondrian liked to play with shapes, mostly square and rectangles. We added triangles for the heart shape.
Materials:
-Paper
-Pencil
-Eraser
-Permanent
-Scissors
-Ruler or straightedge
-Paint or oil pastels
Step 1: Using the pencil draw your heart. The easiest way to draw a heat is to start with 2 ‘V’ shapes, top and bottom and then join them with curves.
 Draw the heart
 Different shapes
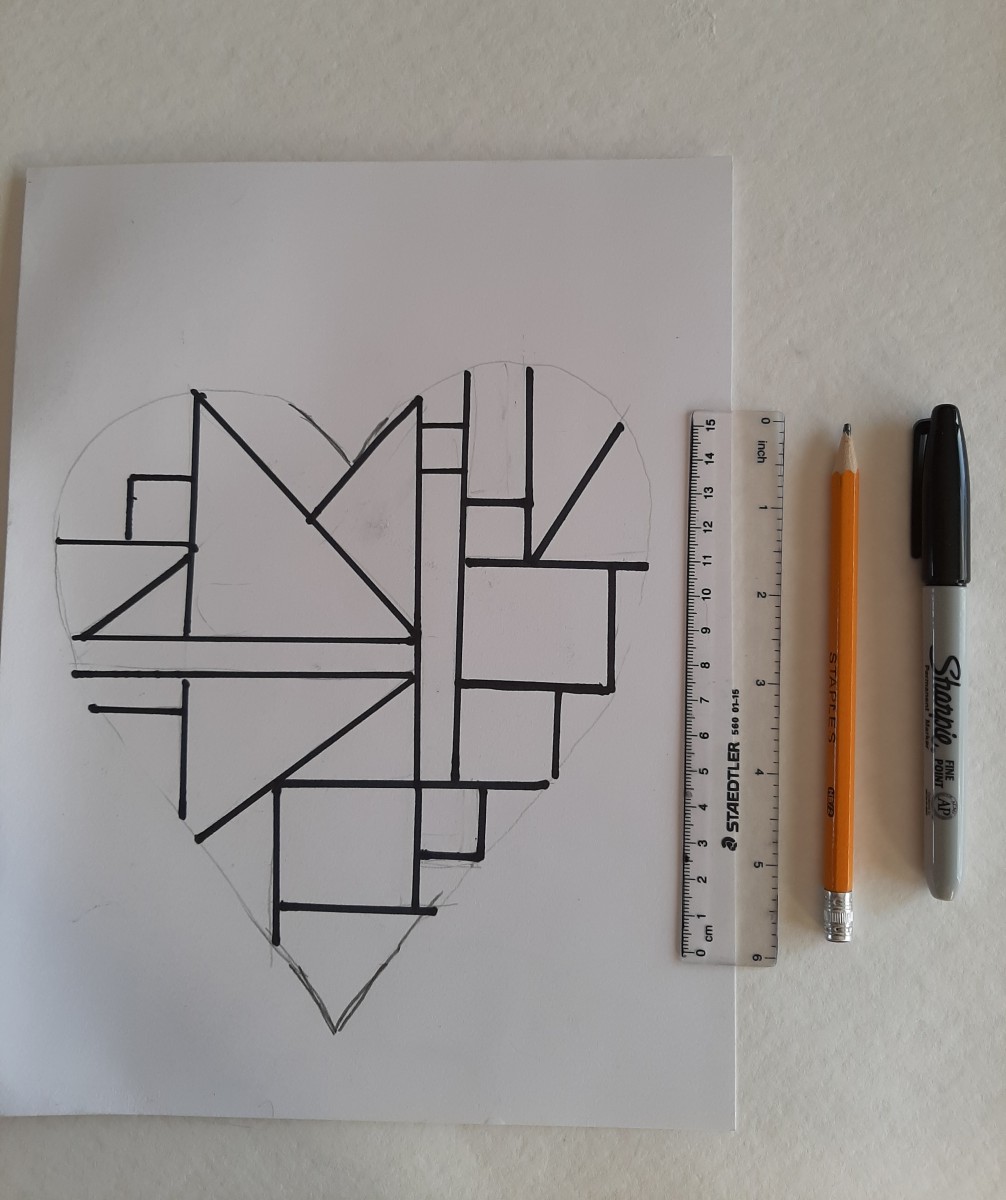 Fill in with shapes
 Fill in with shapes
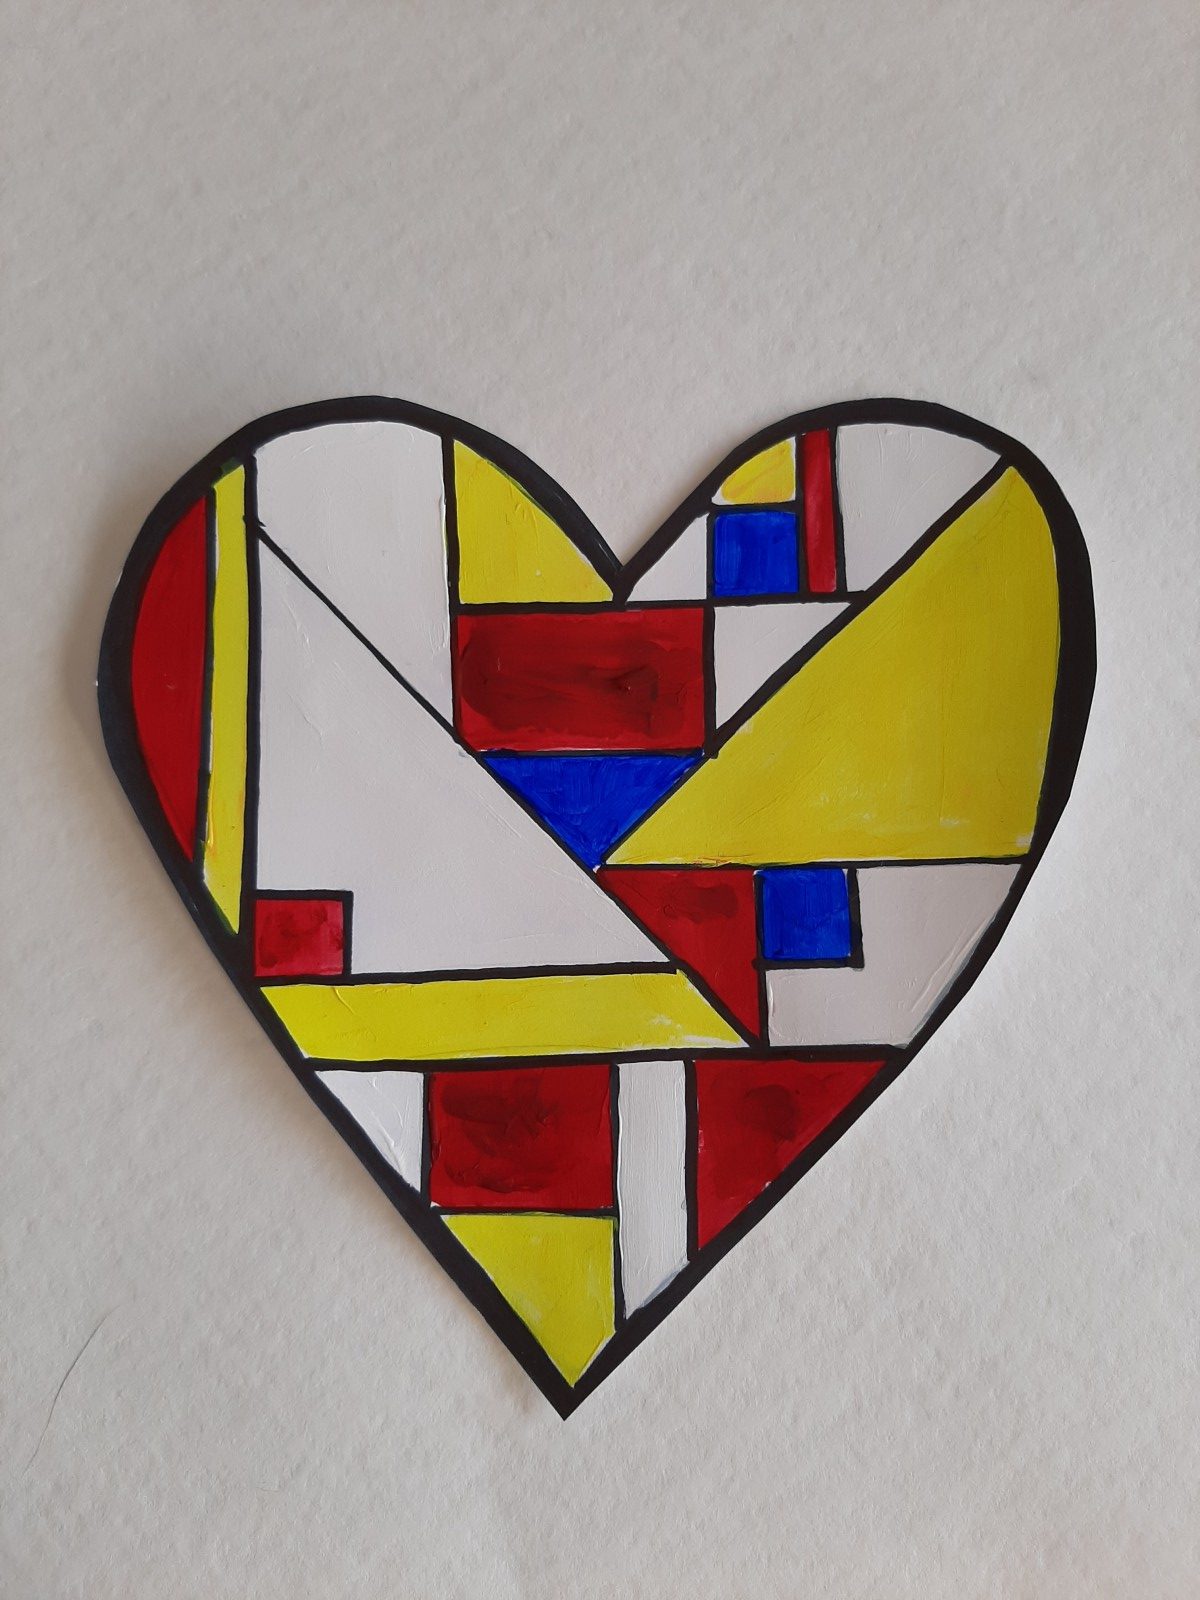 Colour in and cut out
 Try using different shapes
CFCA Art Challenge #16
Egg Carton Animals
Materials:
-Egg cartons, cardboard or styrofoam
-Cardboard from cereal boxes or similar (You could also use cardstock)
-Pencil
-Eraser
-Marker
-Scissors
-Acrylic or tempera paint
-Brushes
-White glue
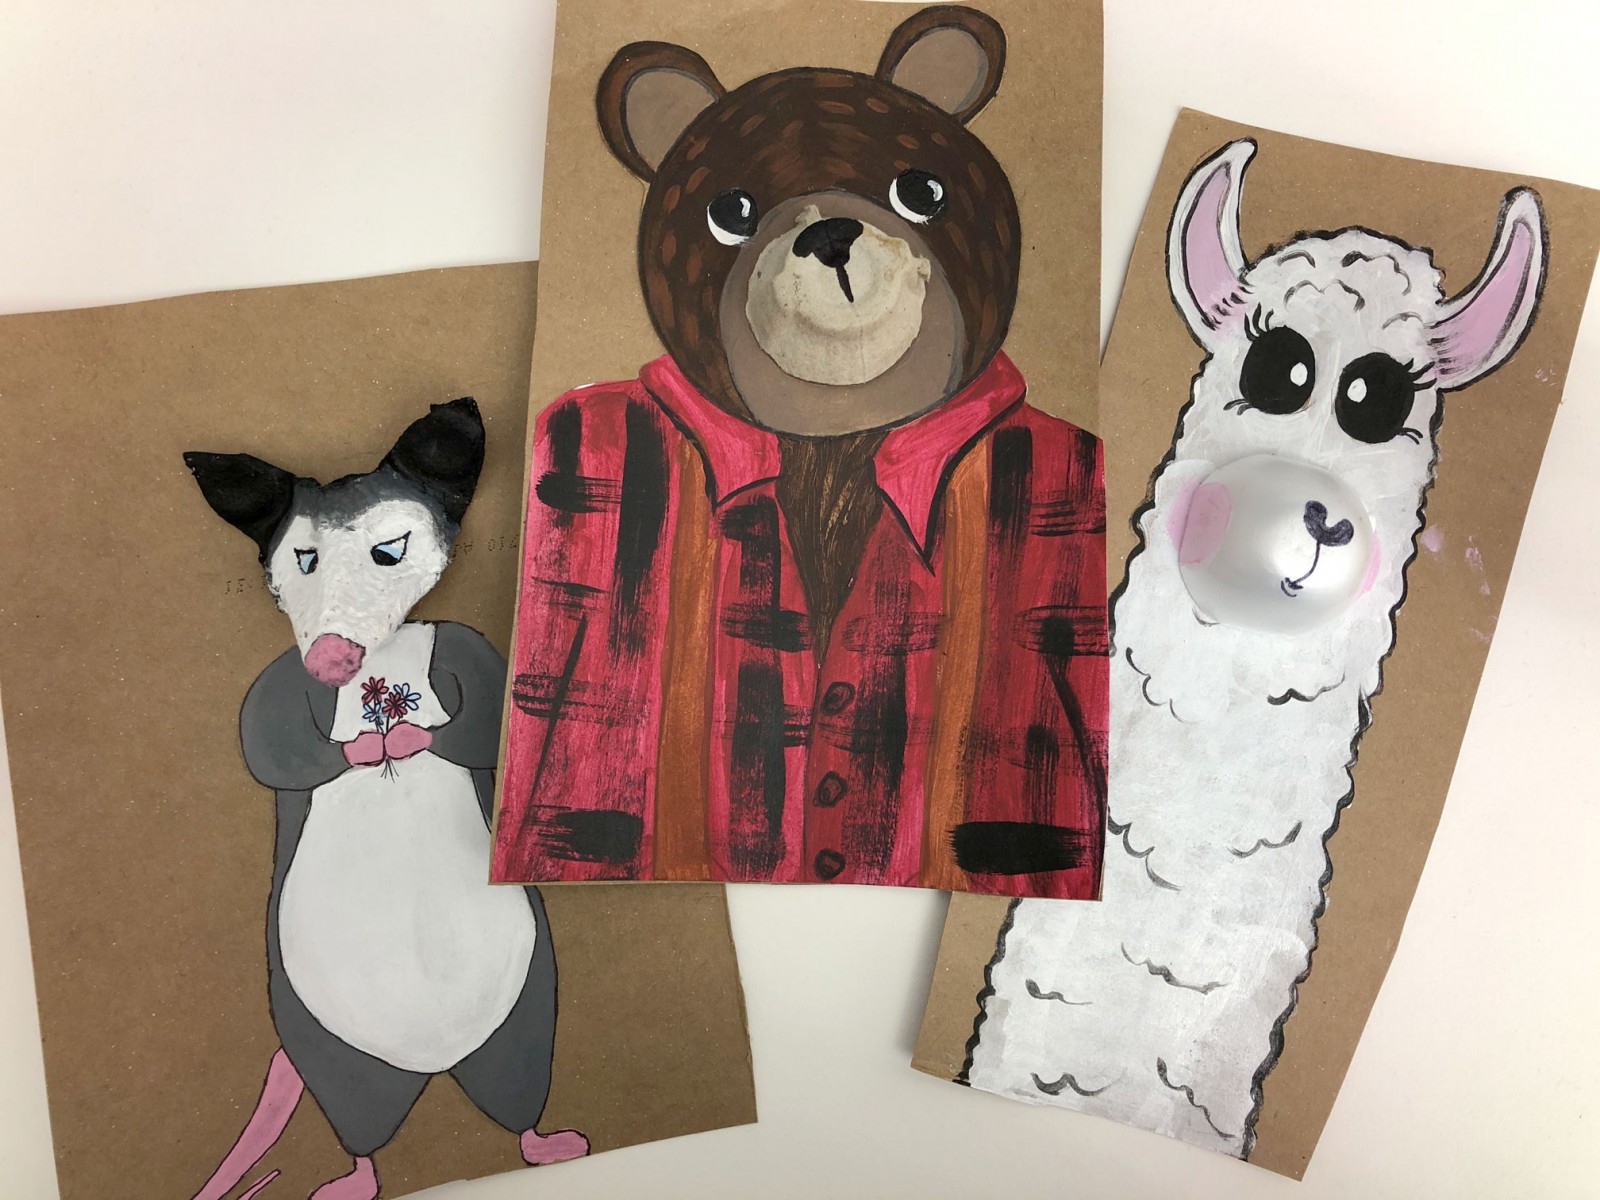
Step 1: Look at your egg cartons and decide on what kind of animal you want to make. We made an opossum, a bear and a llama.
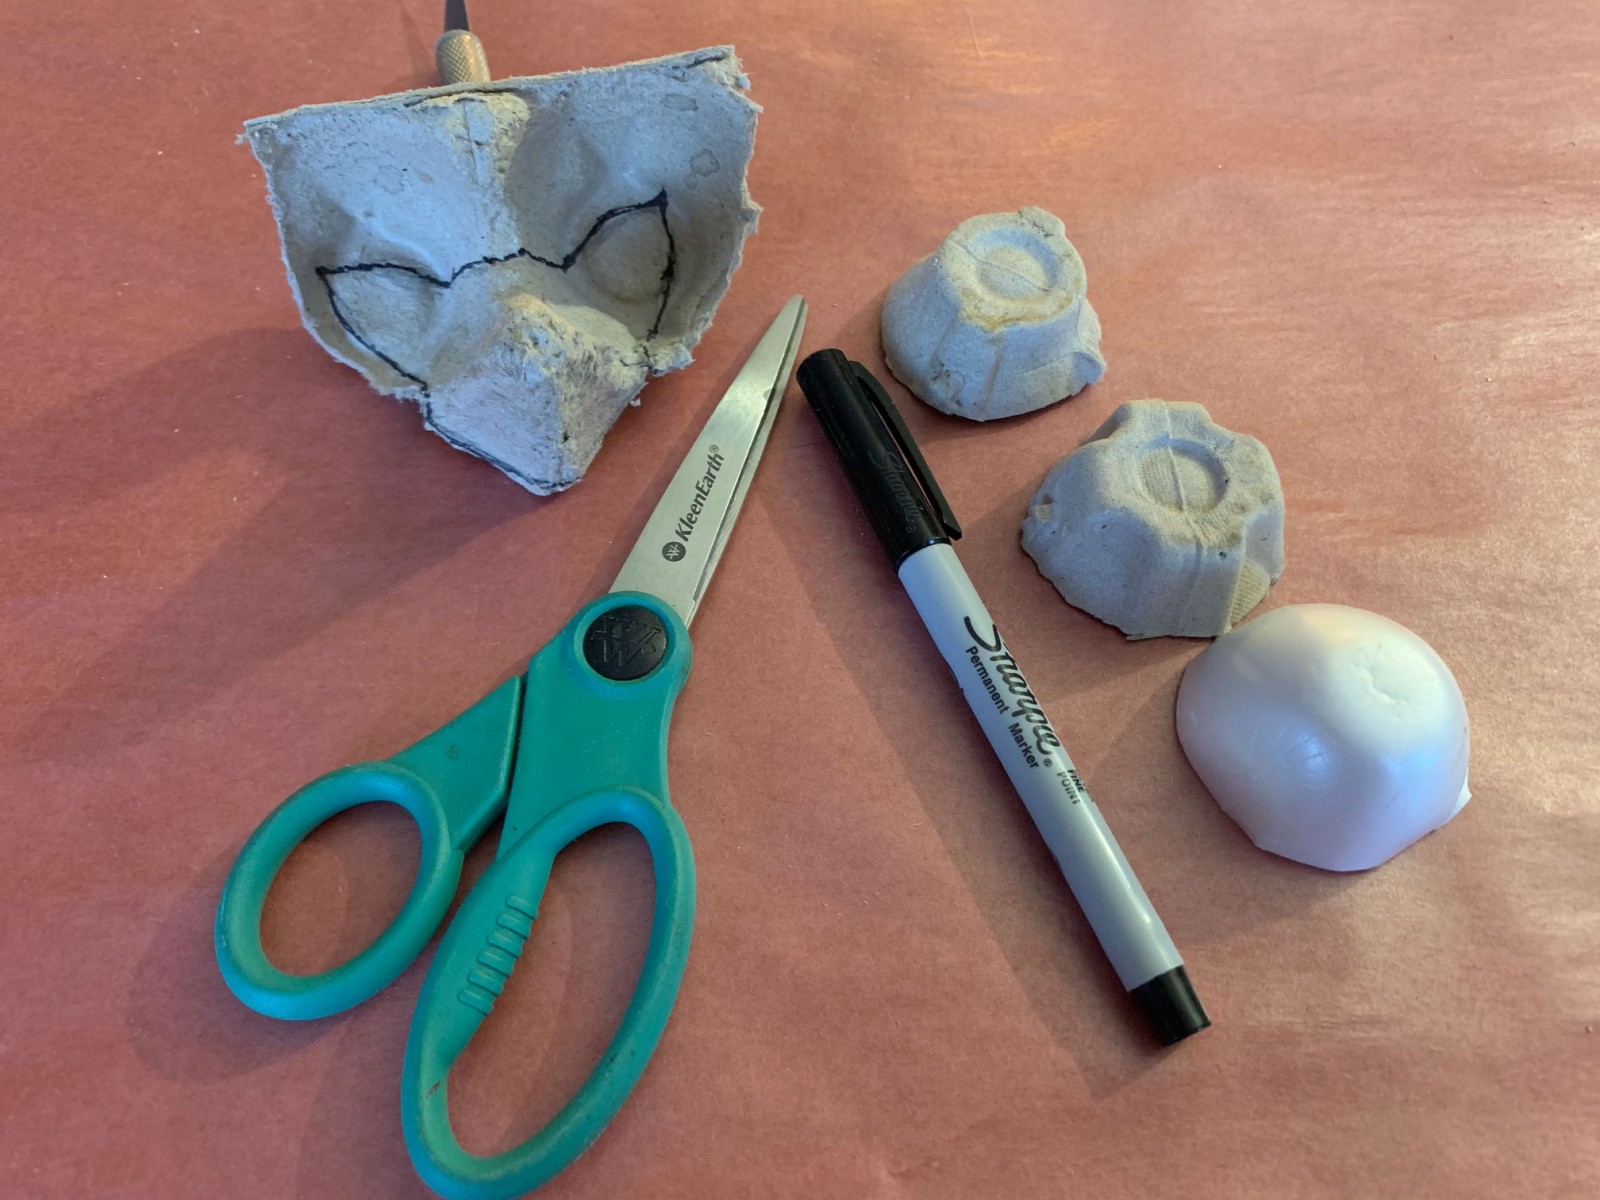 Gather Materials. Draw on carton.
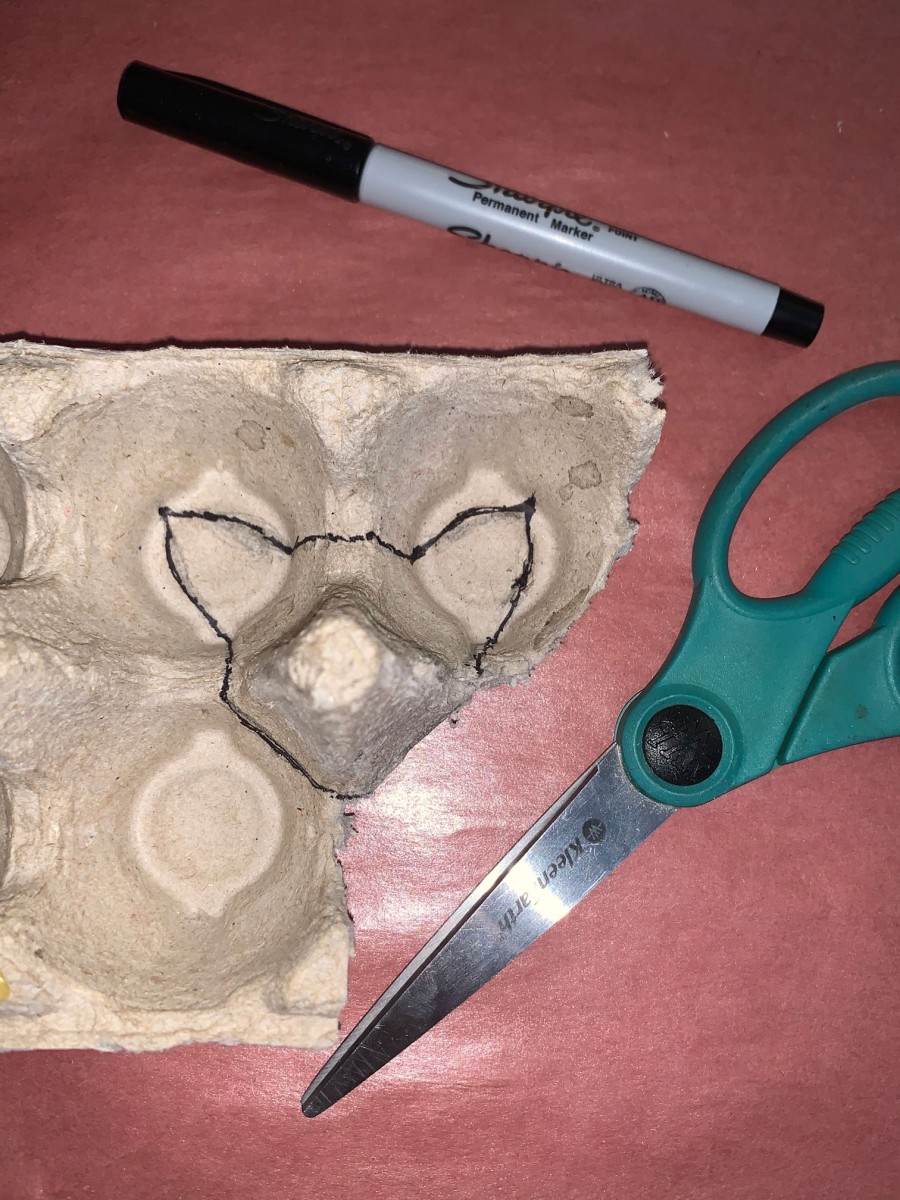 Cut out head shape.
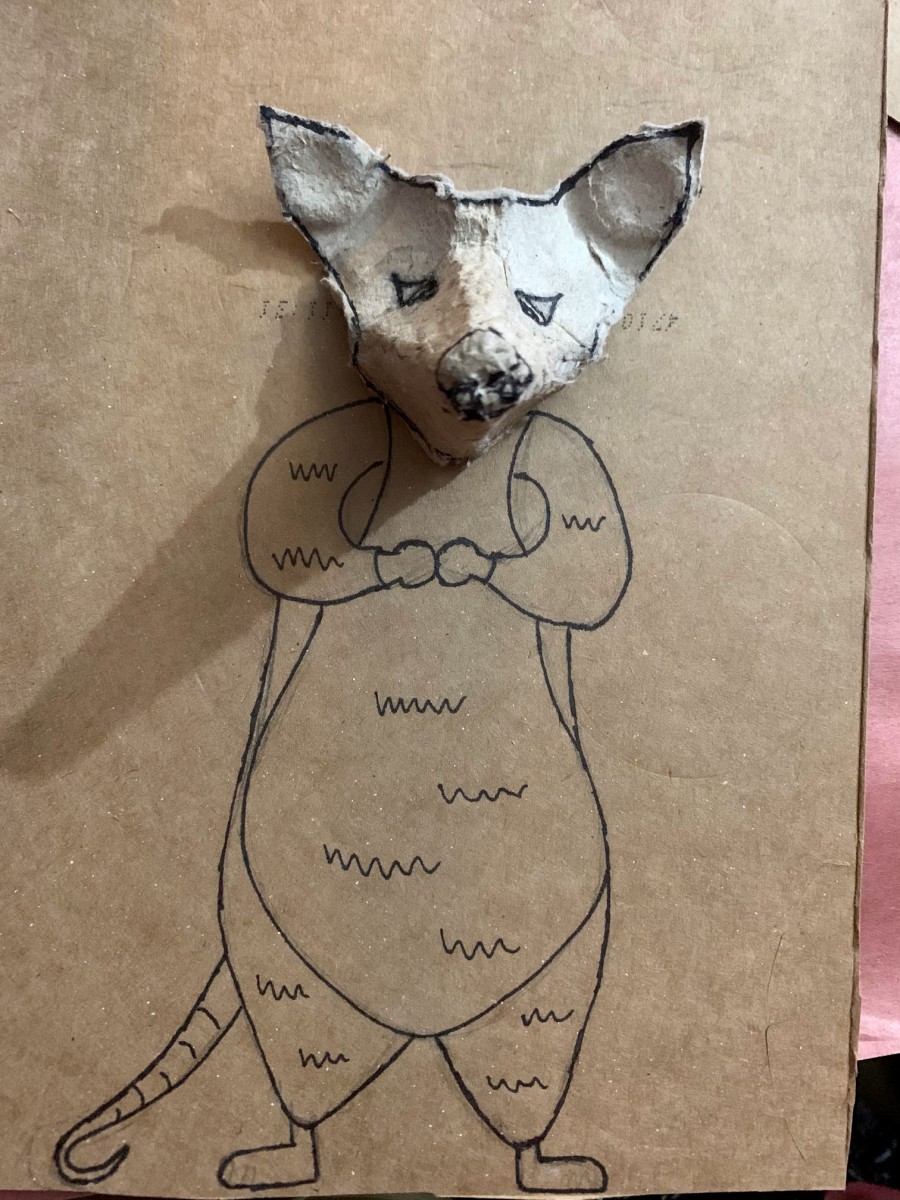 Glue to cardboard and draw body.
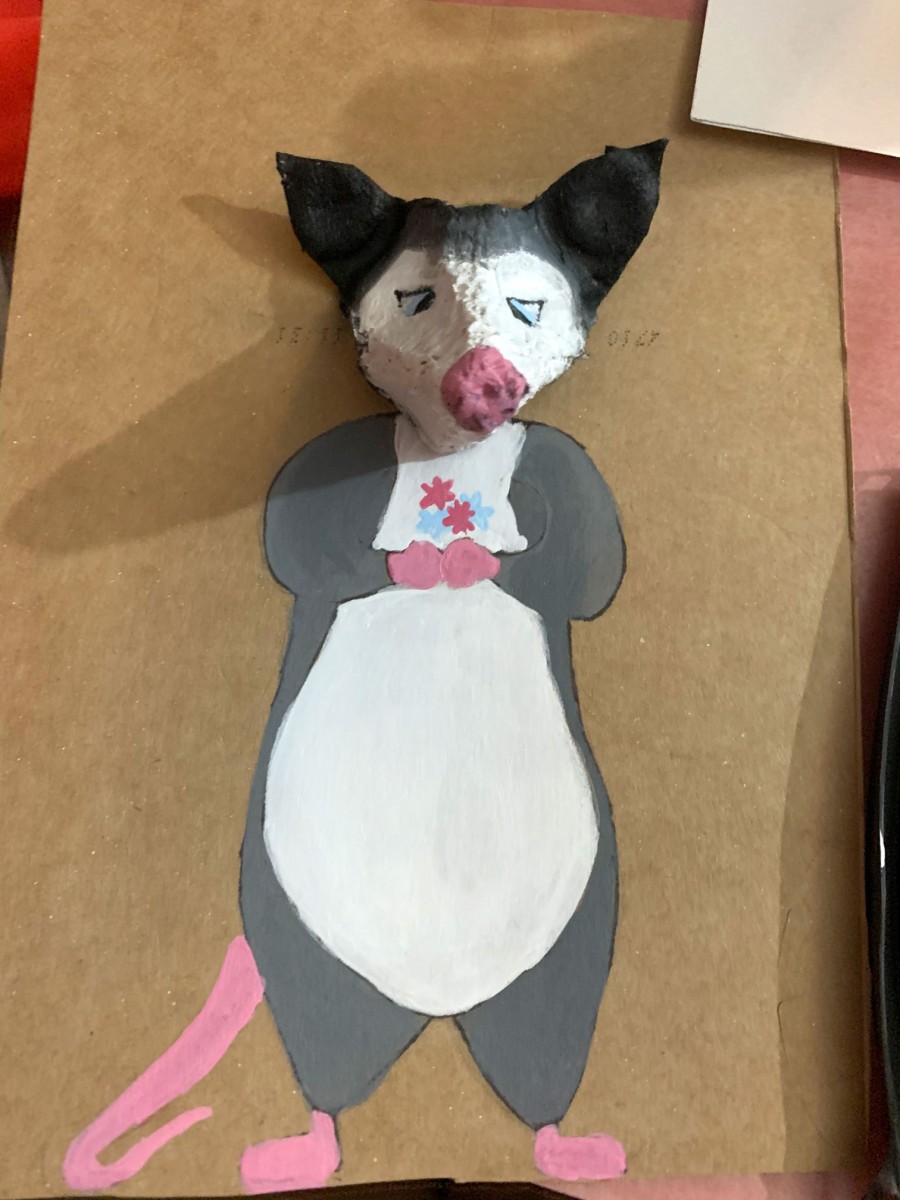 Paint!
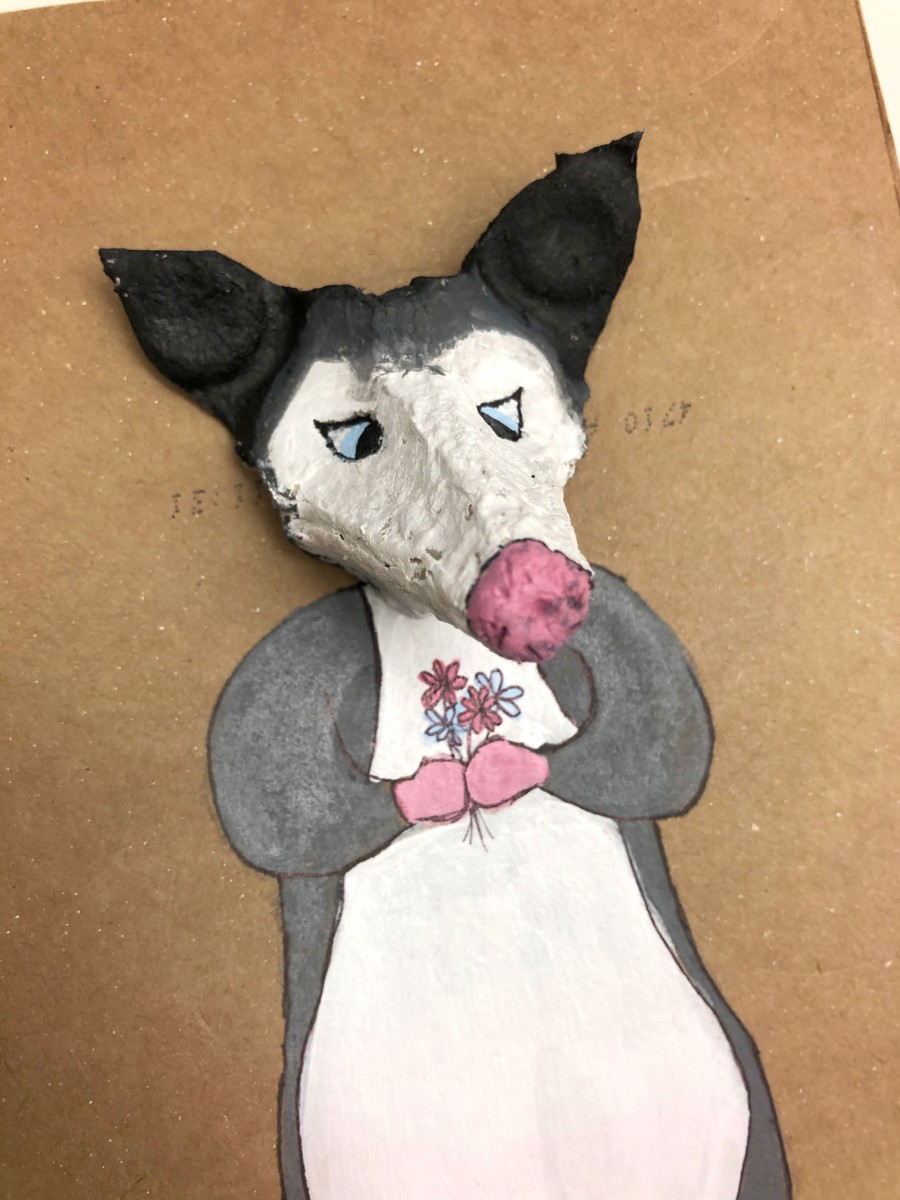 Outline and complete! Opossum!
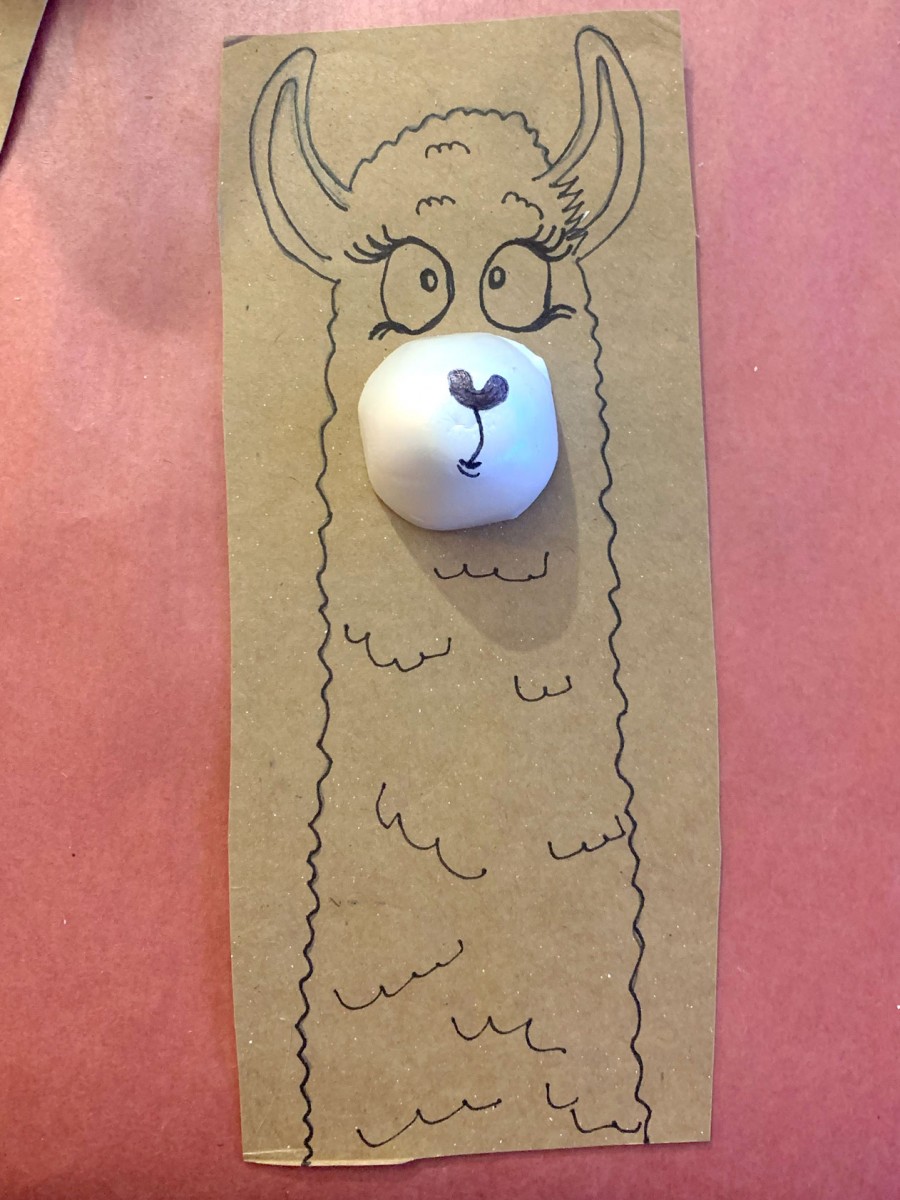 Draw the llama. Add the muzzle.
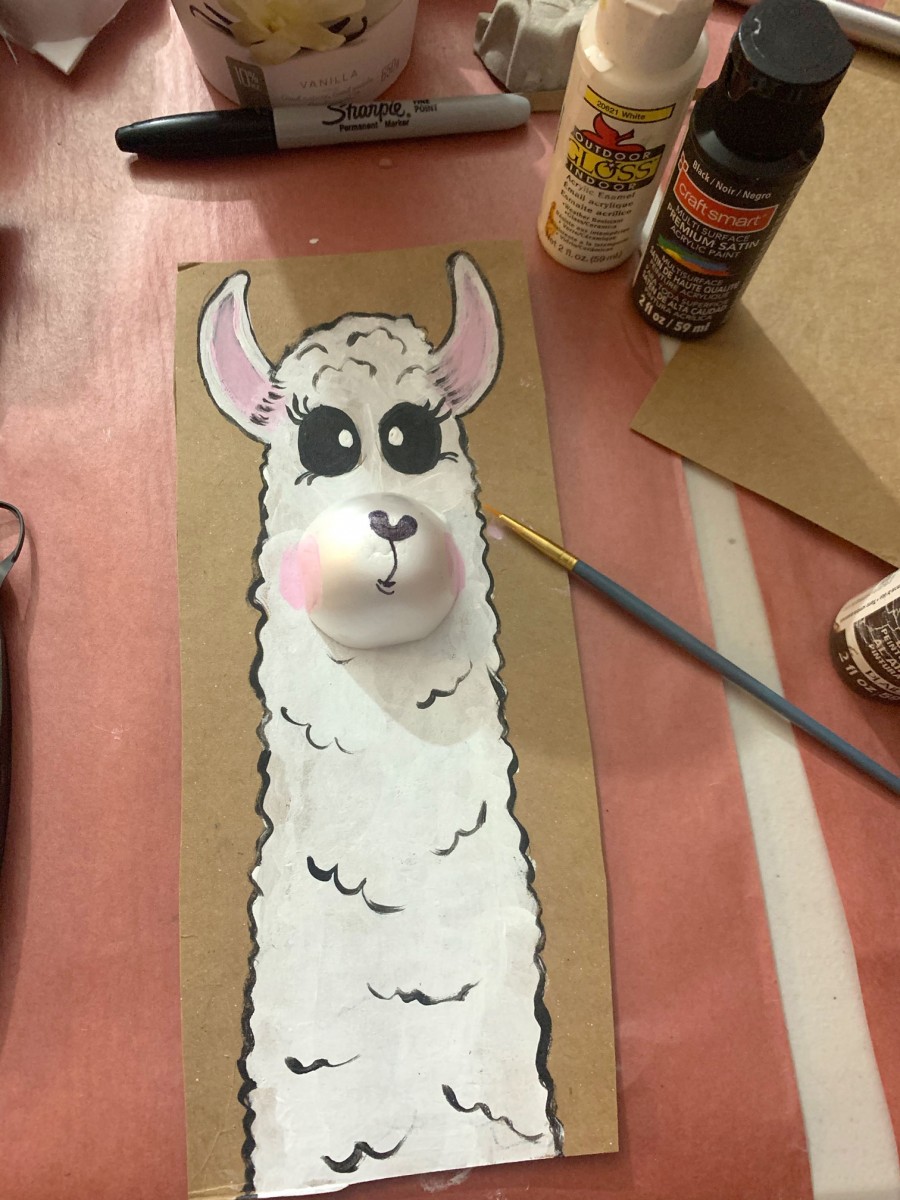 Paint!
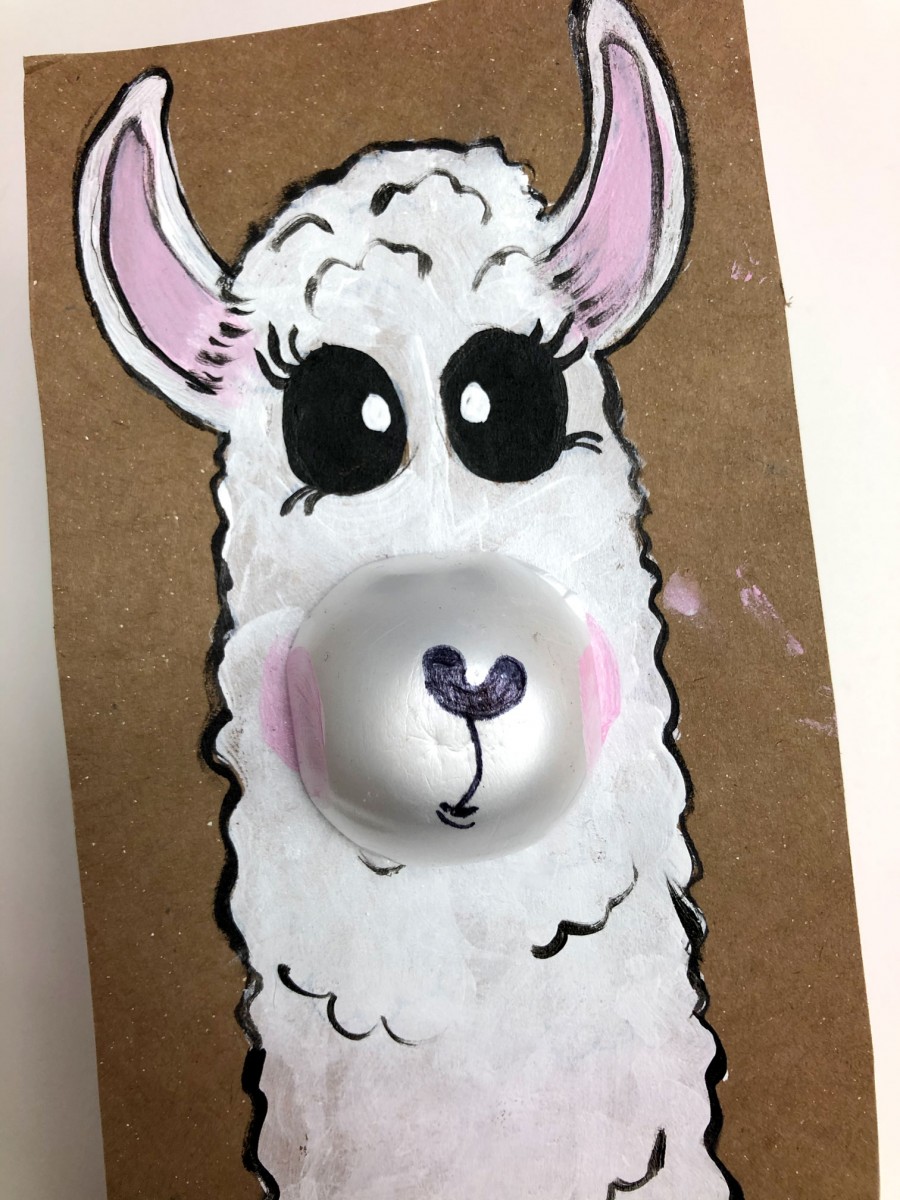 Llama!
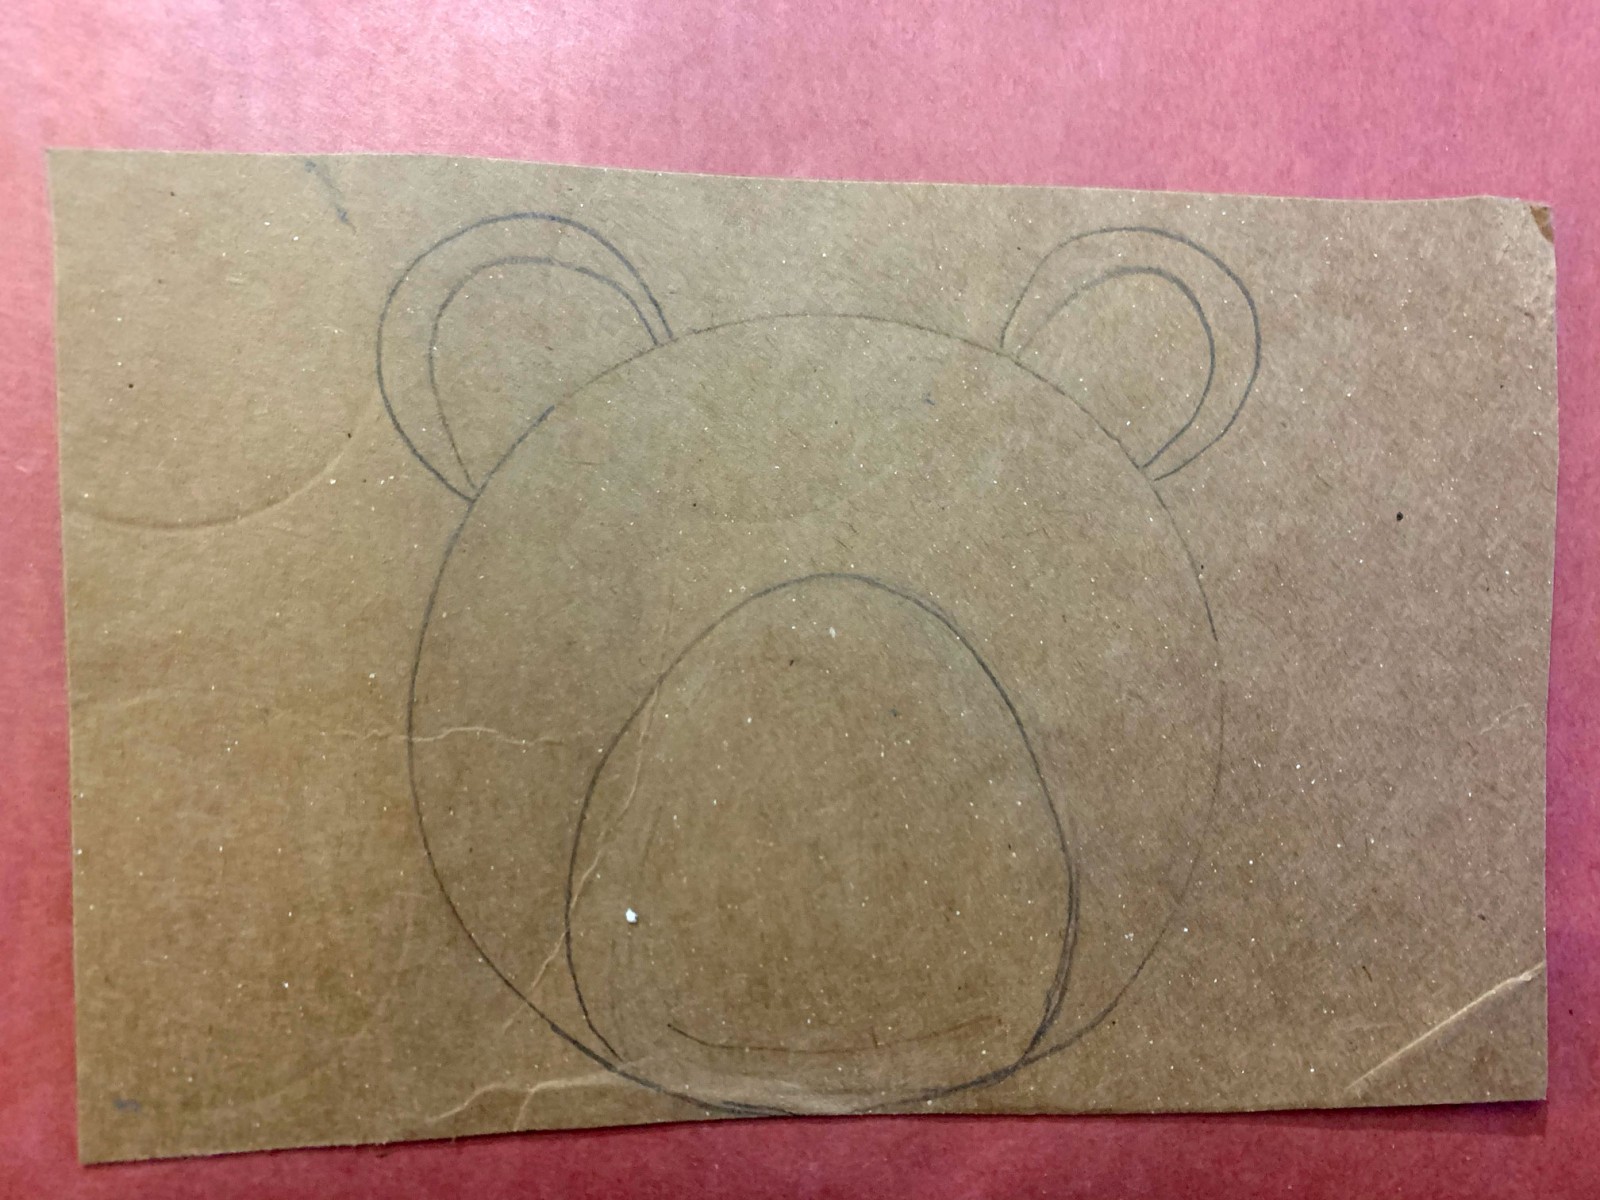 Draw face
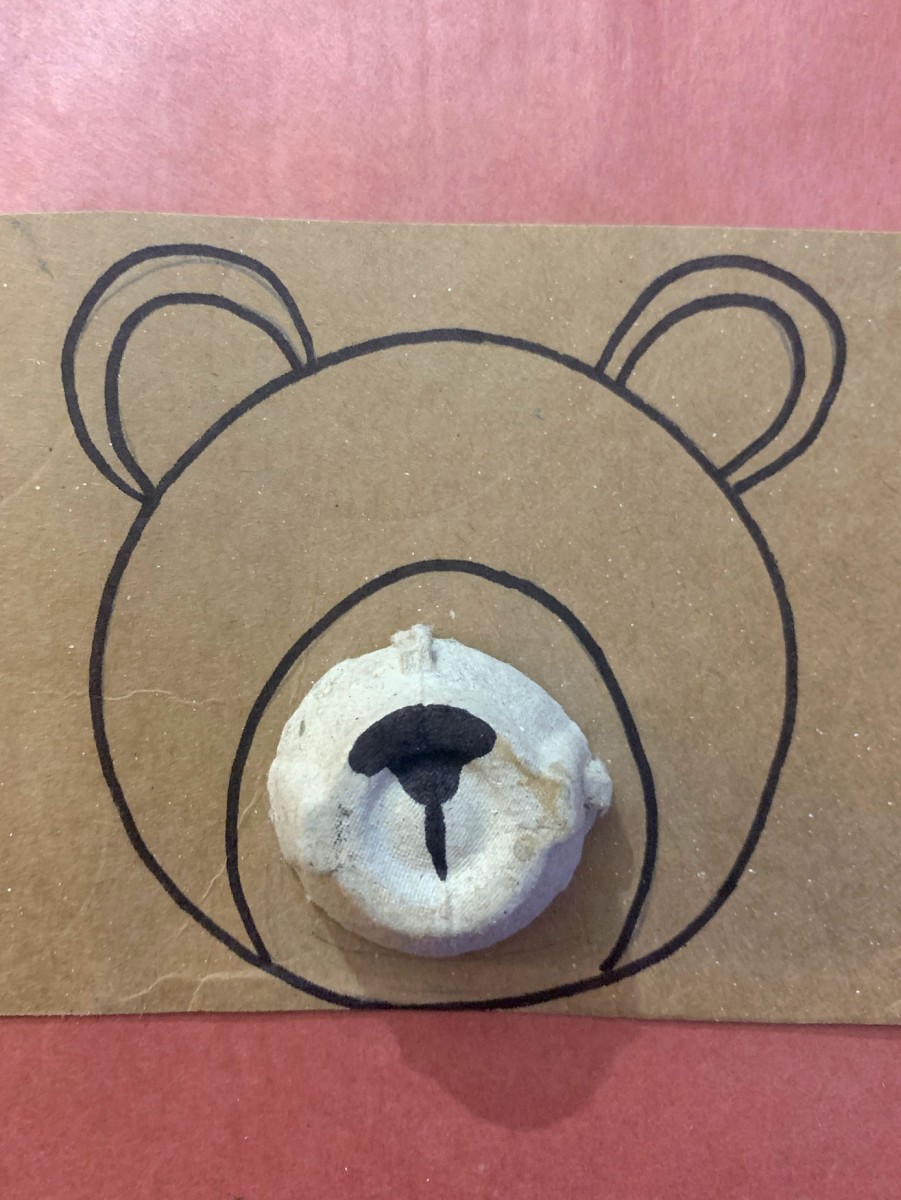 Add egg carton muzzle
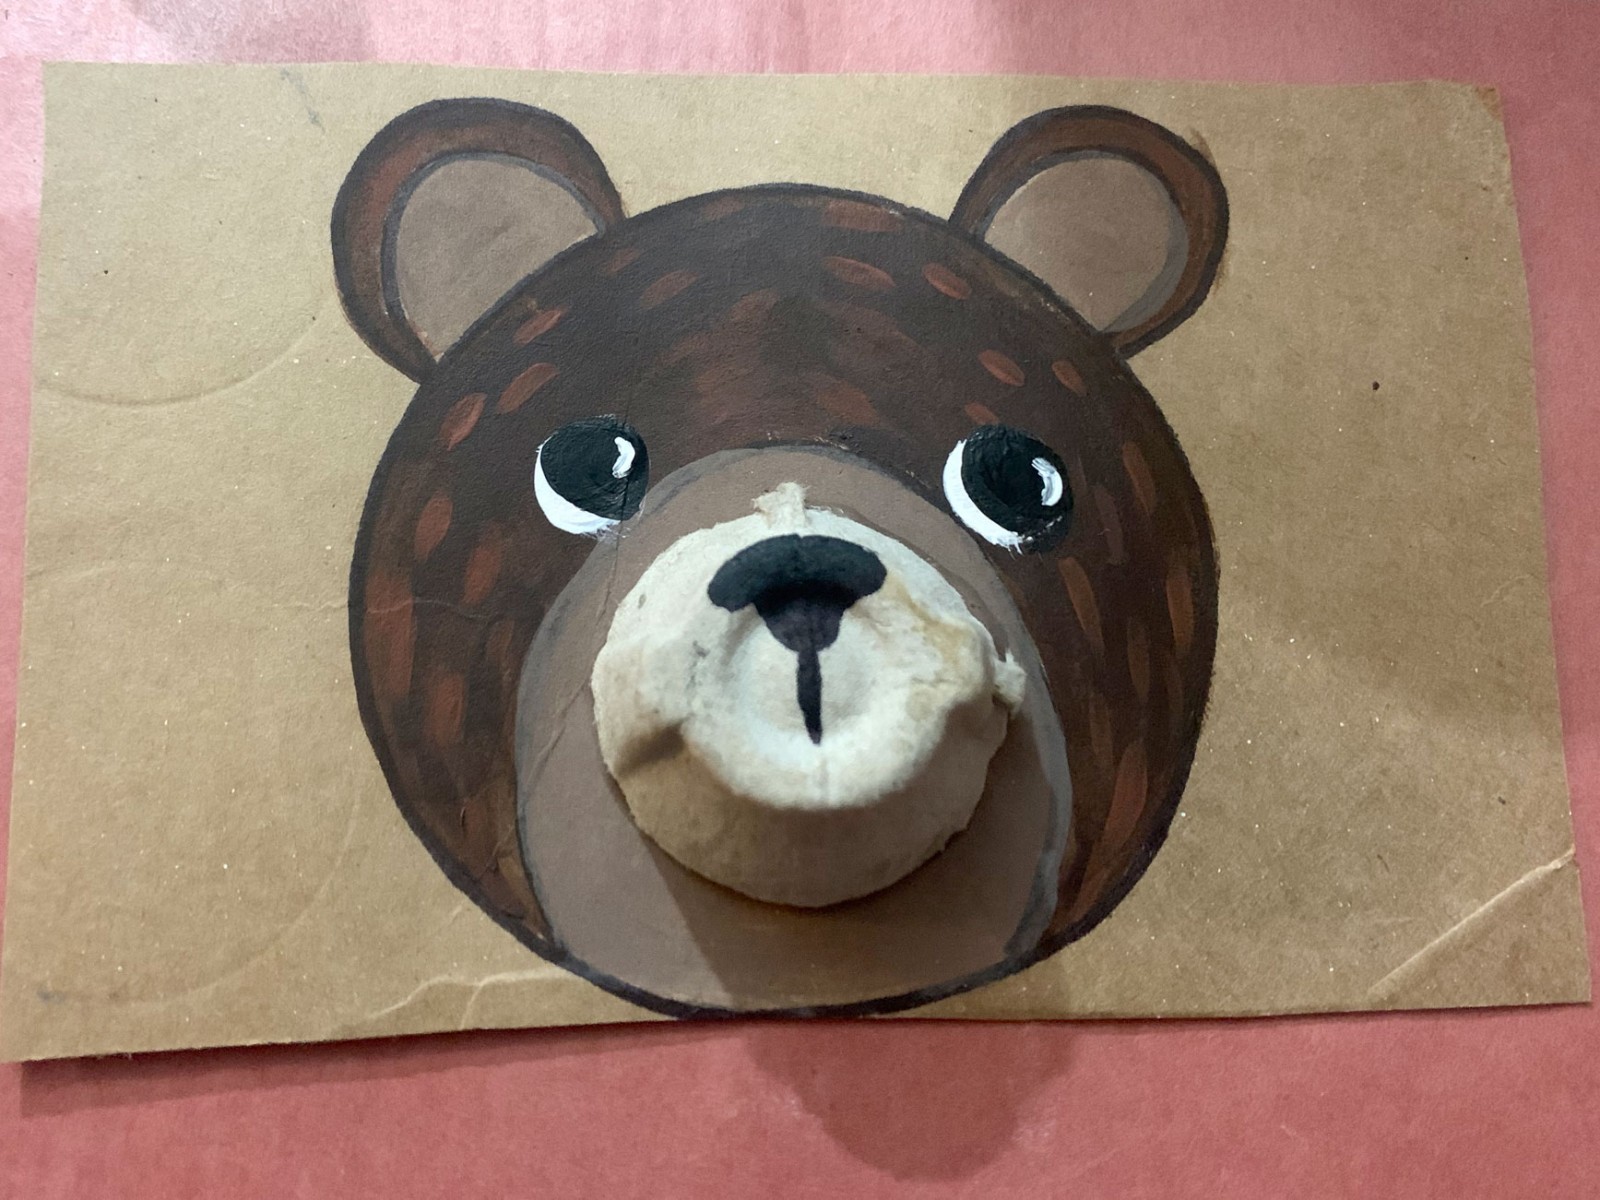 paint and cut out
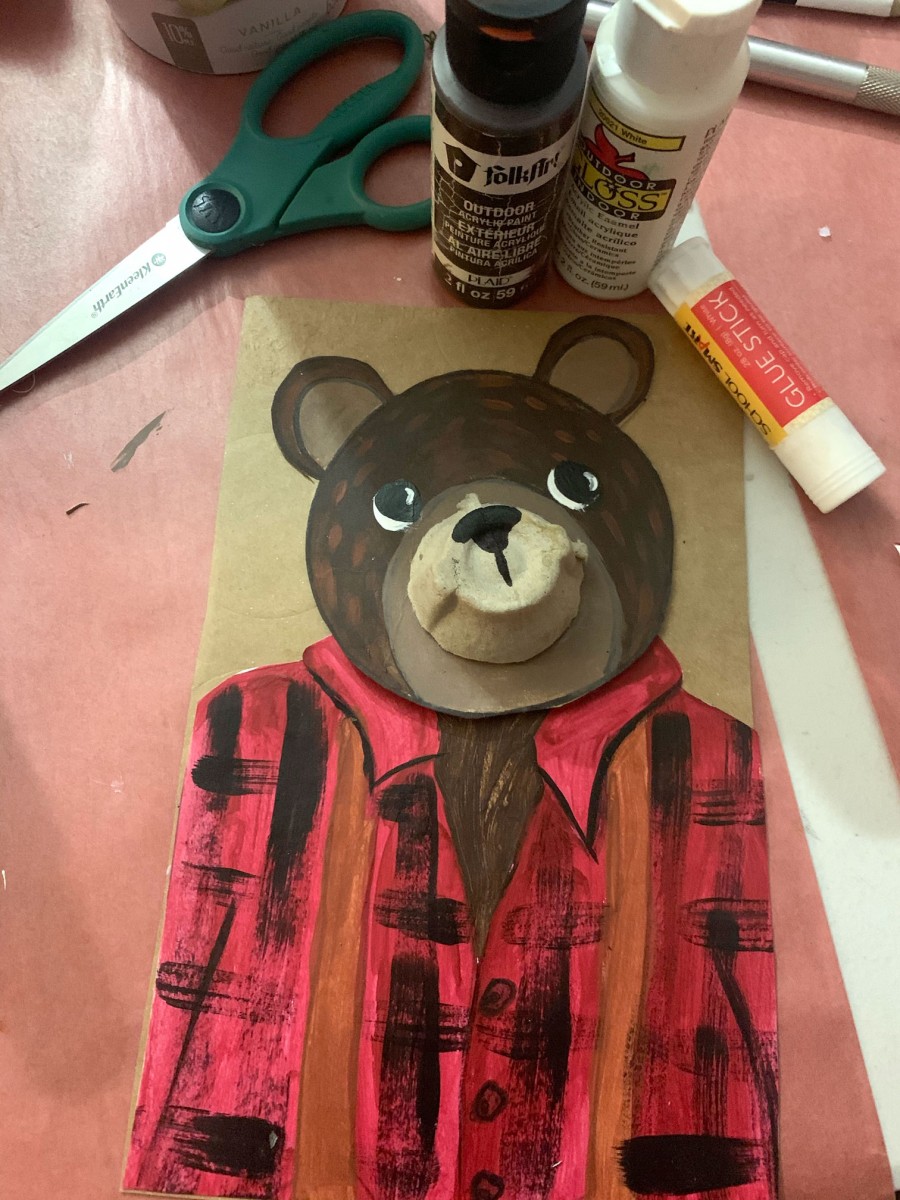 glue to cardboard, draw body and paint!
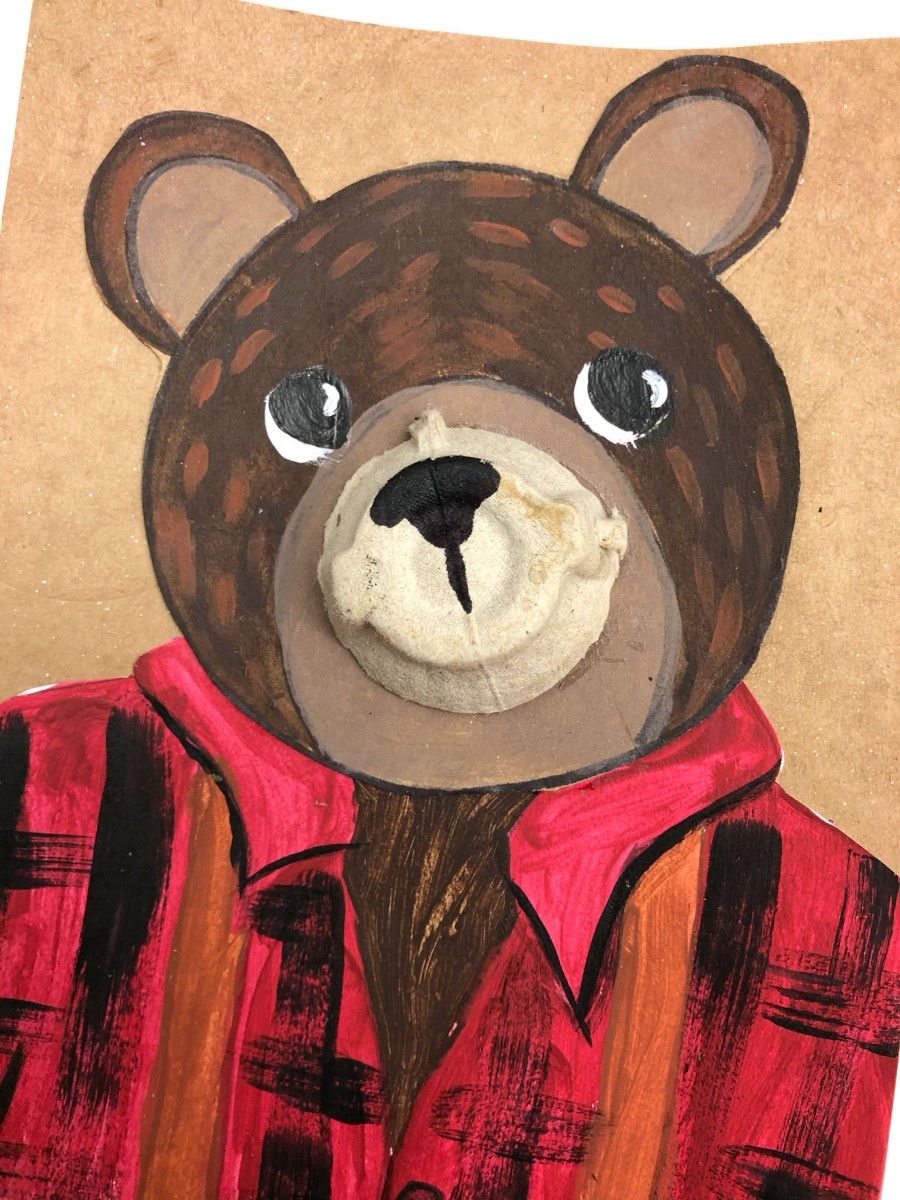 Bear!
Bear!
 Bear!
Bear!
CFCA Art Challenge #17
Draw a Chickadee!
Materials:
-Paper
-Pencil and eraser
Step 1: To begin your chickadee, start with two lightly drawncircles for the body and a few lines for the branch.Build on it. Your 1st line is not your last line.
Step 2: Continue to use light stokes to connect the circles,add wings and legs. Add a beak and eye. For the tailthe easiest way to get a straight line is to lock your wrist and elbow, move from the shoulder. Start using darker values when you are happy with the shapes.
Step 3: Begin shading. Start lightly at a pecil at a 45° angle.Darker values are close to a 90° angle and light valuesat a 15° angle. Restate your shapes with darker lines.
Step 4: The branch, beak and claws are darker on one side. Where is the light? Make the shadows darker, and leave the paper lighter where the light is hitting the bird. Give yourself a 10 second reset or 10 minutes and then decide if it is done.
Tips: Objects with feathers and fur get bigger after initial block in. Keep the initial shapes modest. They will get bigger.Keep the beak away from the edge of the paper, give it room.
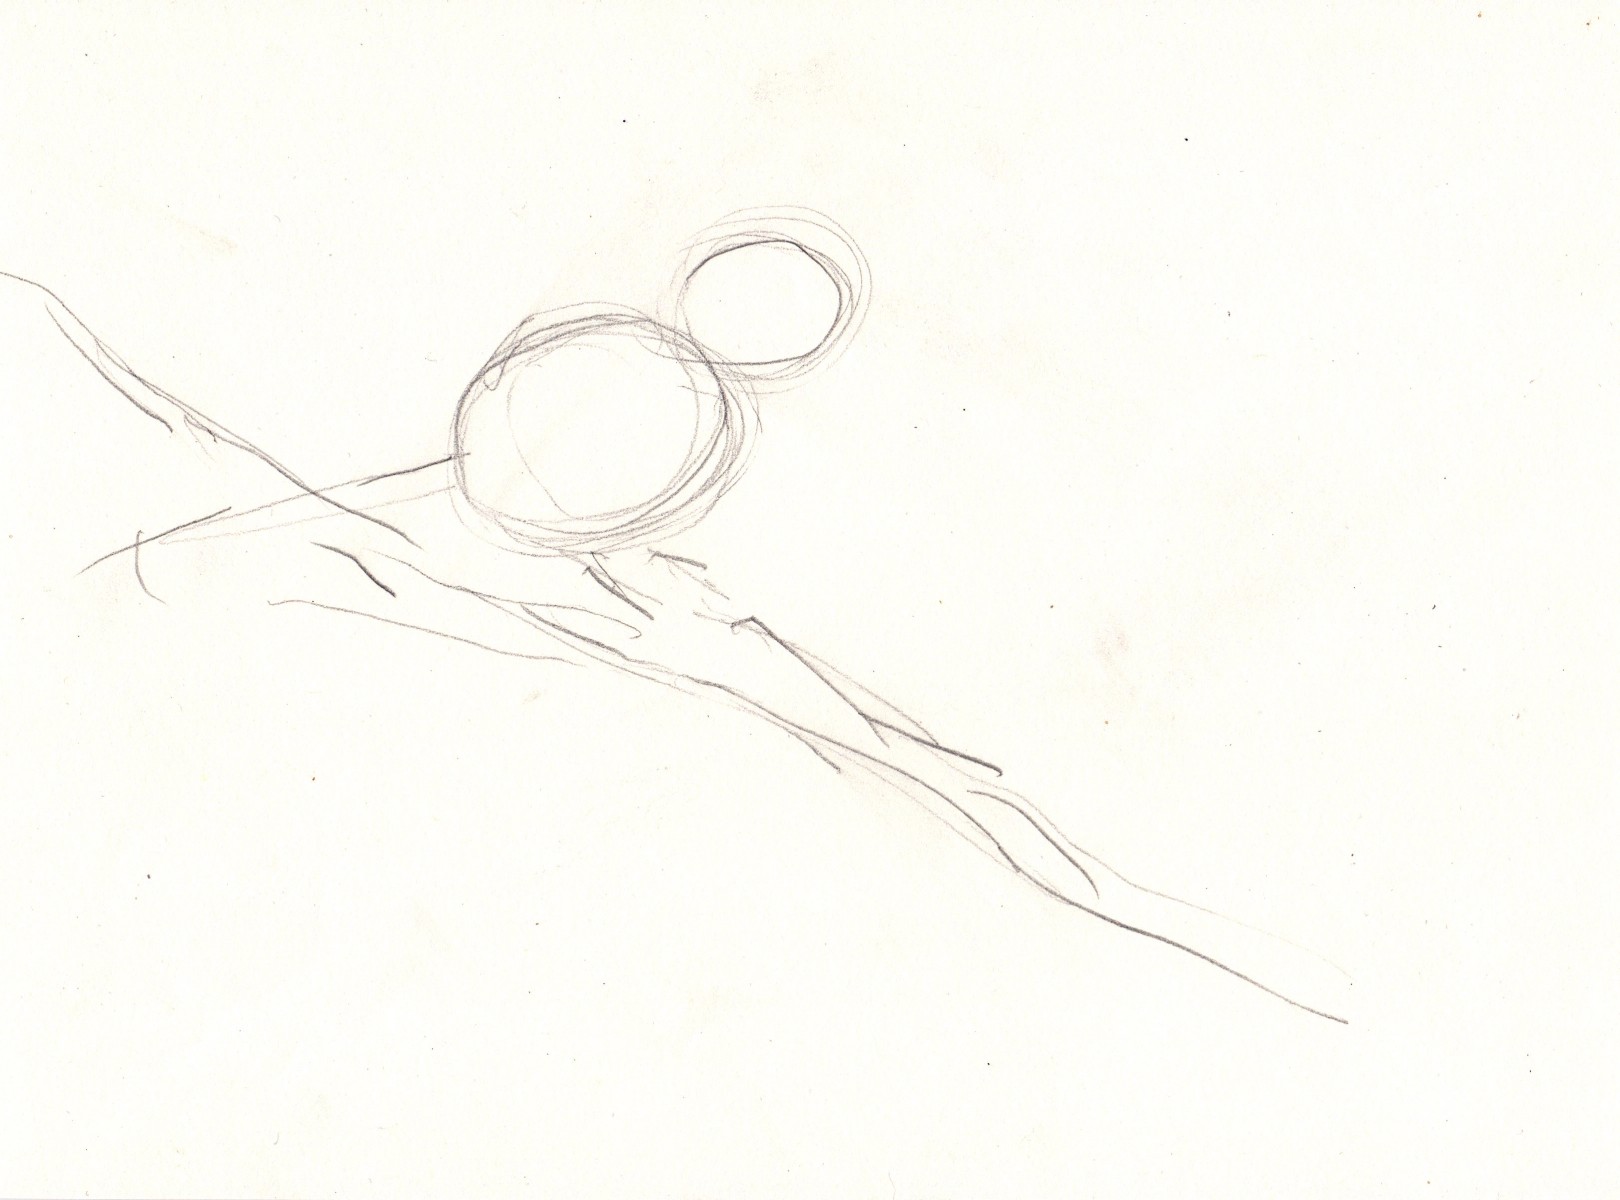 Step 1
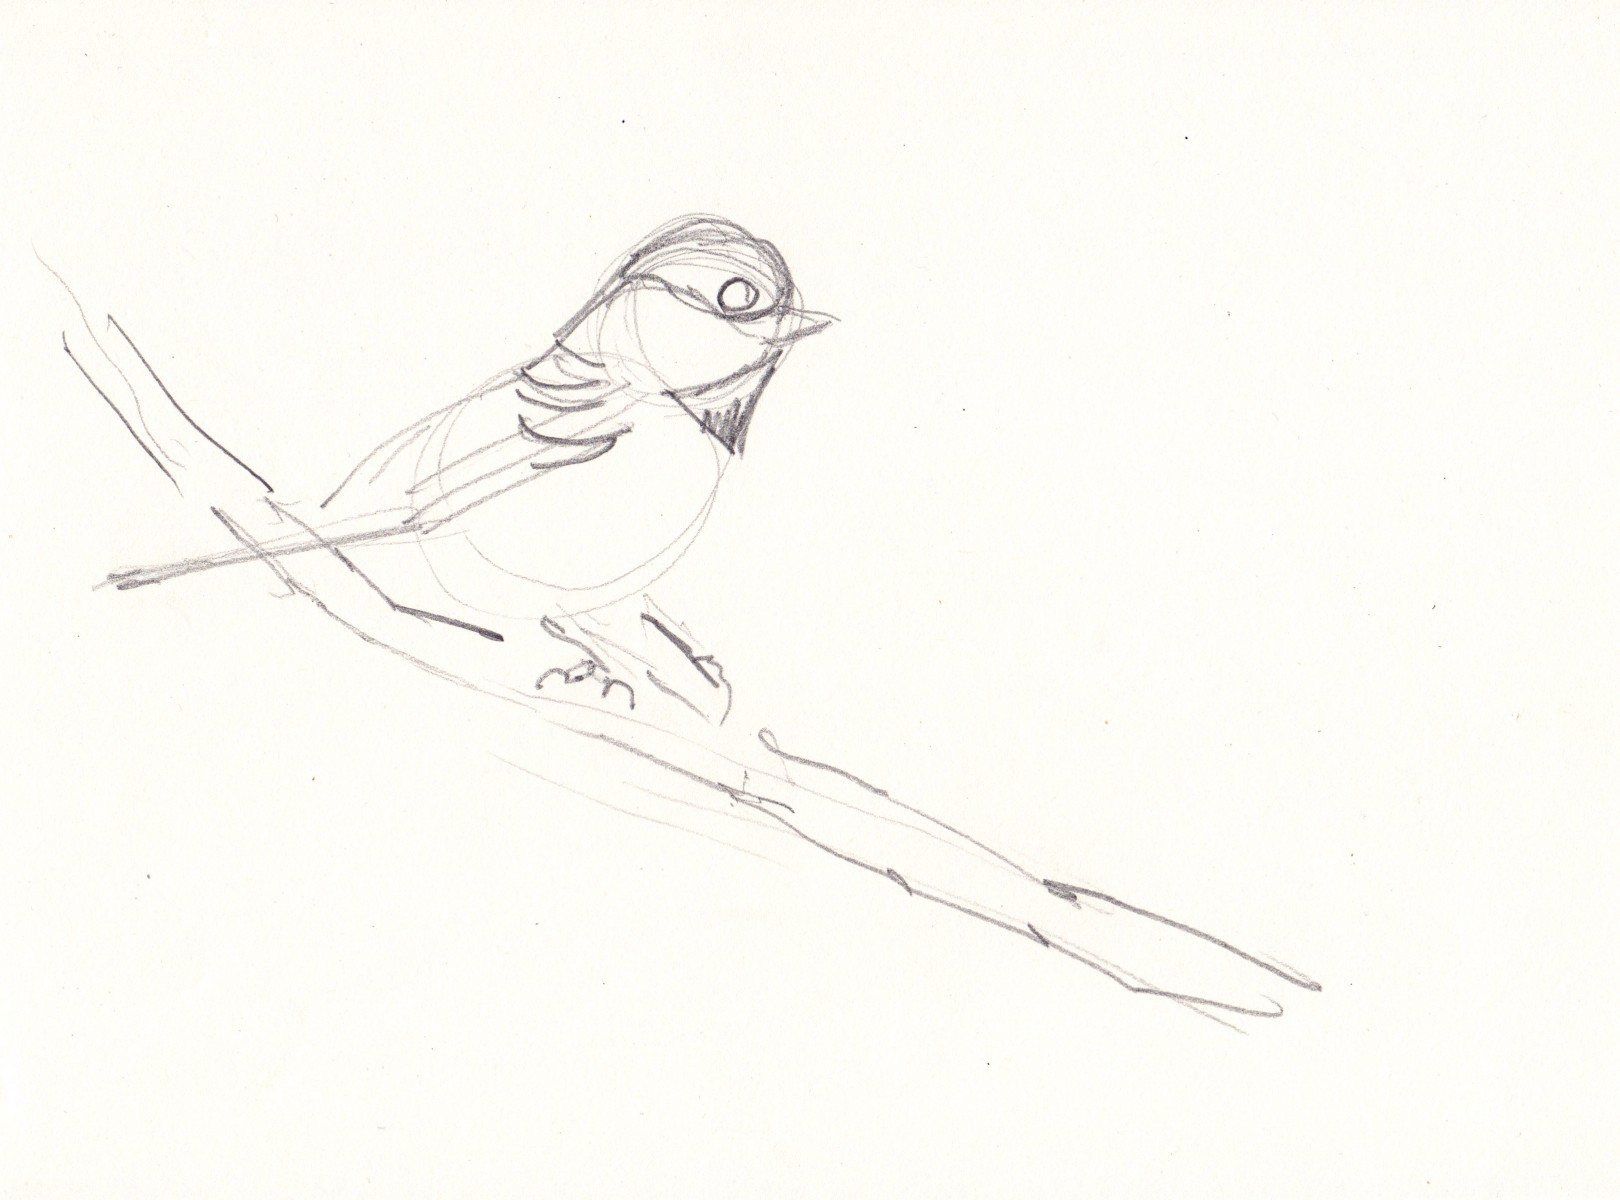 Step 2
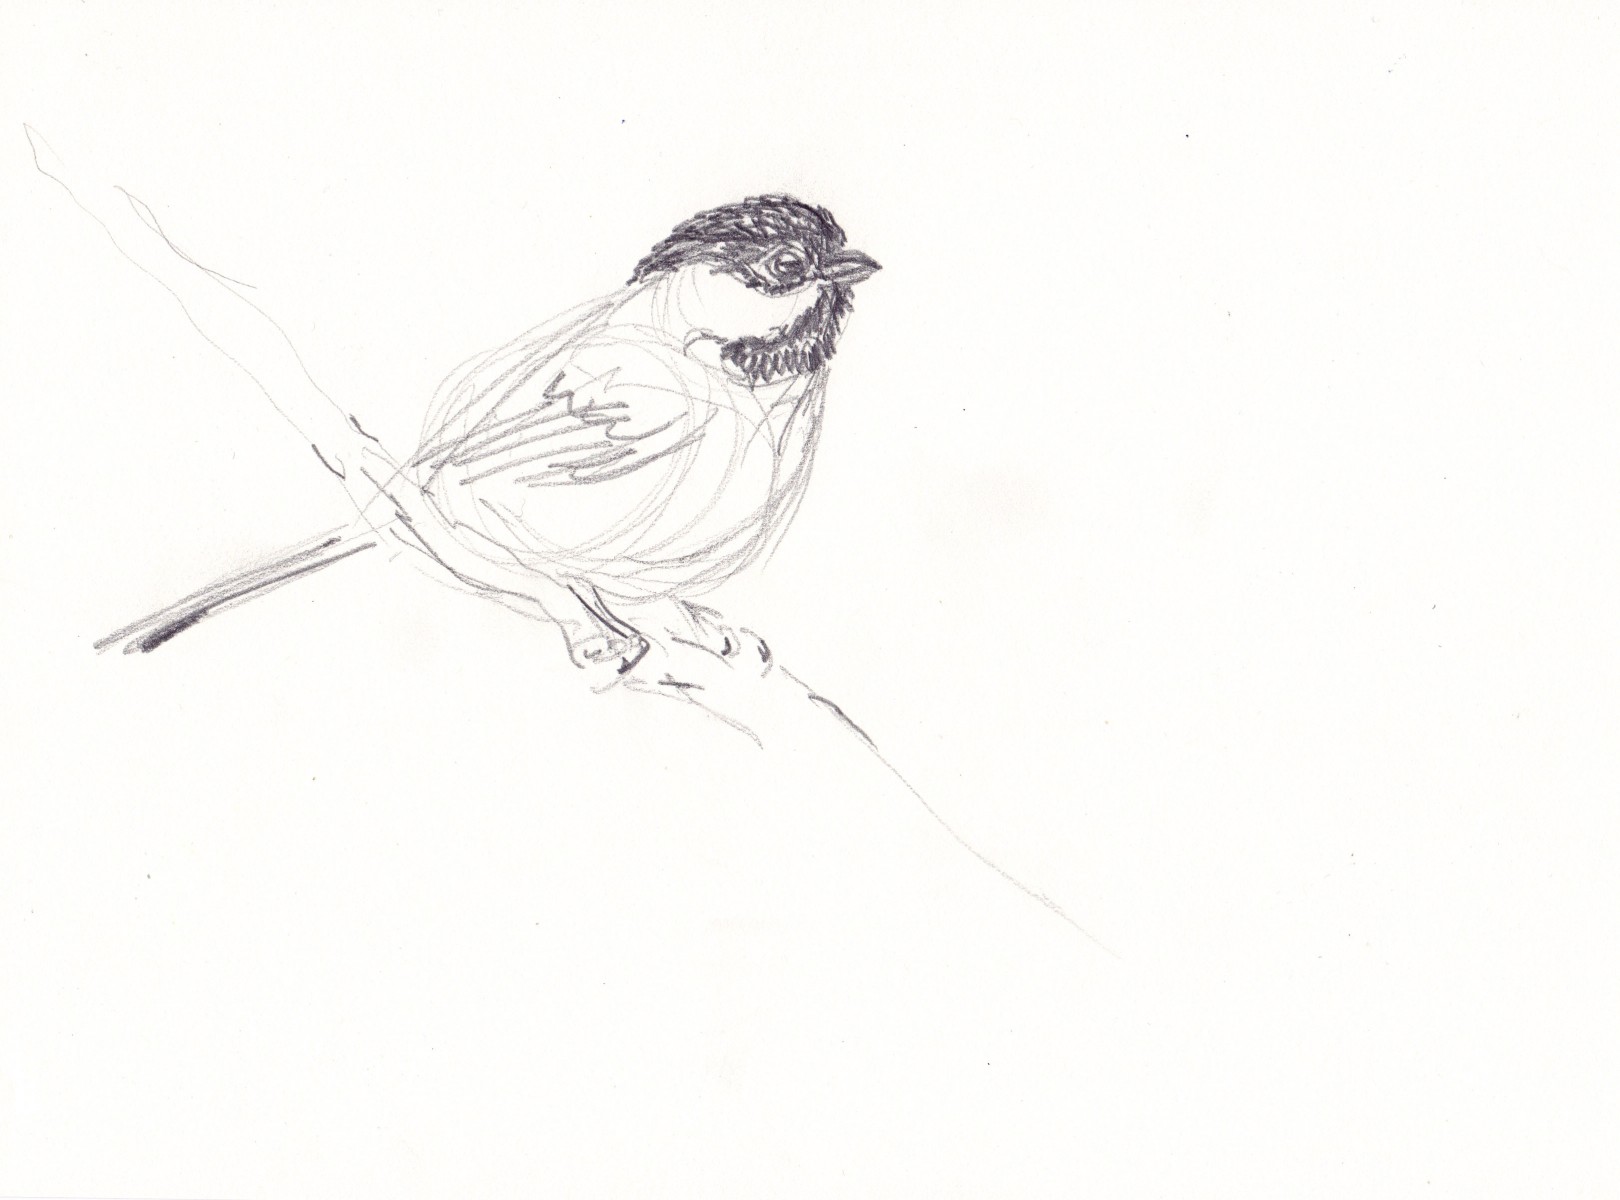 Step 3
 Step 4
CFCA Art Challenge #18
Draw a Racoon!
Materials:
-Paper
-Pencil and eraser
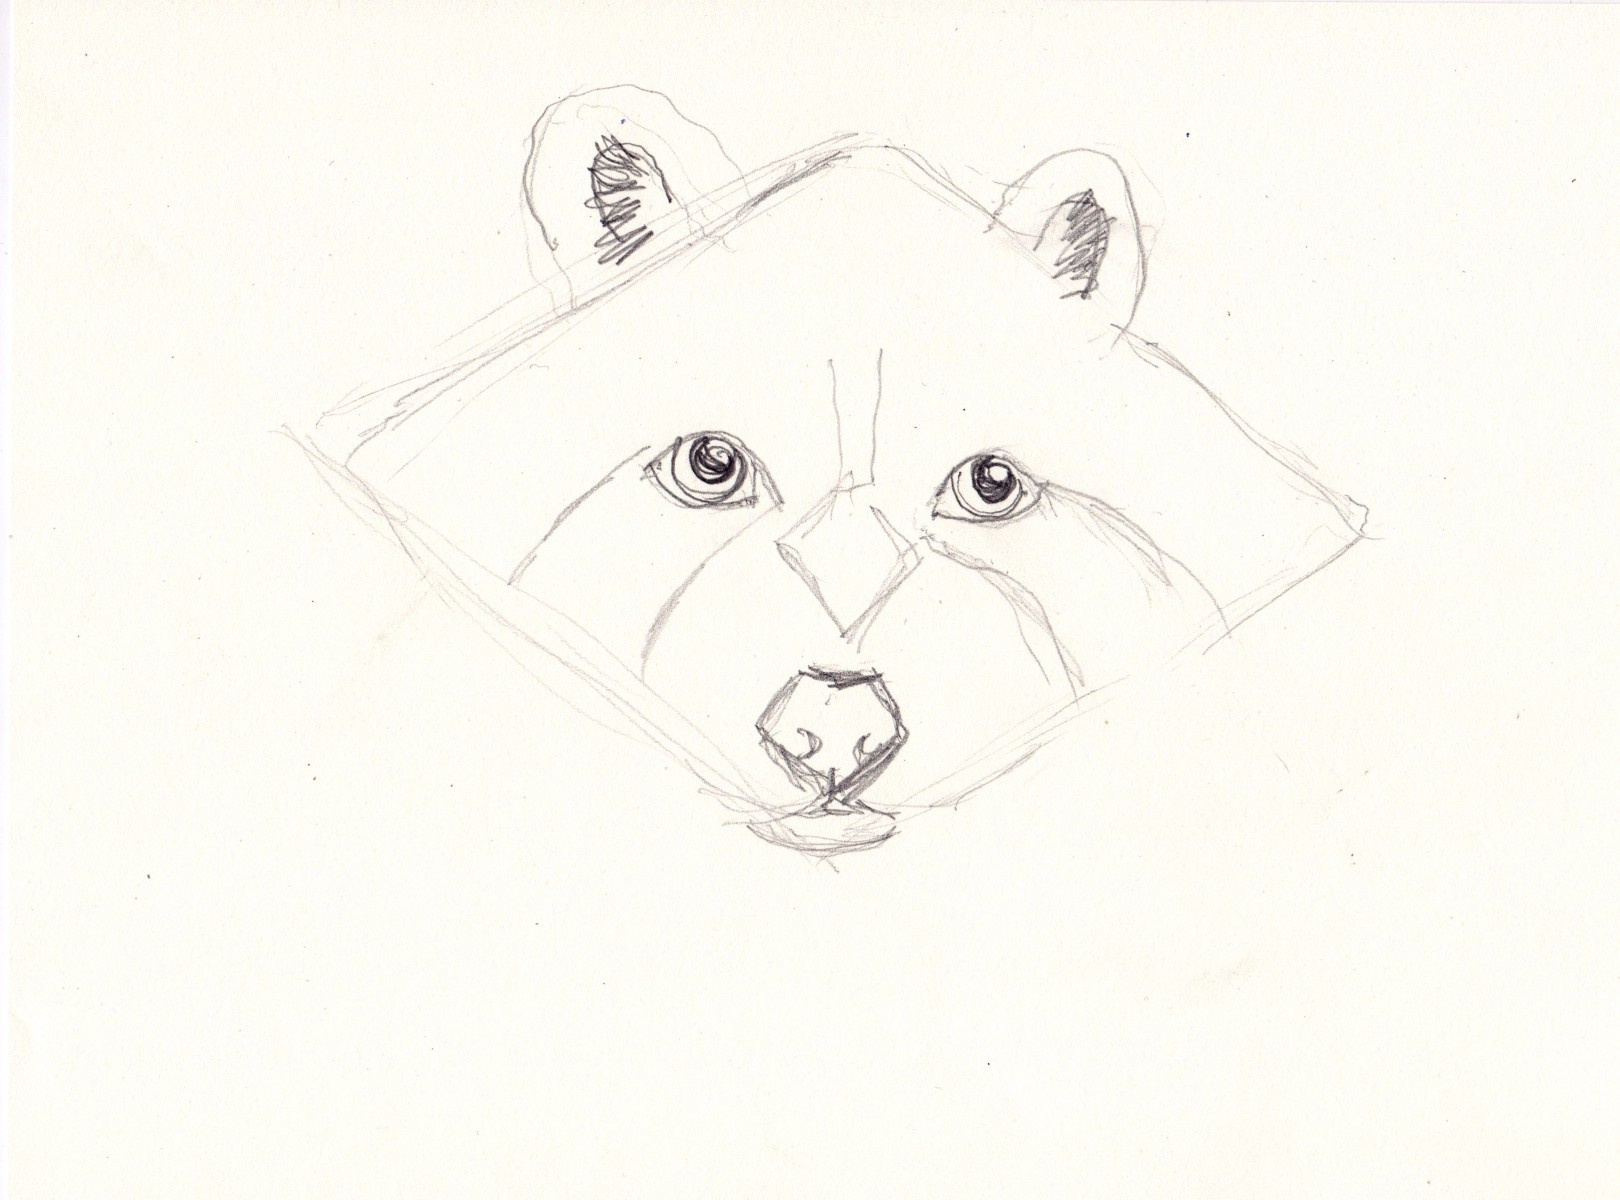
Step 1: Begin by lightly drawing a diamond shape. Add a small cross in the centre. This will give you a centre line to add eye shapes and a Superman symbol shape for a nose. Add rounded ears on top of the head.
Step 2: Add pupils in the eyes, leave a bit of white to show the shine in the eyes. Add curved lines from the corners of the eyes to the raccoons cheeks. Add details in the centre of the face. Add small curves for nostrils in the nose and shade in the inside of the ears. Add chin and mouth.
Step 3: Begin shading. Start lightly at a pencil at a 45° angle.Darker values are close to a 90° angle and light valuesat a 15° angle. Darken the patches around and under the eyes. Darken the nose and ears.
Step 4: Use squiggly lines to suggest fur and add shading. Leave the paper white where it is the lightest. Make it darker under the chin, under the ears and beween the eyes. Where is the light? Make the shadows darker, and leave the paper lighter where the light is hitting the raccoon.
Give yourself a 10 second reset or 10 minutes and then decide if it is done.
 Step 1
 Step 2
 Step 3
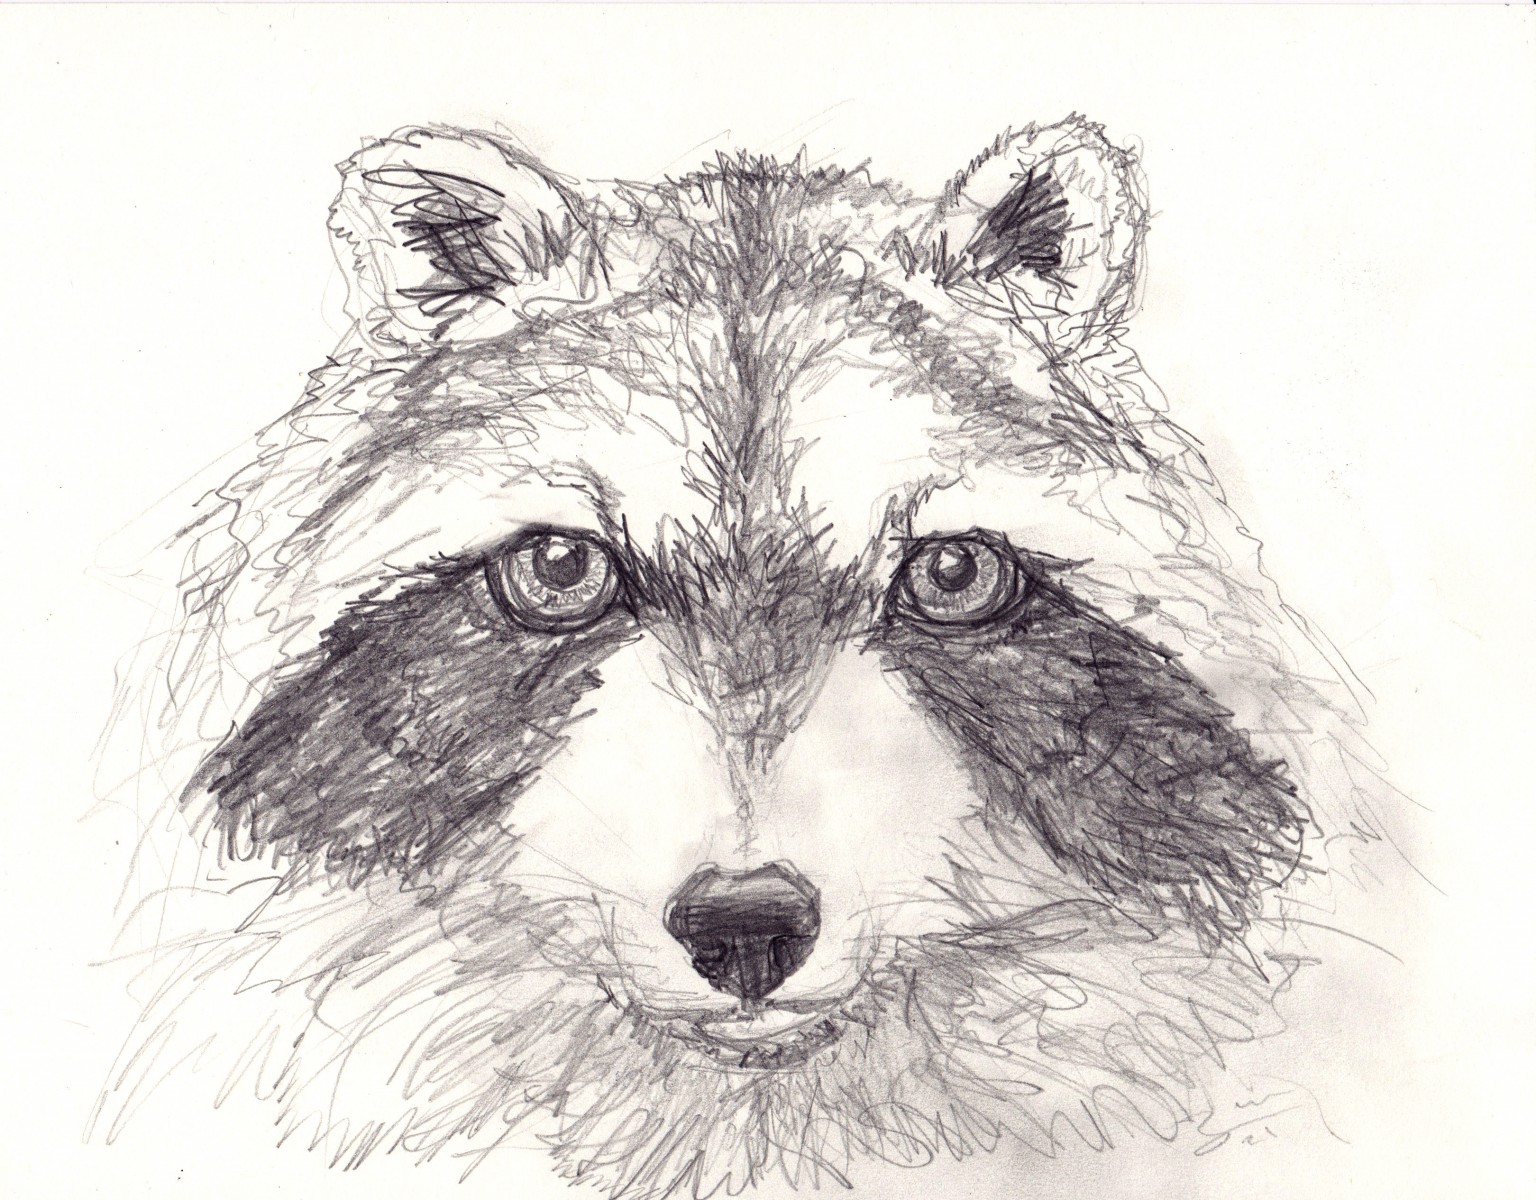 Step 4
Tips for Eyes: The first set of eyes have sharp angular lines, it looks angry. The second on are curving up and look sad and vulnerable. The last set is in between and neutral.
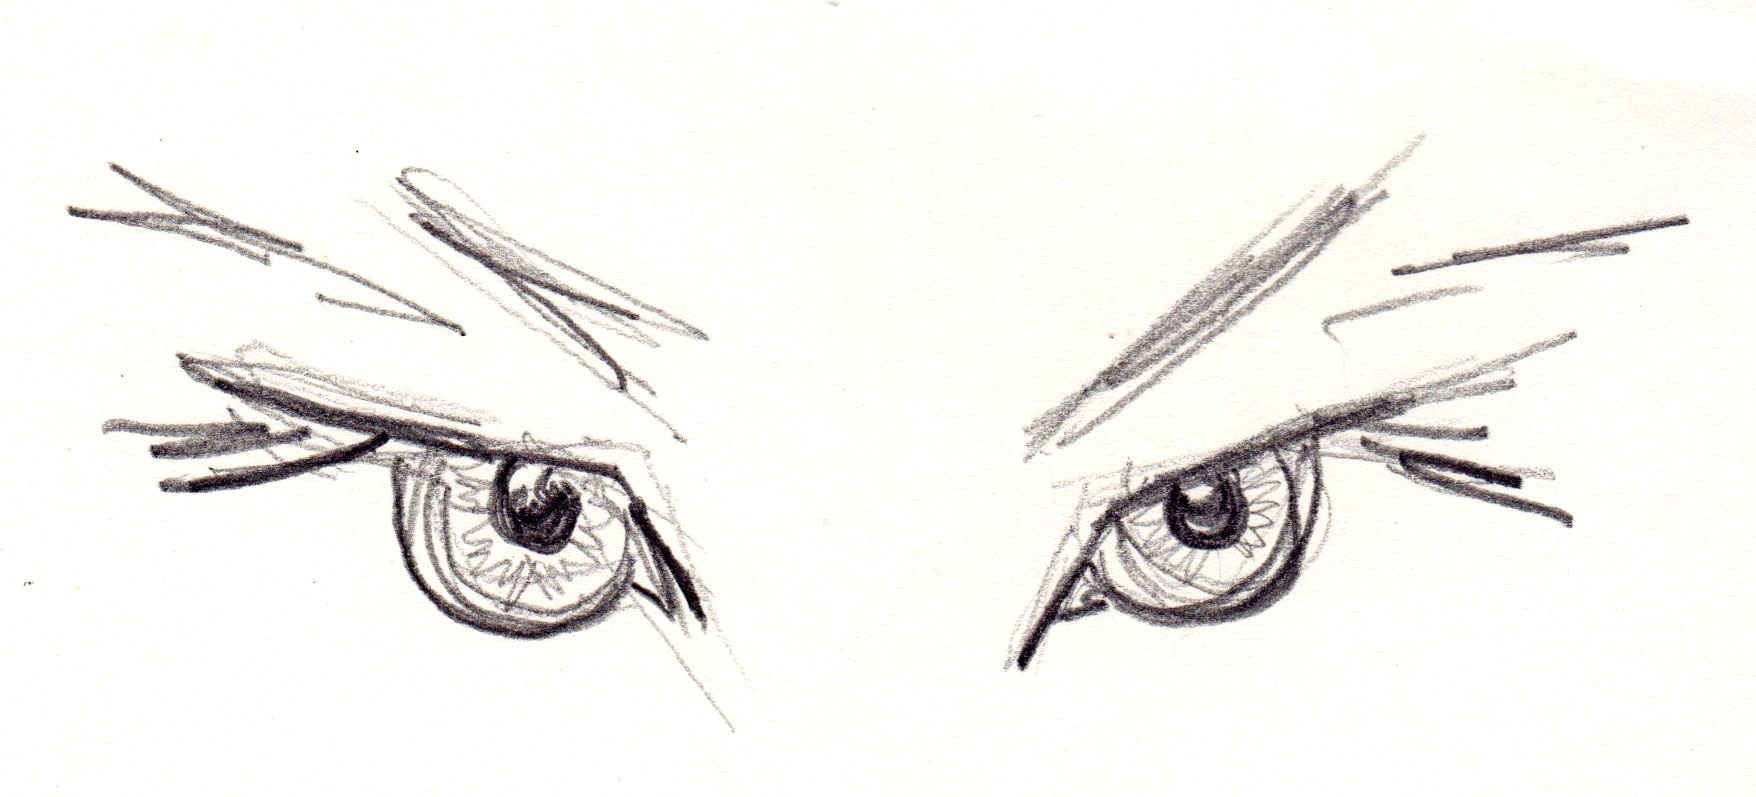 Angry
Angry
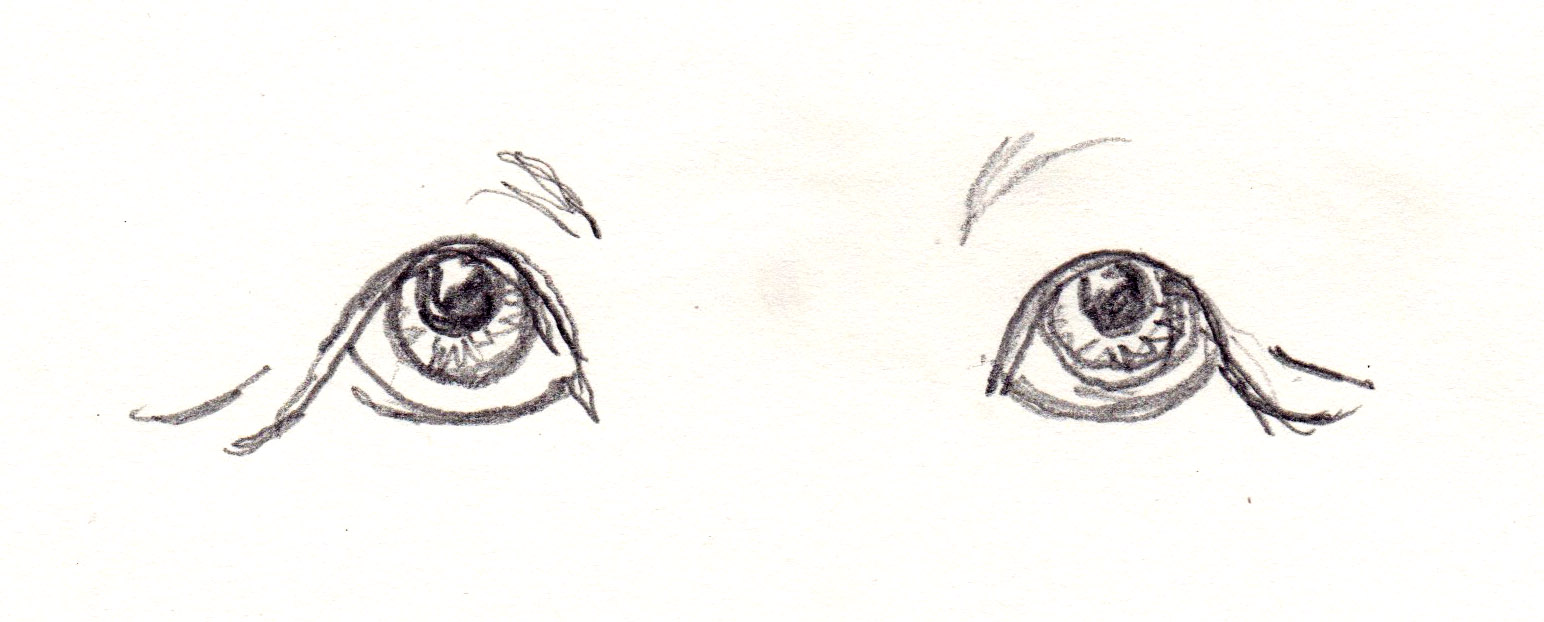 Sad
Sad
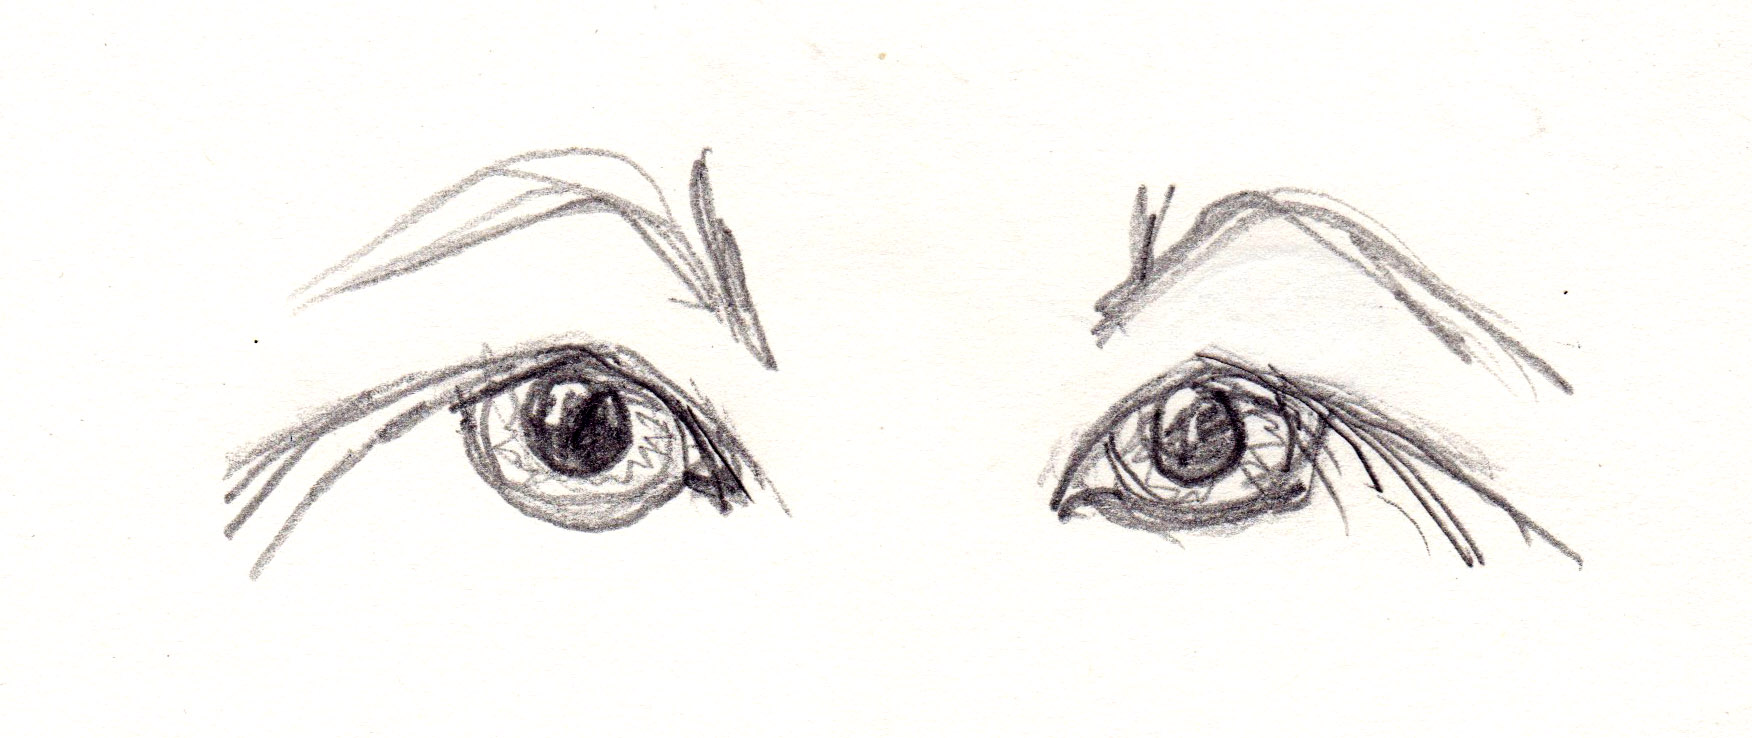 Sad
Sad
CFCA Art Challenge #19
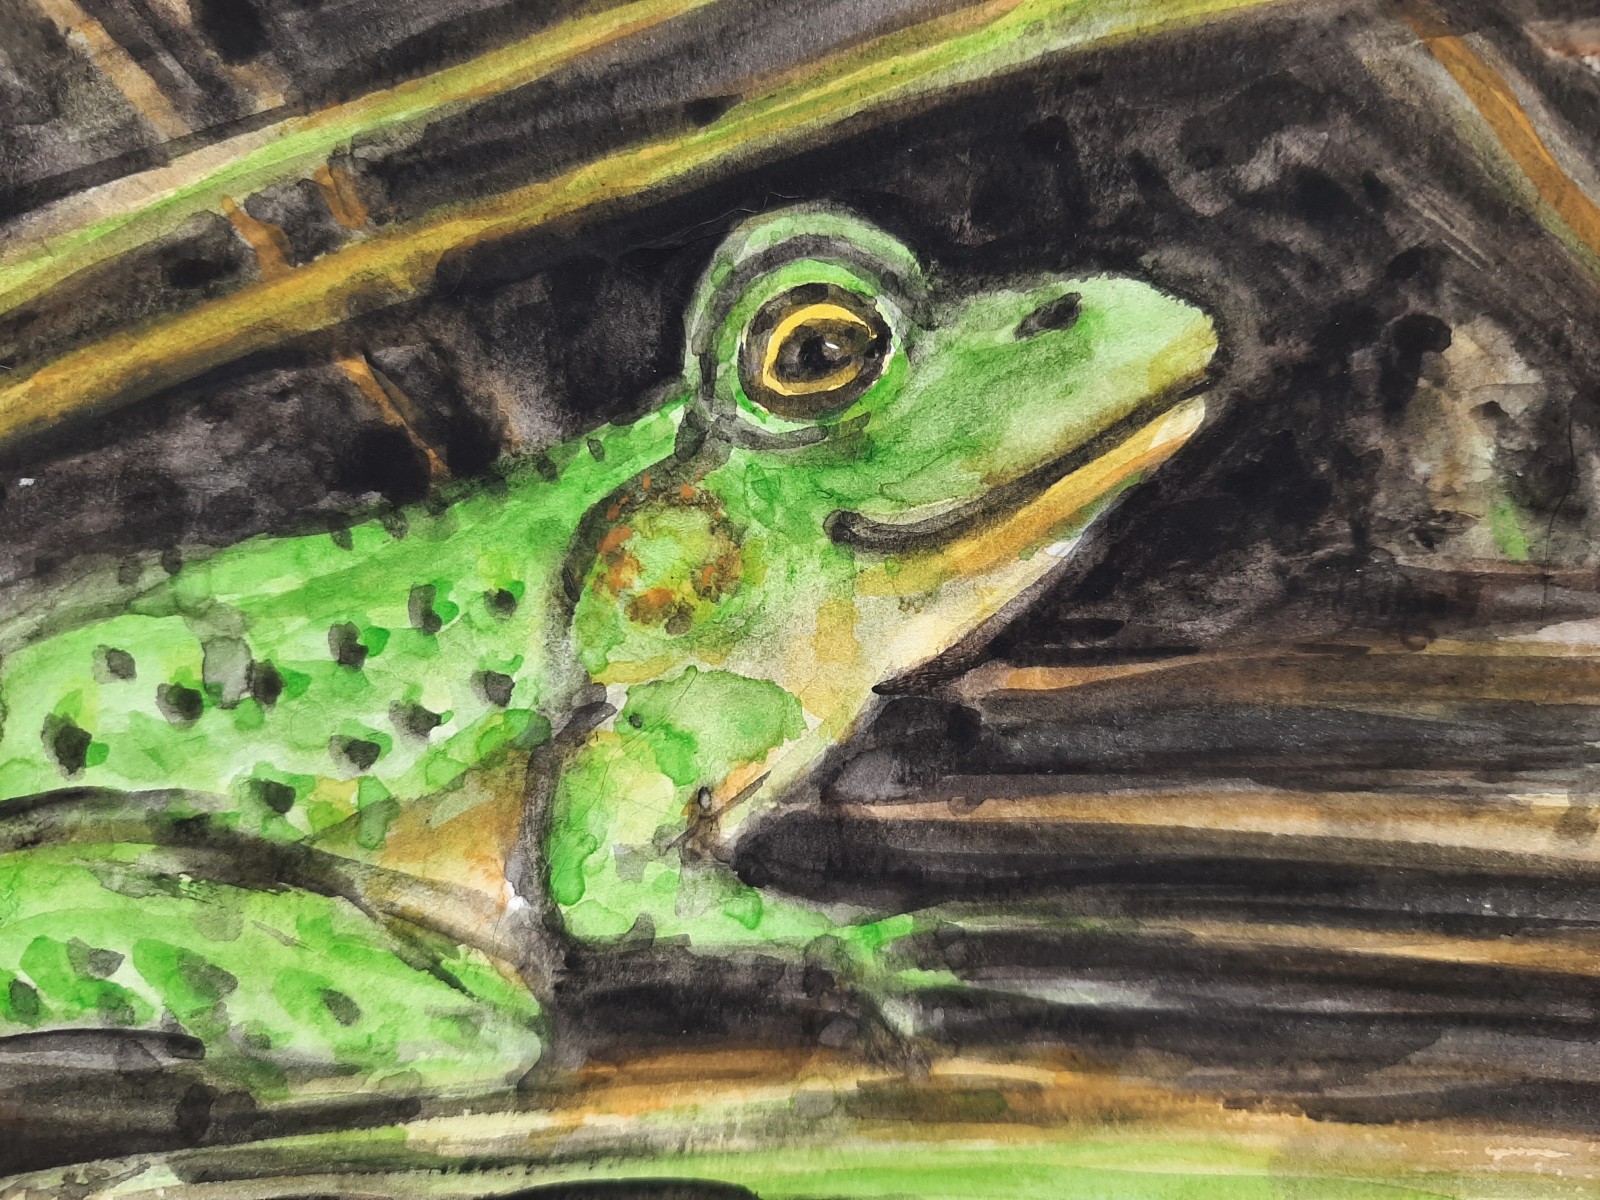
Paint a Frog!
Materials:
-Watercolour paper
-Plain paper for sketching
-Small or medium size round brush
-Watercolour paint in lemon yellow, yellow ochre, sap green, viridian, umber and ivory black.
-water jug
-masking tape
-pencil
-paper towel.
Step 1: Add a drop of clear water to each colour if using watercolour pans (dried blocks) and let sit for 3-5 minutes. Tape down watercolour paper. Sketch the frog on regular paper first. Everything is shapes and shapes within shapes. A frog is a triangle that has been softened. Place the eye just above the middle of the page. Is the frog frowning or smiling? Remember the nostrils and circle shape behind the eye. Lightly sketch the frog on the watercolour paper.
Step 2: Start with lemon yellow for the frog and reeds behind the frog making the eye brighter and let dry. Sap green is next except for the belly and lower jaw. Put some green in the reeds and water. Yellow ochre is used for the reeds and water and to darken the belly and circle gland behind the eye.
Step 3:
Use the viridian to darken the green on the frog and add some depth to the background and water. Let dry. The umber is for darkening the background and water and softens the black. The black is for the details on the frog like the bumps on the back and legs, nostril, mouth and eye. When painting the eye try and leave a dot of light for reflection.
Step 4: A grey is made with a pale black and used to shadow under lower lip, belly and behind the legs. Take a break or 10 second reset and then reevaluate and adjust the image, usually going darker to strengthen the contrast.
Tips:
•Watercolour dries 10-15% lighter. •Start with the lightest colour. The image will look weak until the darker colours are placed, focus on shapes.
•Have a test paper to check the load of your brush.
•To get a darker colour remove excess water from the brush and twirl it in the paint.
•To lighten an area add clear water and count to 5 and lift the paint with a tissue.
•For a soft edge wet the paper with clear water first, avoid pools of water.
•If an edge is too sharp add clear water and move gently with the brush.
•Remove the tape when the painting is dry by pulling away from the middle or the paper may tear.
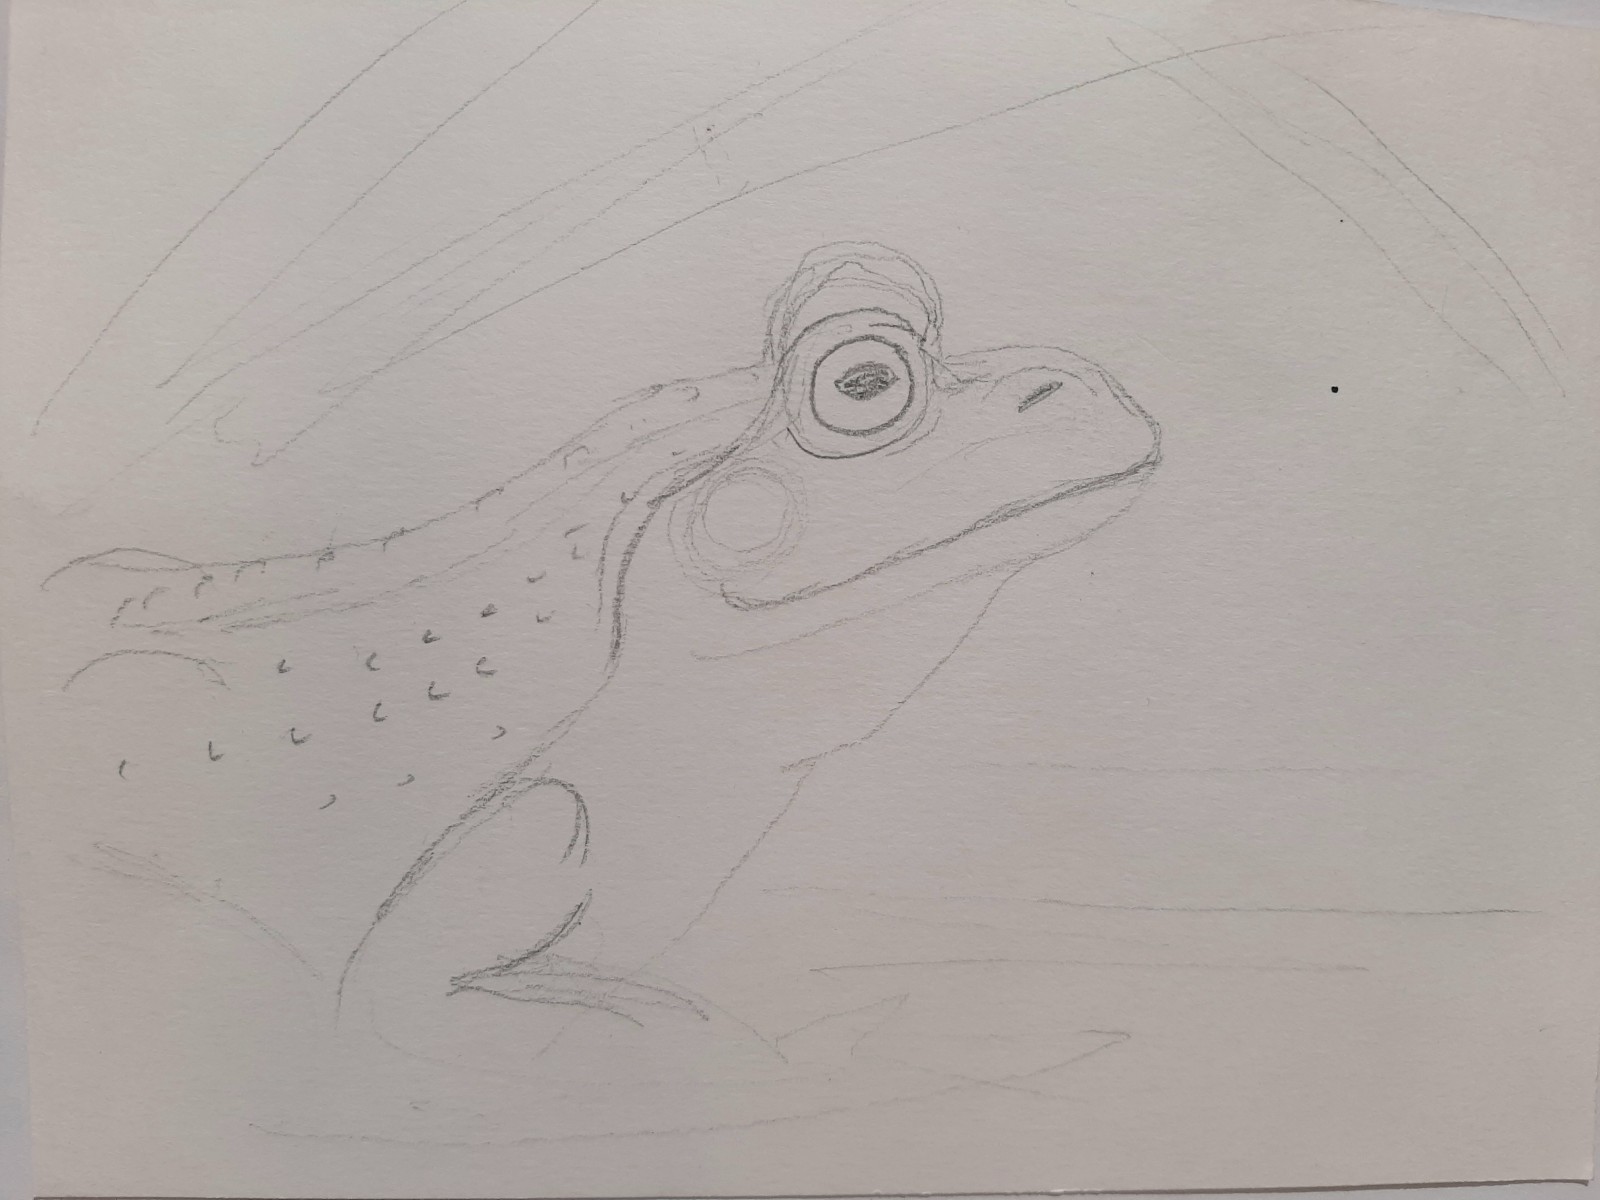 Step 1
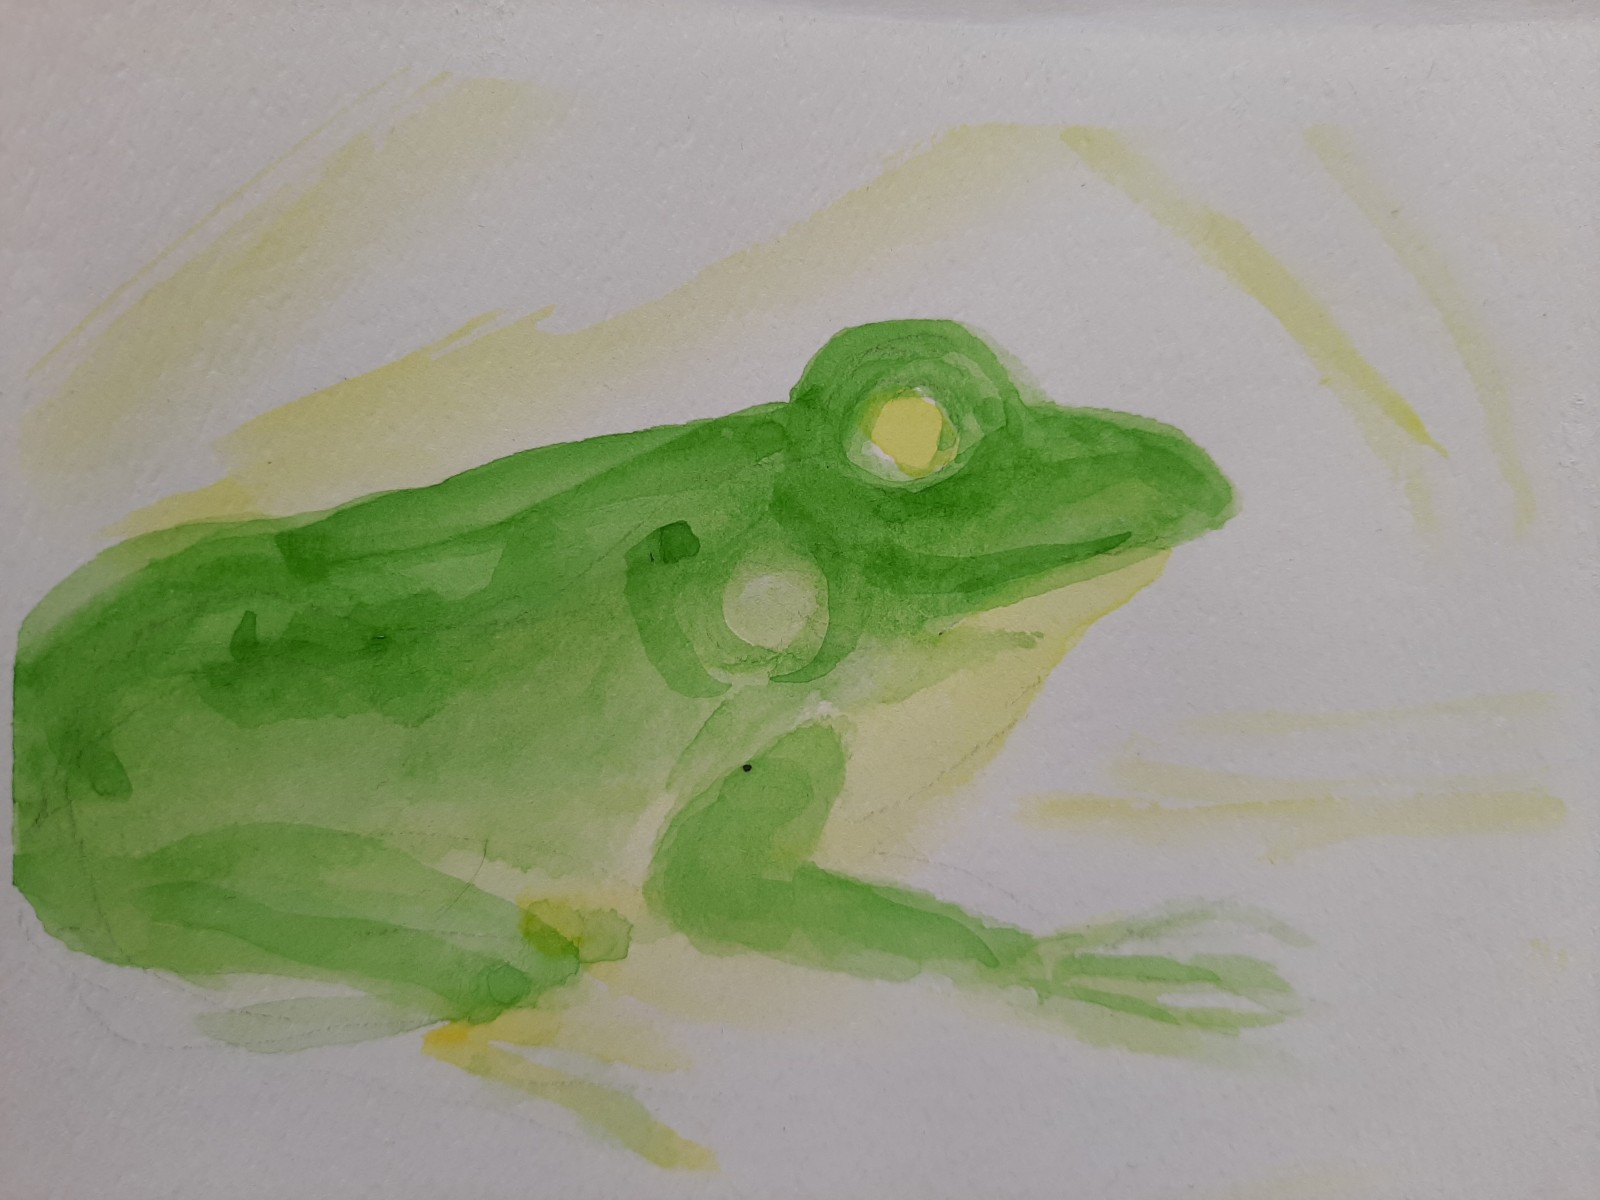 Step 2
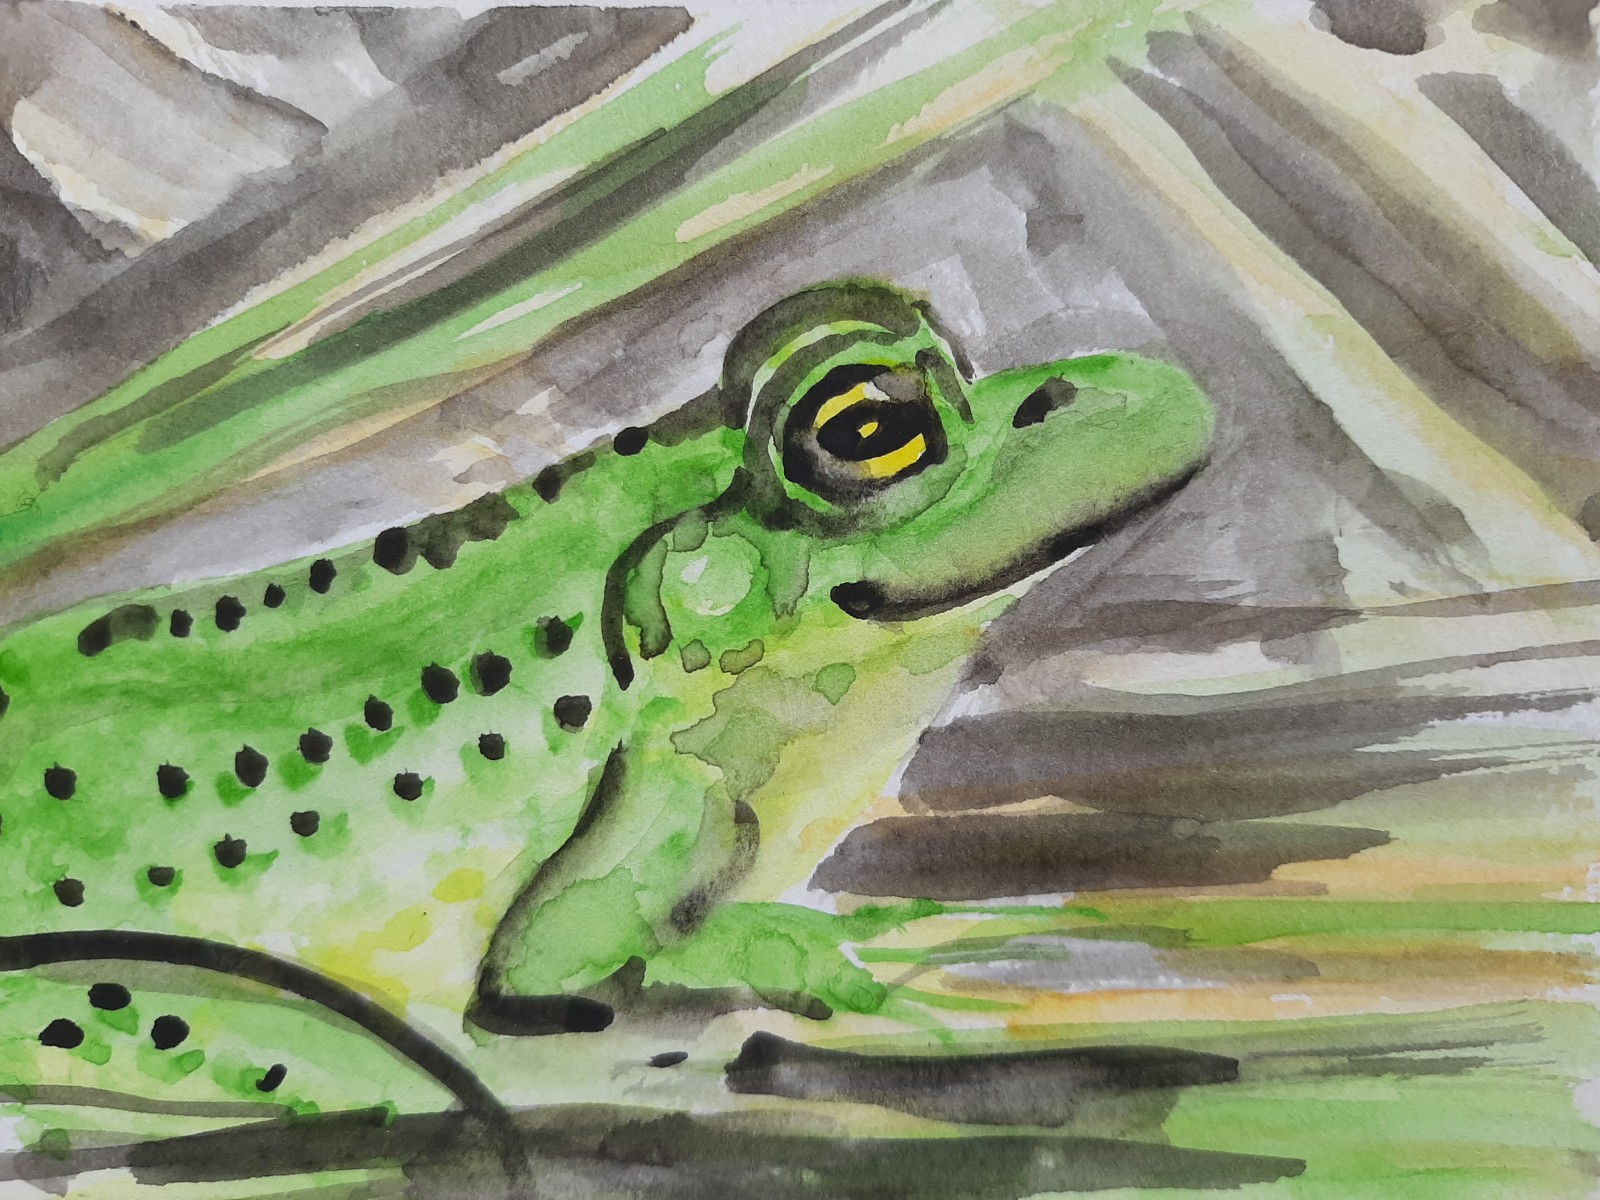 Step 3
 Step 4
CFCA Art Challenge #20
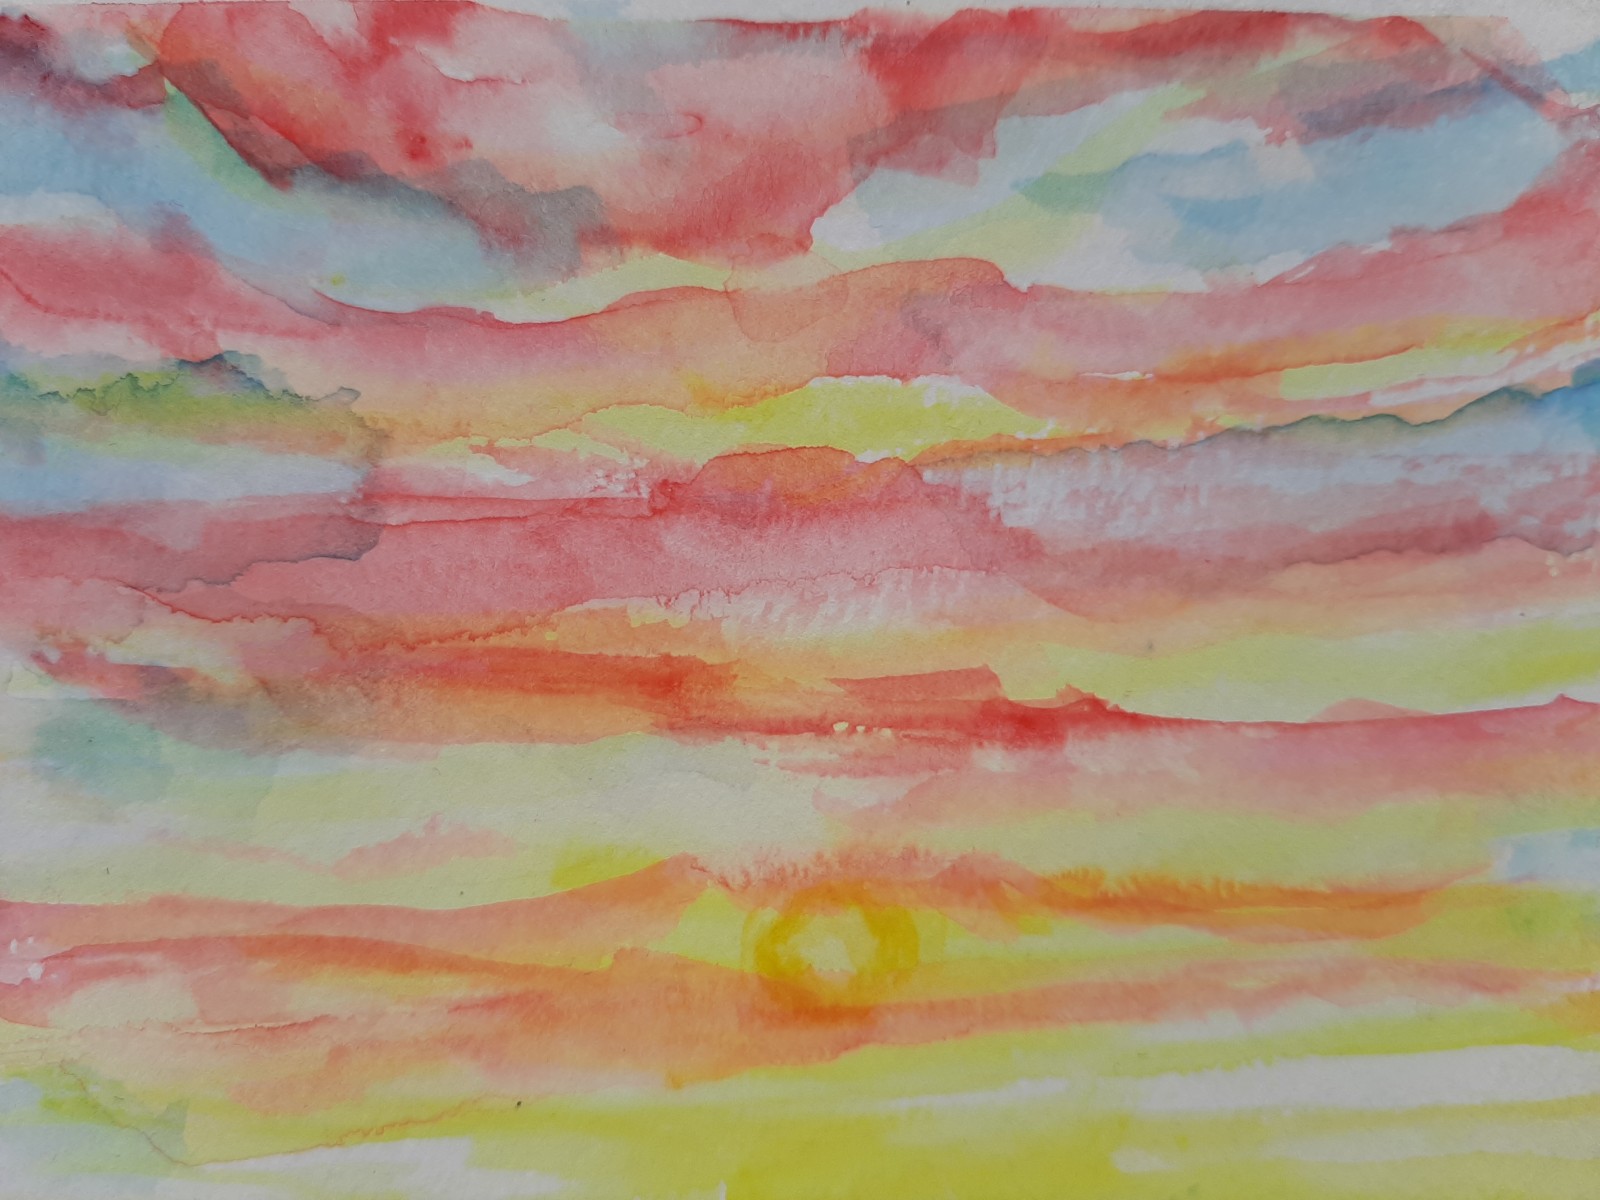
Paint a Sunset!
Materials:
-Watercolour paper (90-140lb)
-Plain paper for a sketch.
-Small or medium round brush.
-Watercolour paint in lemon yellow, cadmium yellow, cadmium red, phthalo blue, ultramarine blue and ivory black.
-water jug
-masking tape
-pencil
-paper towel.
STEP 1:
Start with a sketch, beginning with the horizon line. Keep the focal point, the sun, out of dead center. Clouds are flatter at the horizon and get fluffier and rise diagonally in the top 1/3 of the image. If using dry watercolour paint pans, add a drop of clear water to each colour and let it sit for 3-5 minutes to soften the paint. Tape down the paper, bumpy side up. It will work best on the bumpy side and the smooth will work, just not as well. Start with lemon yellow, leaving white areas for the phthalo blue. Add cadmium yellow for the sun and to strangthen the yellow around the sun as well as in the land mass. Apply the cadmium red to the top of the yellow while the paper is still moist so the colours interact a bit. Remember the clouds are flatter and narrower near the horizon line. Cadmium red is also in the land mass in horizontal strokes.
STEP 2:
Add clear water to the white sections in the sky, try not to touch the yellow, and paint in a pale phthalo blue. The sun has a pale center so add a circle of clear water, count to 5 and lift some of the colour with a kleenex. Let dry.
STEP 3:
Wet the red sections of the clouds with clear water and add ultramarine blue. Avoid the yellow areas as much as possible. The sky should appear soft, so soften any sharp edges with clear water. With the black paint in the horizon and land mass letting some of the yellow and red show through. These shapes should be slightly irregular unless you are painting buildings.
Step 4:
For the trees start at the base for every branch and the base will be wide enough to support the tree. Twirling the brush will create random bumpy shapes. The branches at the back of the tree are paler. Take a break and then reassess and adjust.
Tips:
-A round brush is the most flexible because you can get a fine line or a wider path. For a fine line hold the brush 90 degrees to the paper and for a wider path hold it 15 degrees.
-The strongest brush stroke is a pull stroke, pulling toward you. Try turning the image upside down for the trees.
-Painting nature is great because no one can tell you it’s wrong, they weren’t there.
 Step 1
 Step 2
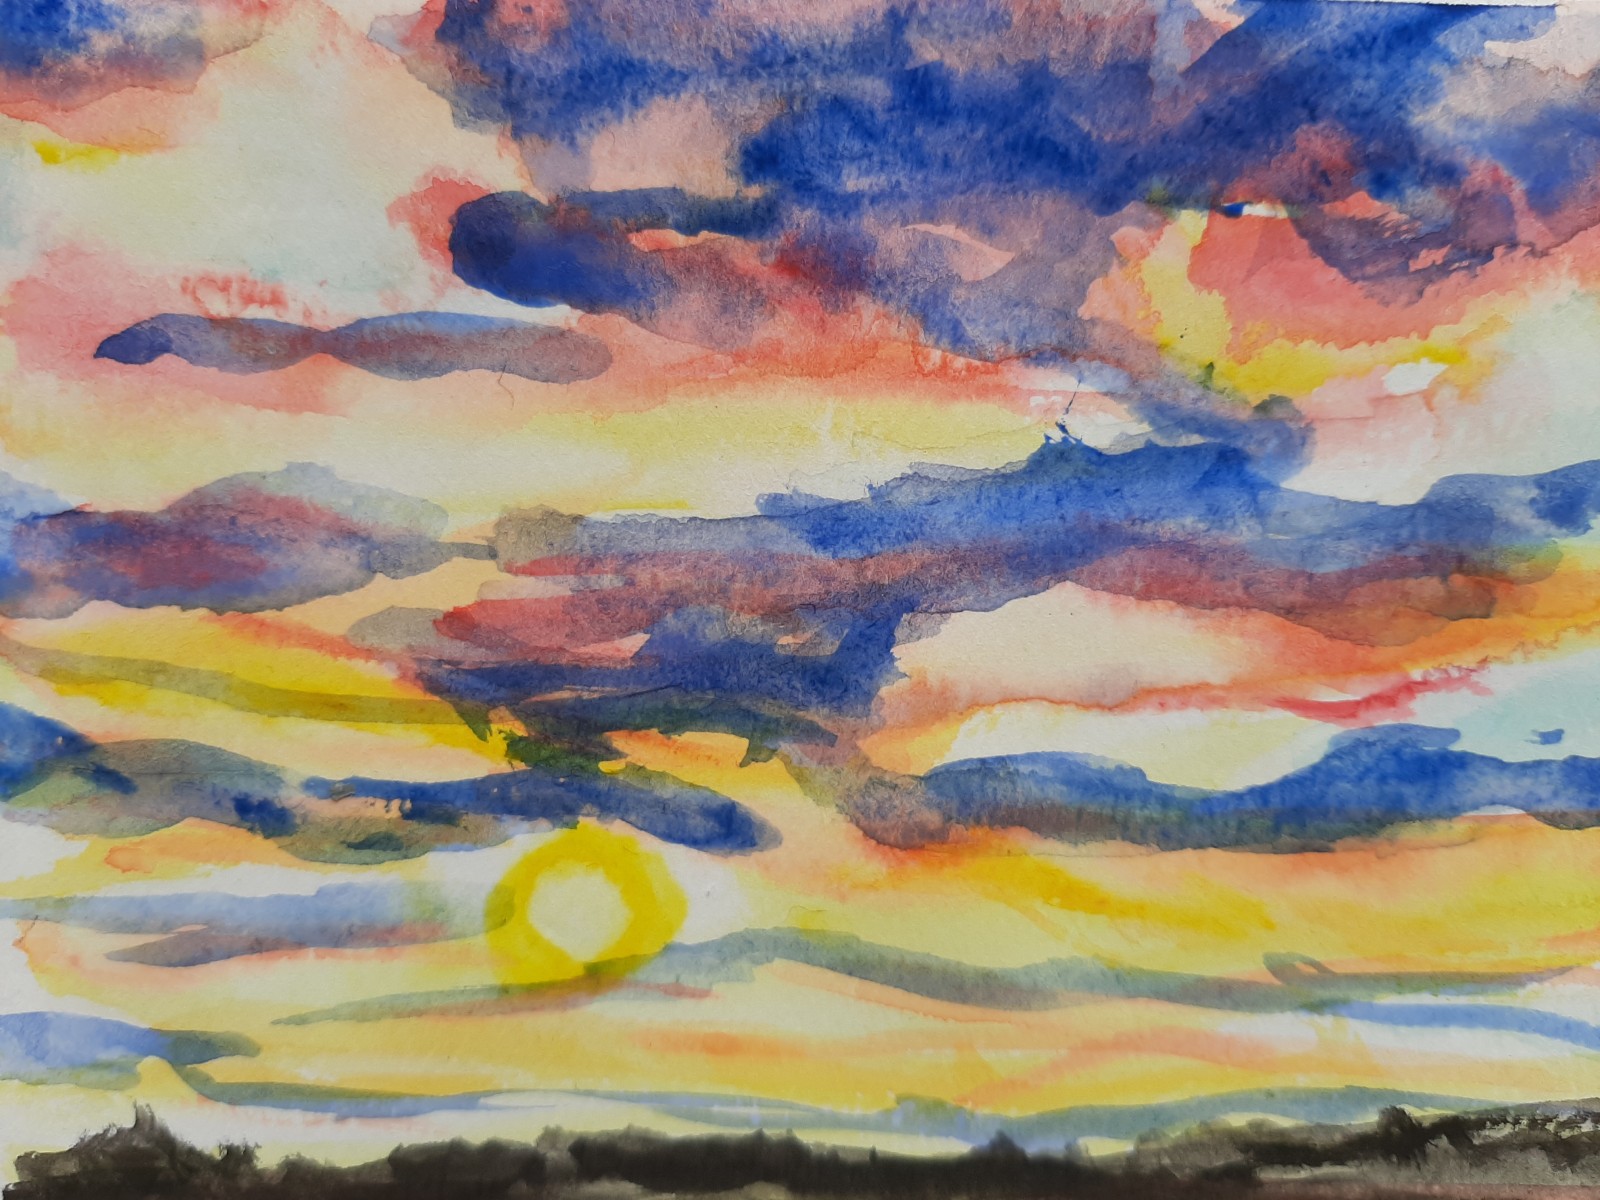 Step 3
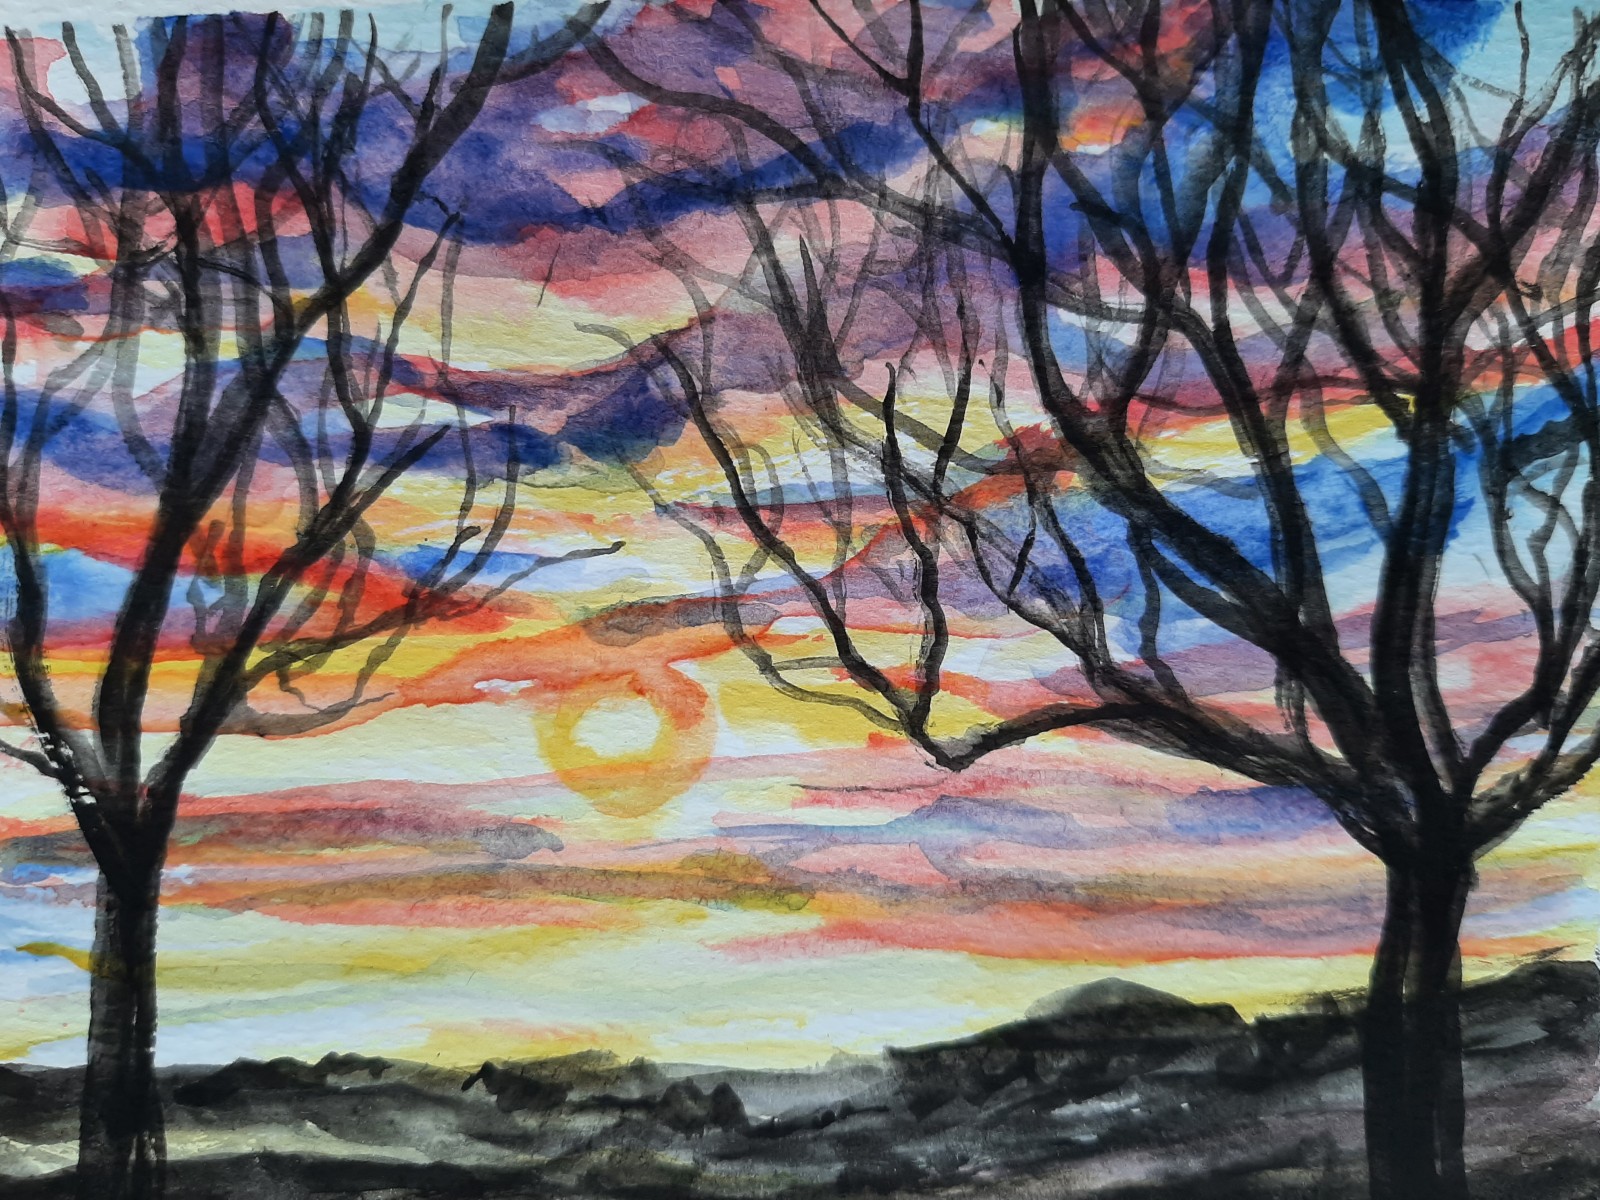 Step 4
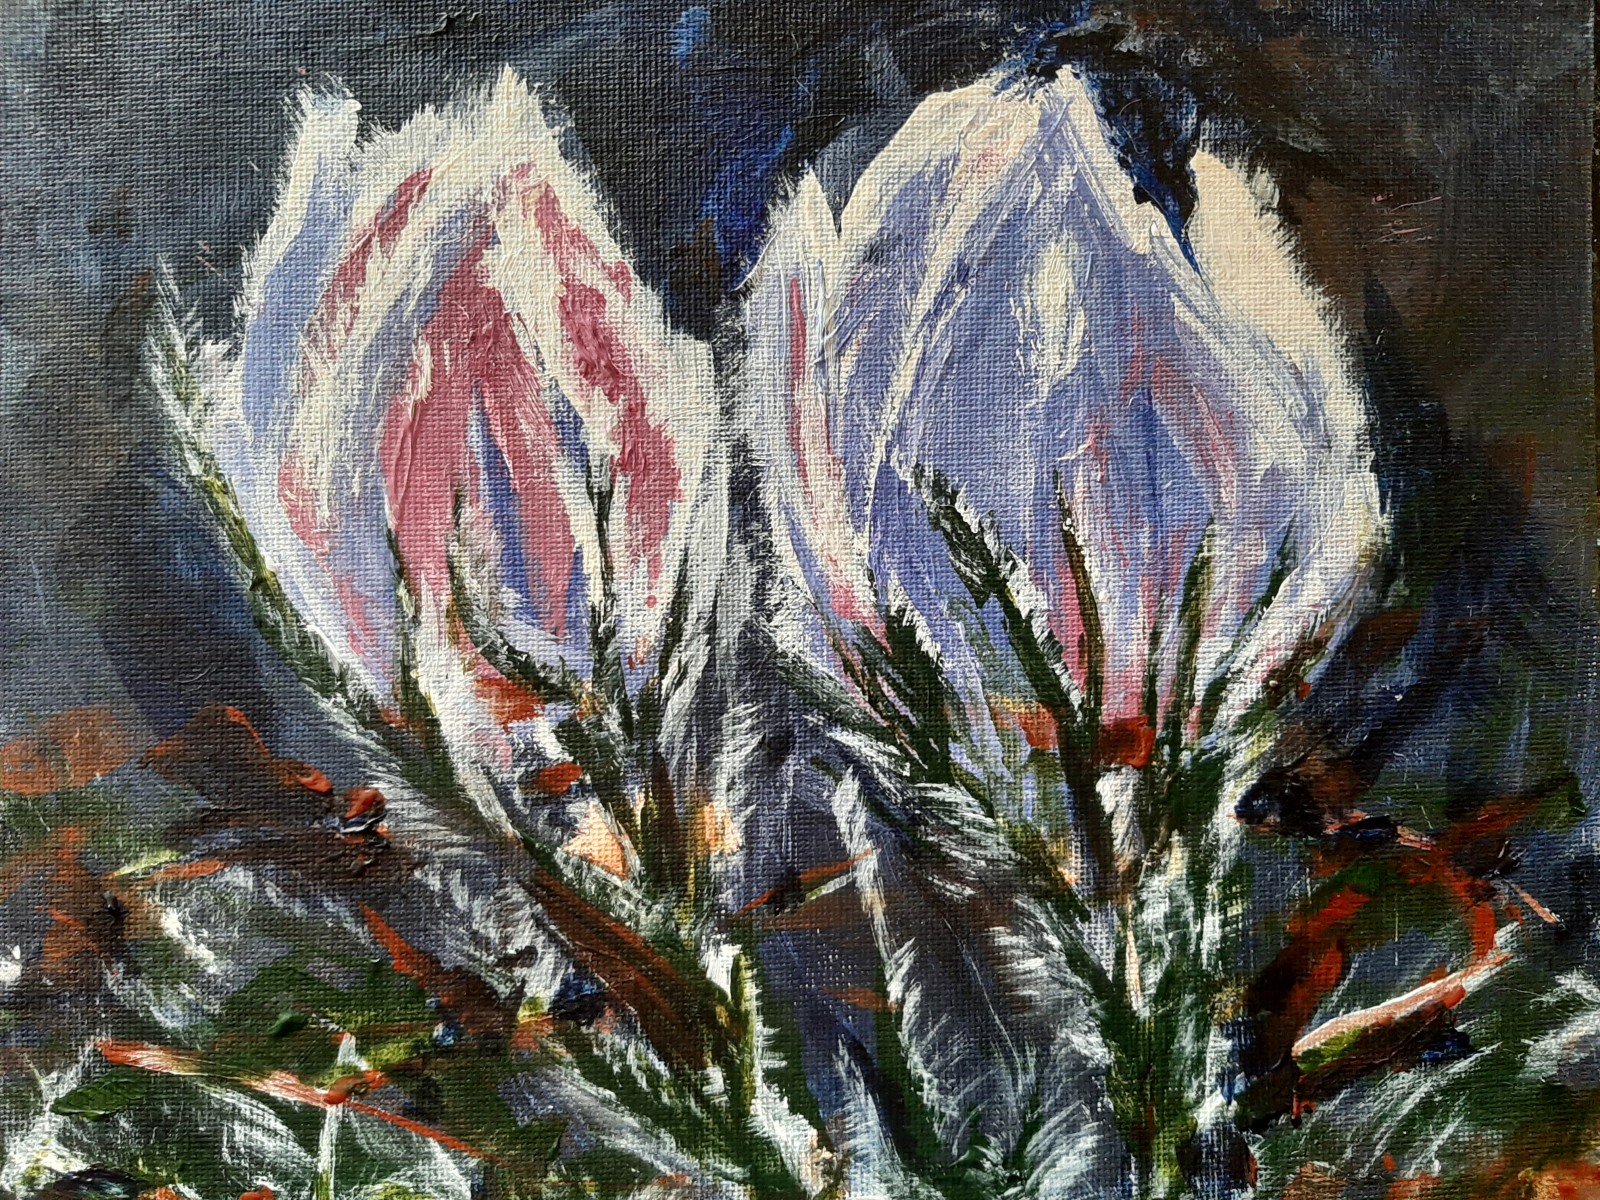
CFCA Art Challenge #21
Crocus Painting
Materials:
STEP 1: Sketch the subject on a 4 x 6 or similar paper. Everything is shapes; these remind me of sceptres.
Thank you to MAJ Photography for our reference image!
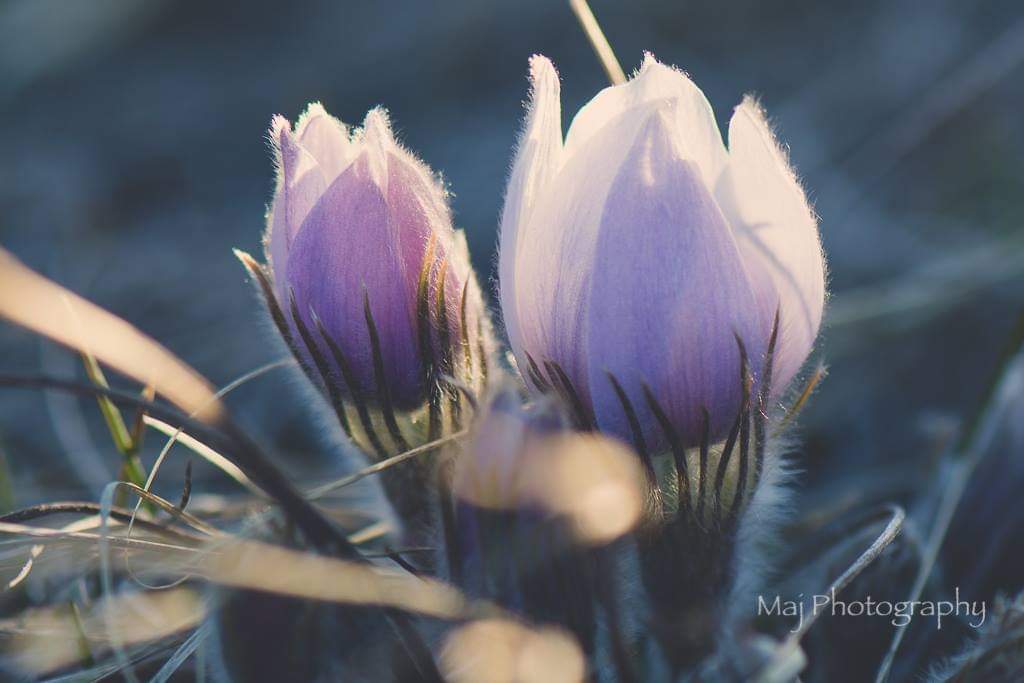 Crocus reference image by MAJ Photography
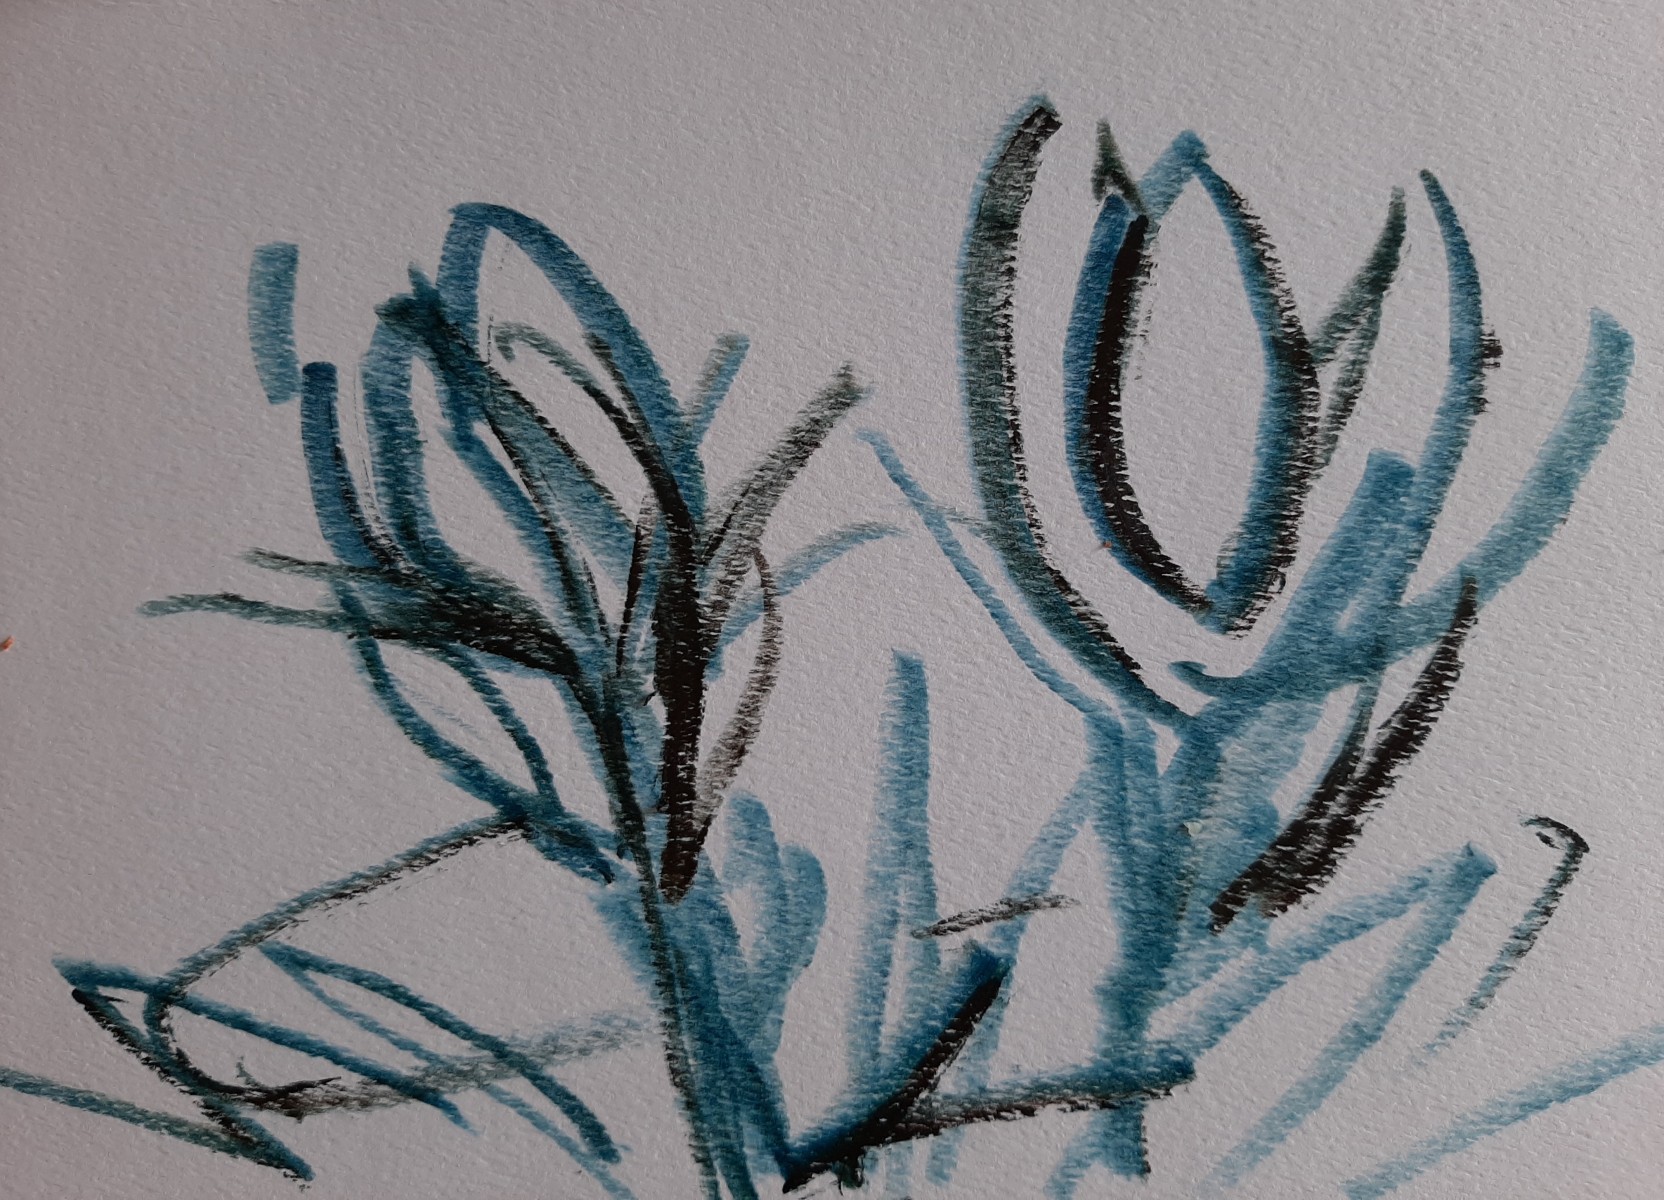 Step 2
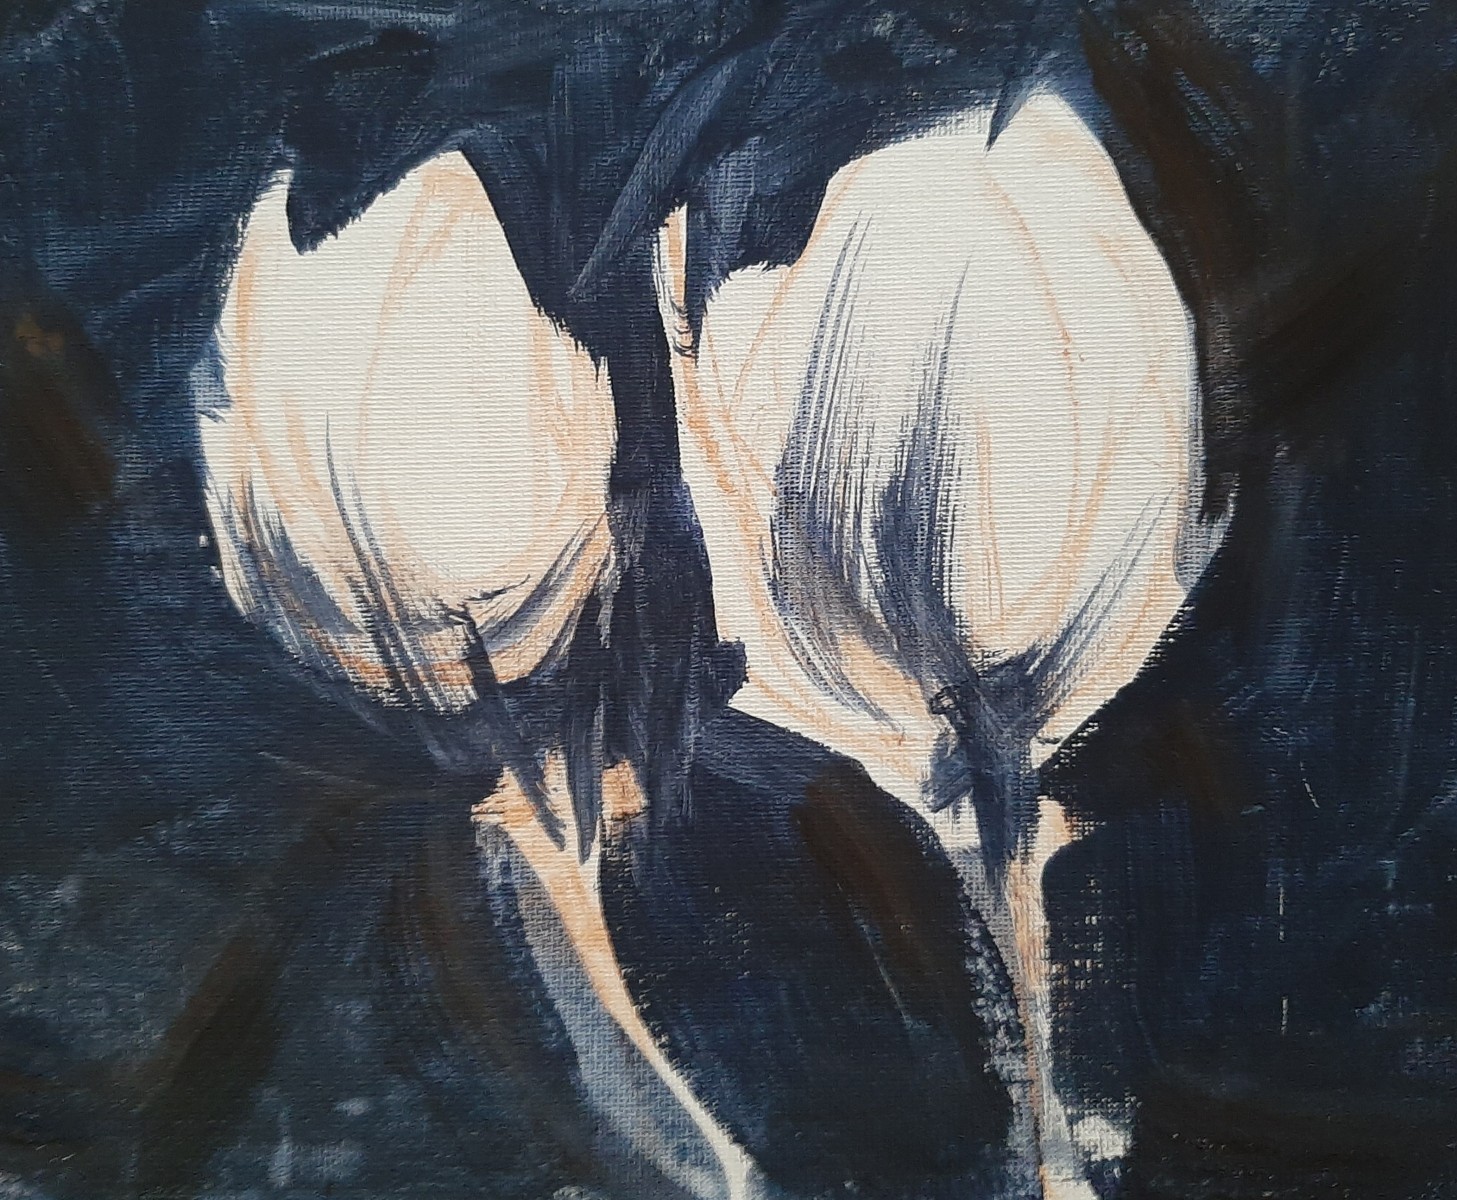 Step 3
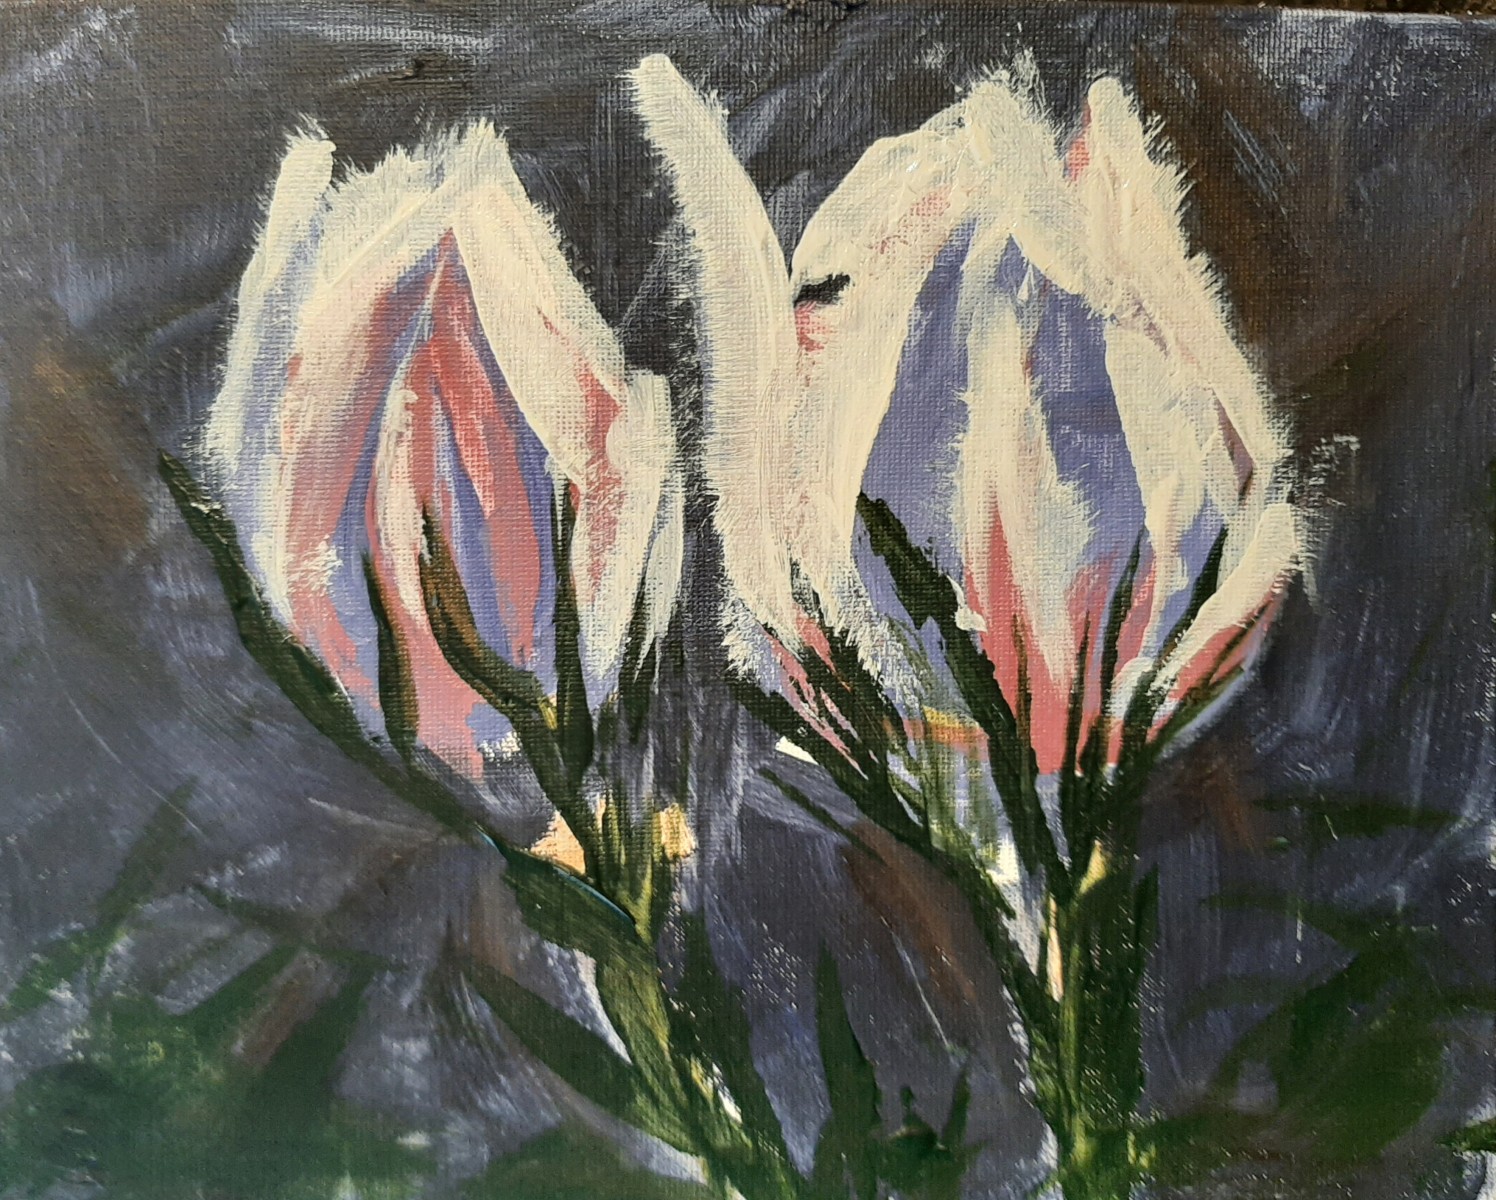 Step 4
 Step 5
CFCA Art Challenge #22
Mixed Media Flowers
Materials:
 Materials
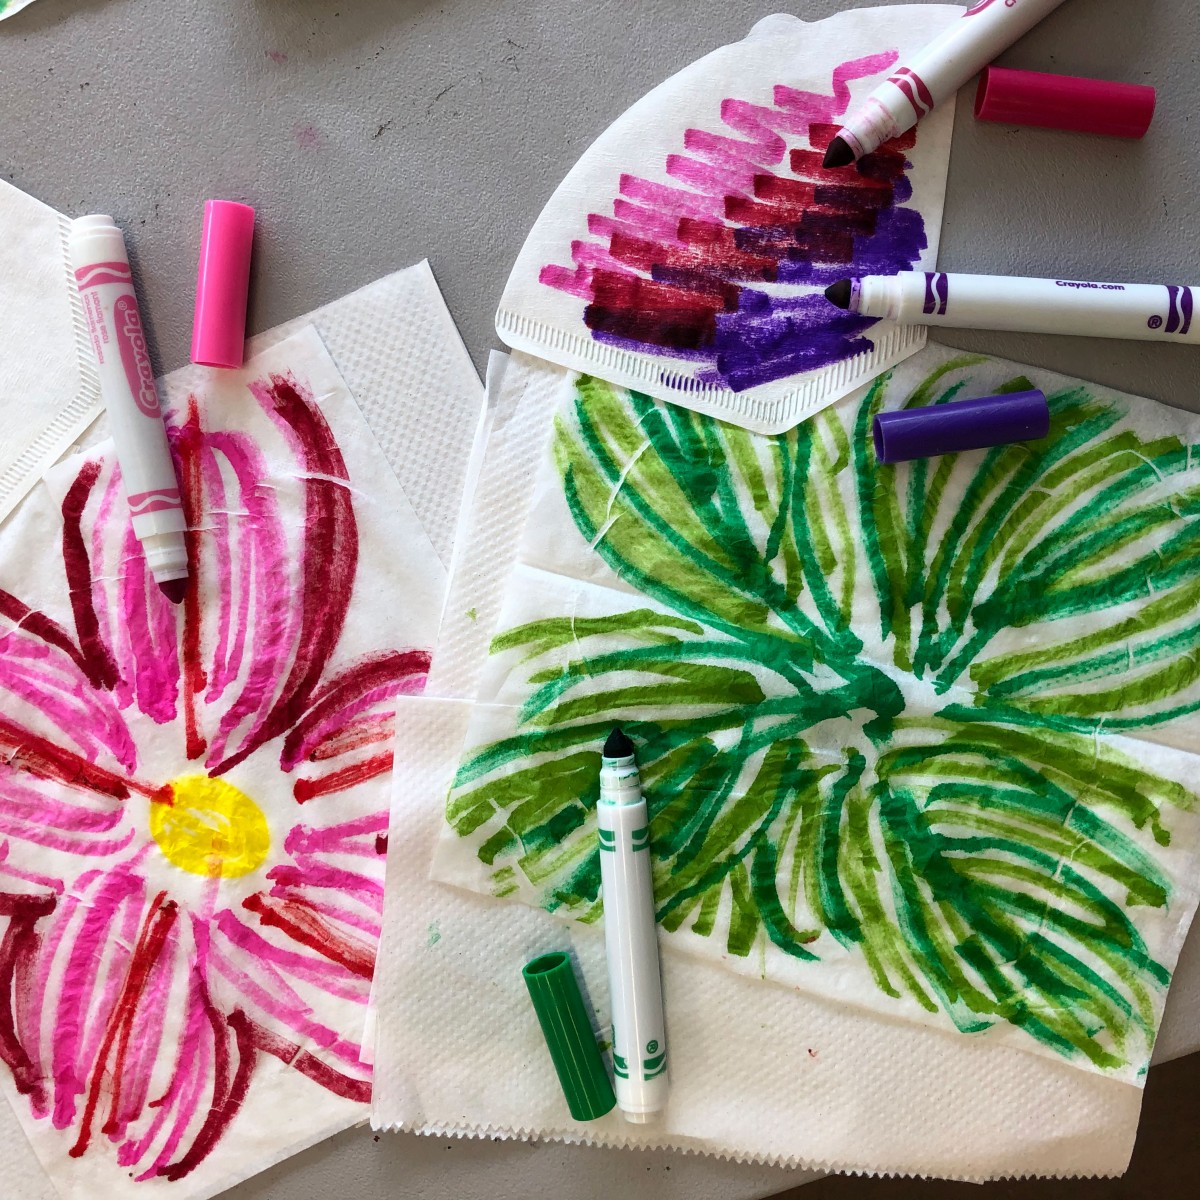 Step 2: Colour the tissue with washable markers
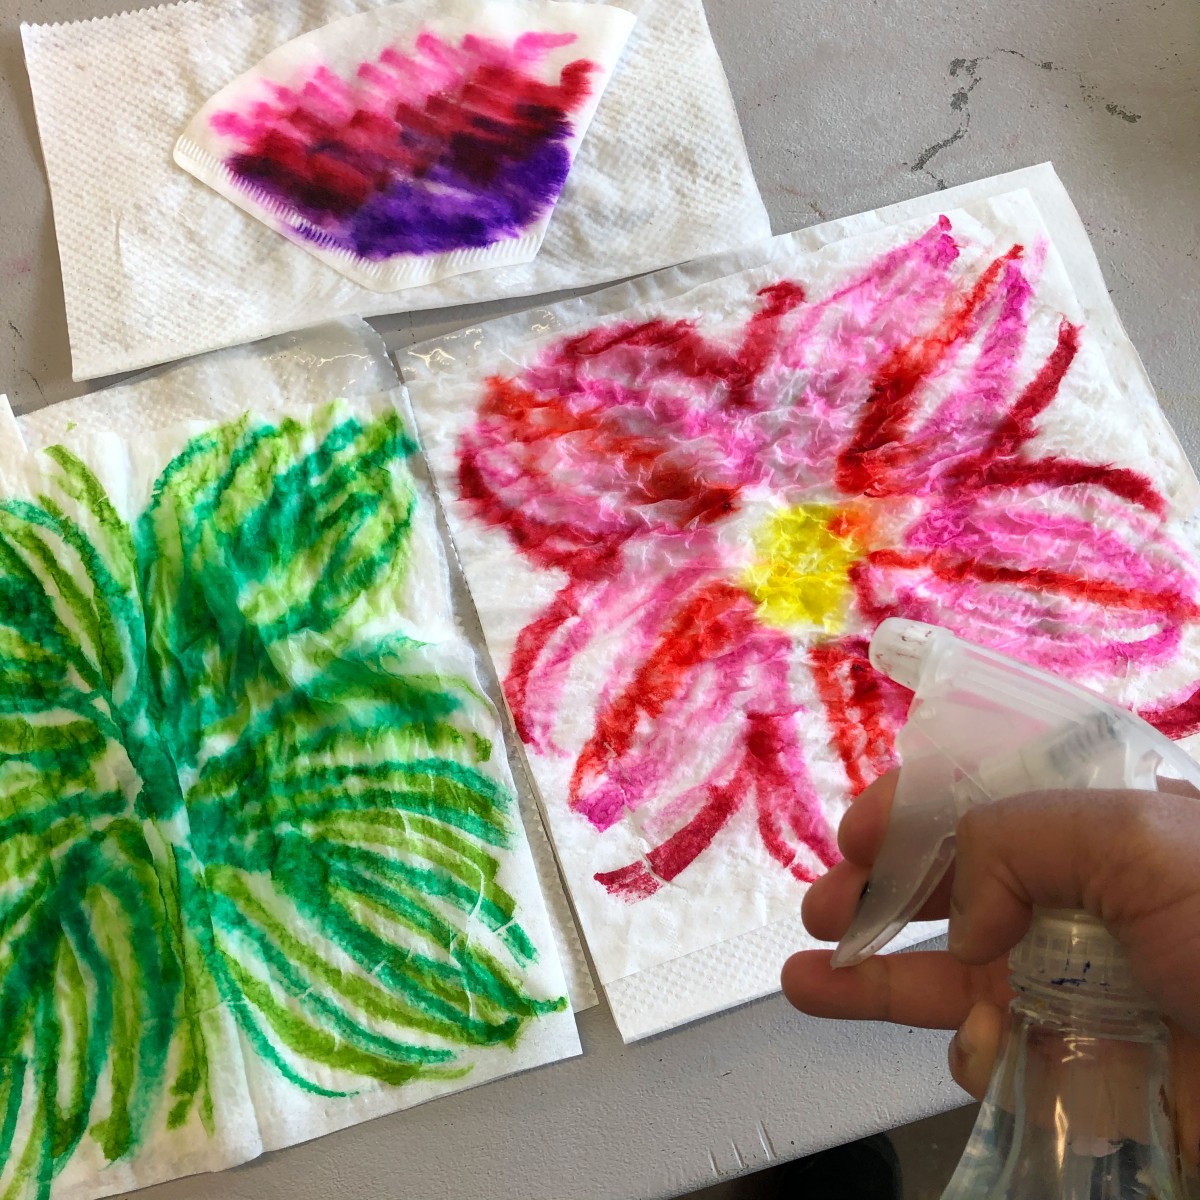 Step 3: Spray with water
 Step 4: Let dry, separate layers
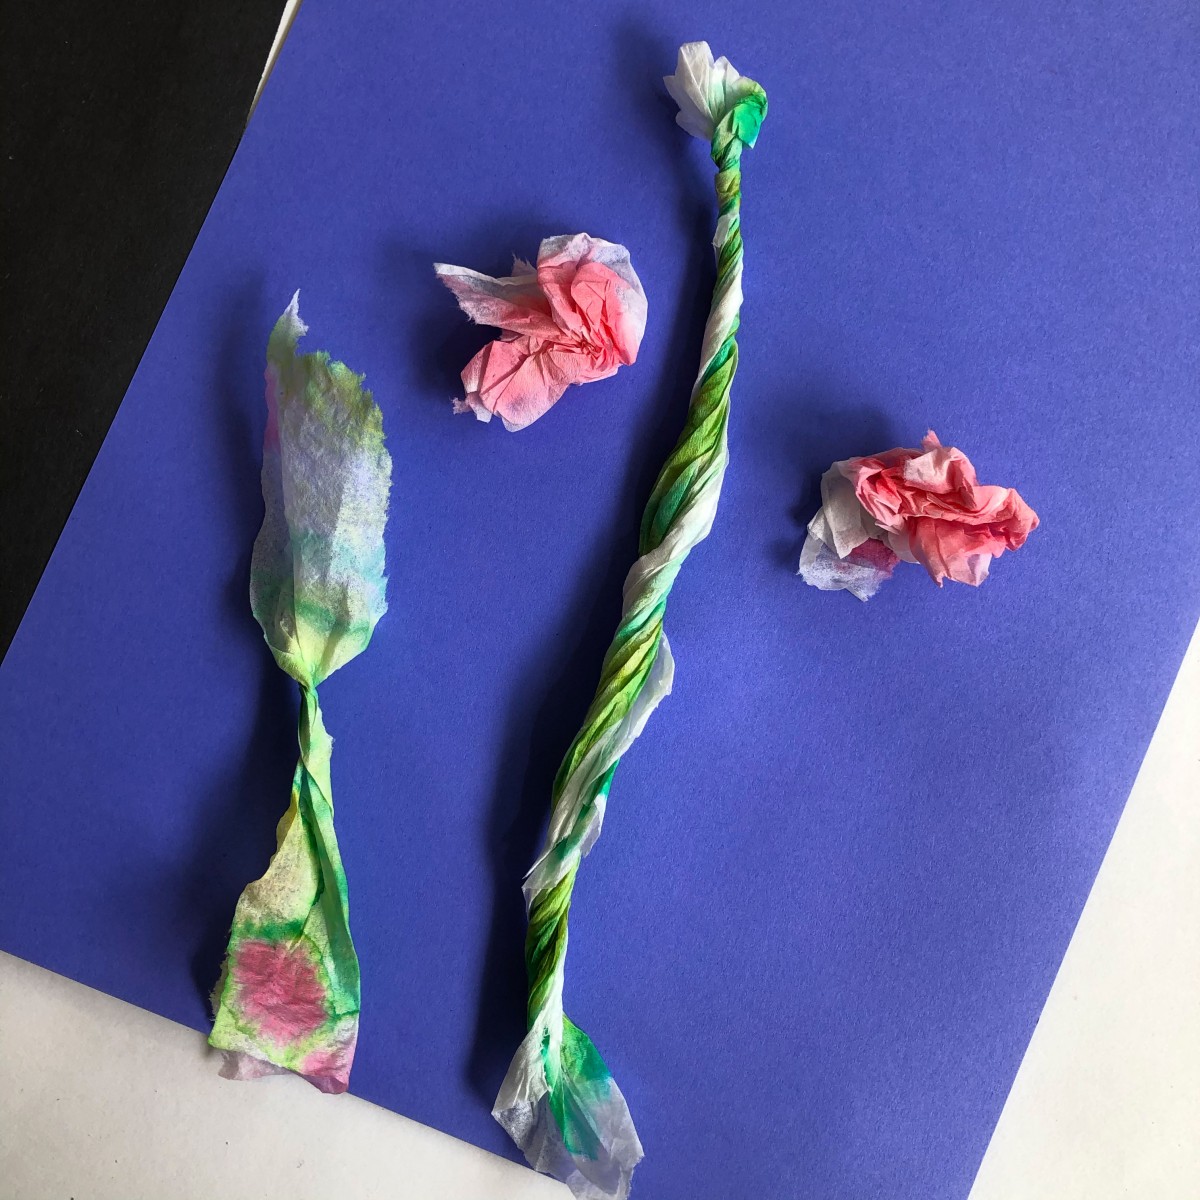 Step 5 and 6: Rip and twist for stems and flowers
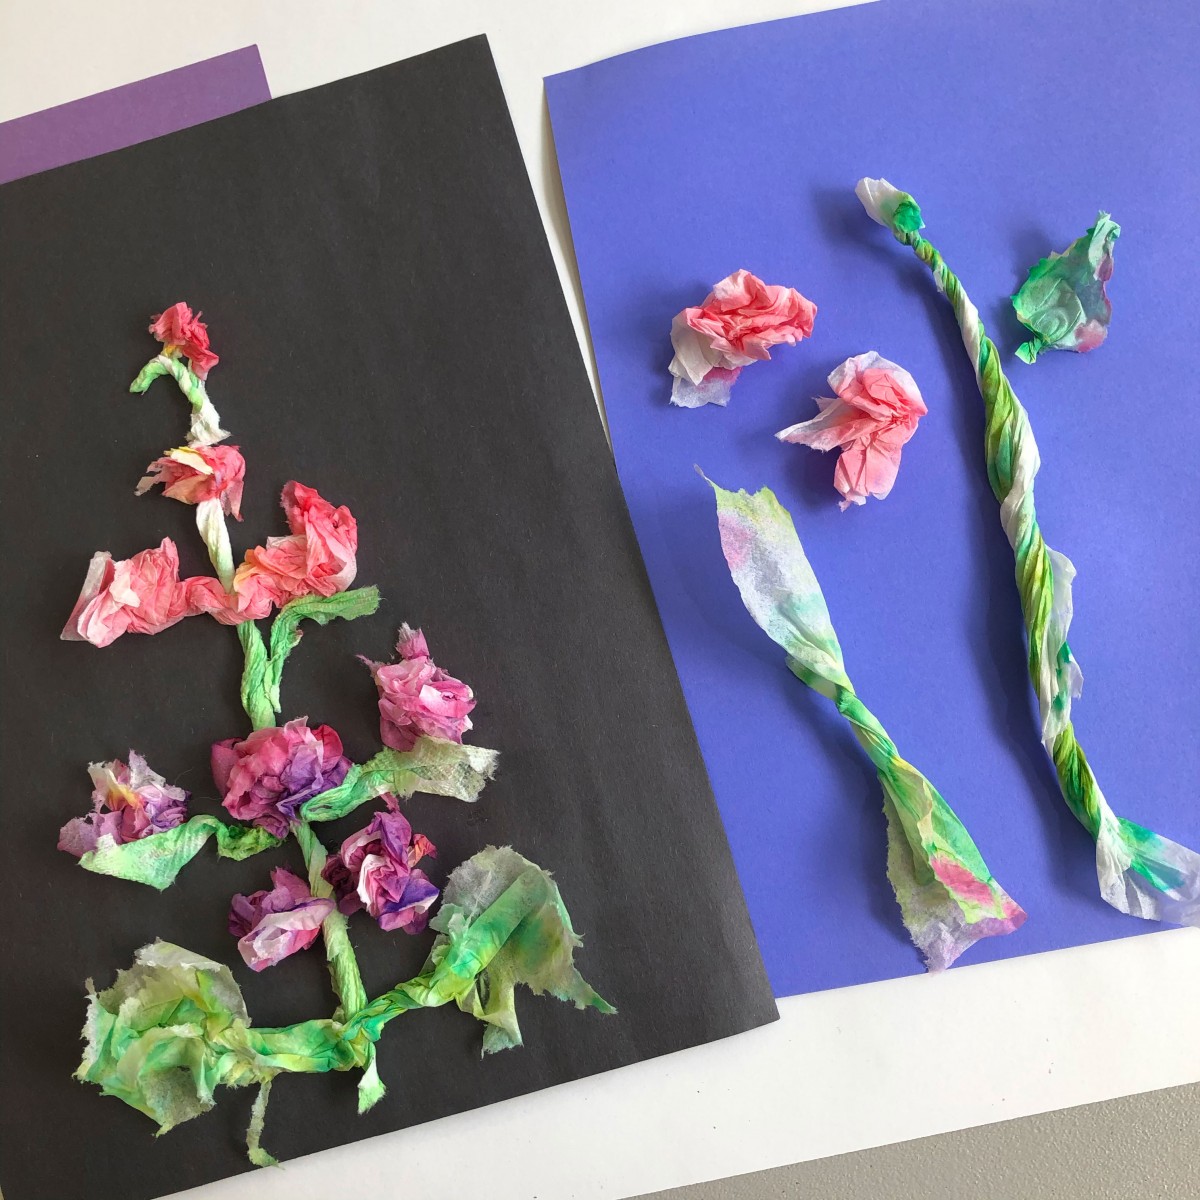 Step 7: Glue to background